
Continental V8-4.6L DOHC (1995)
Fluid Pump: Service and Repair
Disassembly and Assembly
DISASSEMBLE
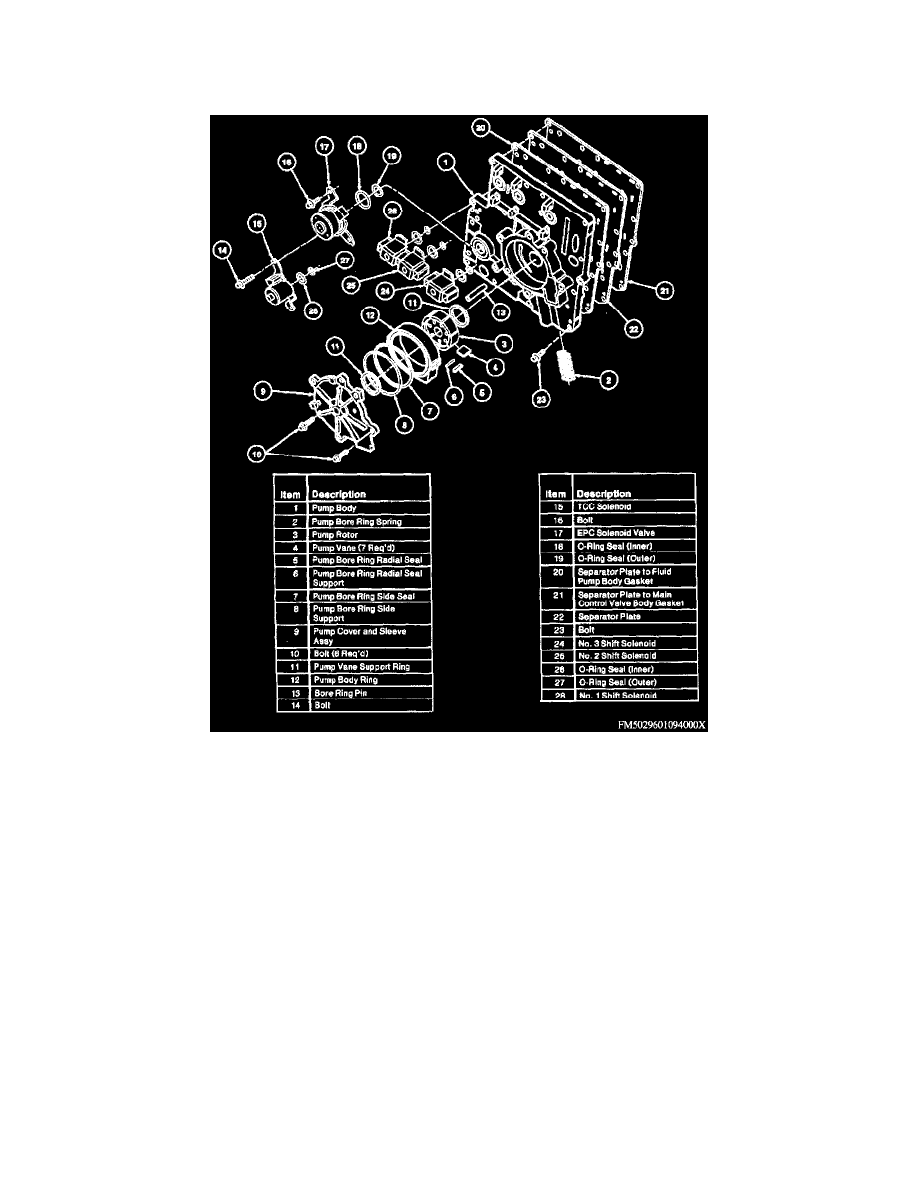
Exploded View Of Pump Assmbly
1. Remove two T-30 Torx bolts retaining valve body separator plate to pump housing.
2. Remove pump housing to valve body separator plate and discard gaskets.
3. Remove check ball.
4. Remove two bolts retaining pump cover to pump housing, then the pump cover.
5. Remove bore ring spring by prying spring out of housing.
6. Remove outer vane support retaining ring.
7. Remove metal 0-ring retainer and pump bore ring side seal from outer vane support. Discard 0-ring.
8. Remove and discard pump bore ring side seal.
9. Remove side seal support.
10. Remove top pump vane support ring and outer pump body ring.
11. Remove seven vanes from rotor, then the rotor from the pump assembly.
12. Remove bottom pump vane support.
13. Remove Electronic Pressure Control (EPC) solenoid retaining ring and solenoid. Discard 0-rings.
14. Remove torque converter clutch solenoid and discard 0-rings.
15. Remove three shift solenoids by pressing tab with small screwdriver, then twist and lift solenoids from pump assembly. Discard 0-rings.
ASSEMBLE
1. Install new 0-rings on shift solenoids.
2. Install shift solenoids by pressing down and twisting until click is heard.
3. Place new 0-rings on Torque Converter Clutch (TCC) solenoid and install solenoid and retaining bolt. Torque to 7-9 ft lbs.
4. Install Electronic Pressure Control (EPC) solenoid with new 0-rings. Torque to 7-9 ft lbs.