
Continental V8-4.6L DOHC (1995)
Valve Body: Service and Repair
Removal and Installation
REMOVAL
1. Remove air cleaner assembly
2. Disconnect battery cables, then remove battery and battery tray.
3. Disconnect transaxle range sensor and transaxle harness electrical connector. Position engine wire harness out of the way.
4. Place sensor manual lever in Park position.
5. Install Rotunda three bar engine support, tool No. D88L-6000-A or equivalent with Rotunda engine lift bracket set, tool No. 014-00796, or
equivalent and support engine assembly.
6. Remove transaxle side pan upper attaching bolts.
7. Raise and support vehicle.
8. Remove left front tire and wheel.
9. Remove left front splash shield.
10. Remove lefthand side engine support and insulator.
11. Position drain pan under transaxle side pan, then remove remaining lower transaxle side pan attaching bolts.
12. Remove transaxle side pan and gasket, then discard gasket.
13. Disconnect transaxle fluid temperature sensor from main control valve body and solenoid electrical connectors.
14. Remove transaxle wiring harness from chain cover.
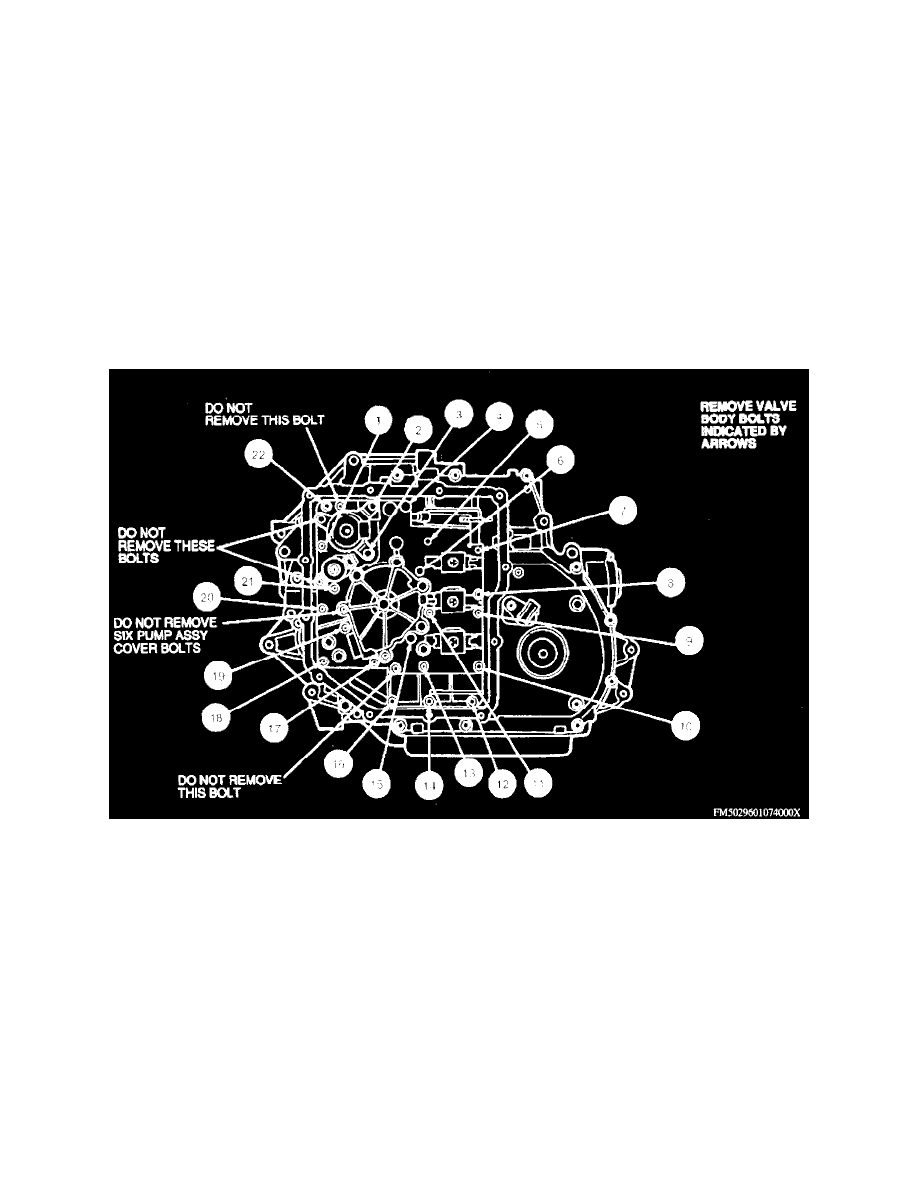
Valve Body Bolt Removal
15. Remove main control valve body retaining bolts.
NOTE: Do not remove pump assembly cover bolts.
16. Disconnect manual valve linkage and carefully slide pump assembly and main control valve body off pump shaft and remove from transaxle.
INSTALLATION
1. Reverse procedure to install.
2. Torque valve body retaining bolts and transaxle side pan bolts to 80-106 in lbs.