
Continental V8-4.6L DOHC (1995)
4. Using a clean wool applicator, wipe inside glass edge with Urethane Glass Prep WSB-M5B280-C2 21 mm (0.8 inch) wide along top and sides
and 70 mm (2.75 inch) wide along bottom. Wipe off prep wipe and repeat application.
NOTE: Wipe off Urethane Glass Prep WSB-M5B280-C2 immediately after application because it flash dries. Prep application must be applied
twice.
5. Properly align back window glass to body.
a. Place back window glass into opening. Center it top and bottom, side-to-side (adjust lower velcro glass stops if necessary).
b. Using masking tape or crayon, make alignment marks at points on four sides of both glass and window opening.
6. Remove back window glass and moulding assemblies from vehicle and place it back on work table.
7. Thoroughly shake and stir Urethane Glass Primer WSB-M2G314-C to make sure of uniform pigment mixing.
8. Using a clean wool applicator. apply primer to inside glass edge 21 mm (0.8 inch) wide along top and sides and 70 mm (2.75 inch) wide along
bottom.
NOTE: Allow a minimum of five minutes for glass primer to dry.
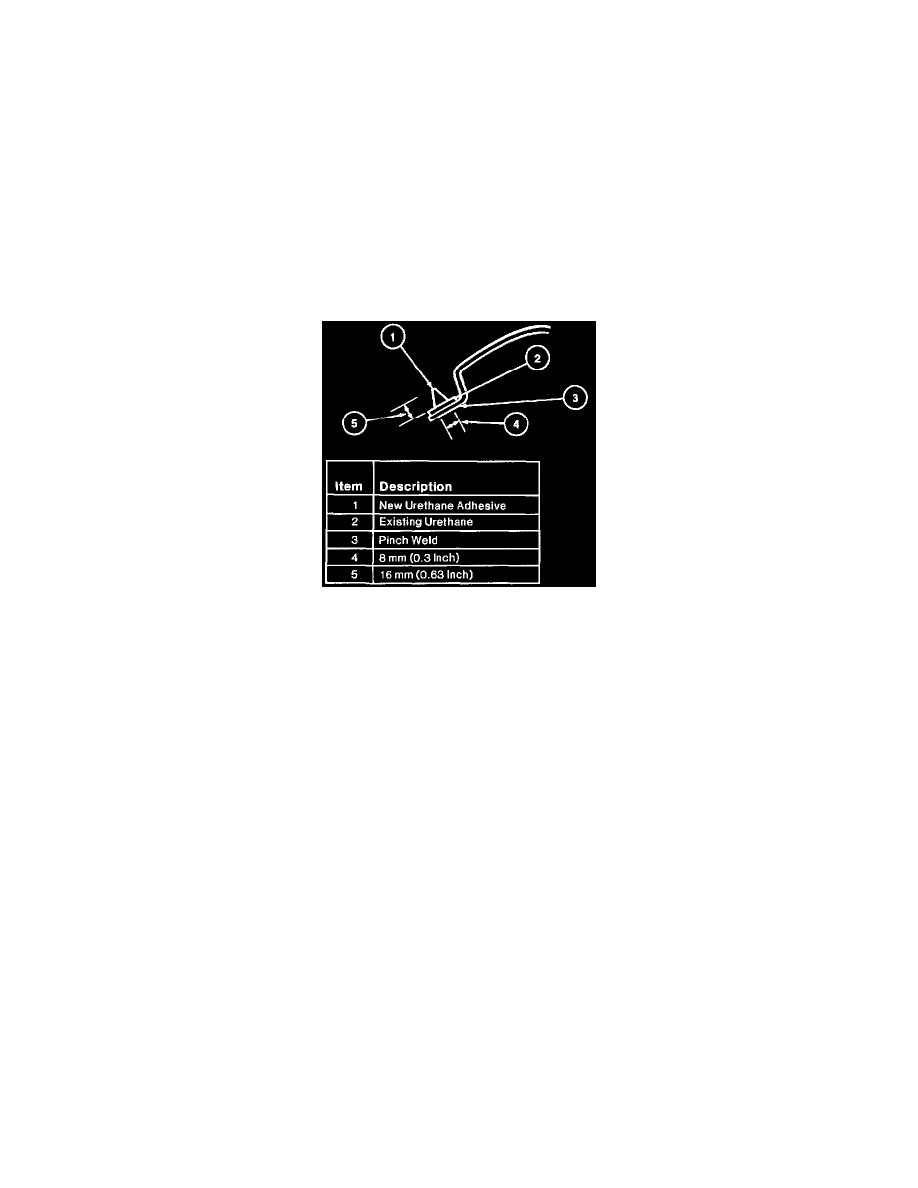
9. Apply an even bead of Urethane Adhesive WSB-M2G316-B around entire sheet metal pinch weld next to rear window moulding retaining leg.
The bead should be triangular in shape, 16 mm (0.63 inch) high and 8 mm (0.3 inch) at base.
NOTE:
-
Leave a door window slightly open until adhesive is cured.
-
Apply new urethane on top of existing material on pinch weld.
10. Install back window assembly onto vehicle, taking care to align velcro stops on glass to body, then set roof line onto adhesive before setting rest of
back window down into adhesive. This must be done before adhesive skins over.
CAUTION: When replacing urethane installed glass parts, do not drive the vehicle until the urethane has cured. At temperatures above 13°C (55°
F) and relative humidities above 50%, adequate cure time is typically 12 to 24 hours (less at higher temperatures and lower humidities). See
detailed instructions provided by the urethane manufacturer. Inadequate or improper curing may adversely affect the retention of the back window.
11. Reconnect antenna and rear window defroster wires.
12. Remove spacer and install headliner. Install all garnish mouldings and rear package tray trim panel.