
Continental V8-4.6L DOHC VIN V (1998)
2
Apply low air pressure to the fluid port of the disc brake caliper.
3
Force the caliper piston out to the wood block.
Remove the wood block and the caliper piston
5. Remove and discard the caliper piston seals and dust boots.
6. If the front disc brake calipers are leaking, replace the caliper seal kits. If the caliper bores are damaged, replace the front disc brake caliper.
NOTE: Do not hone the caliper bores. Caliper pistons are not available for honed calipers.
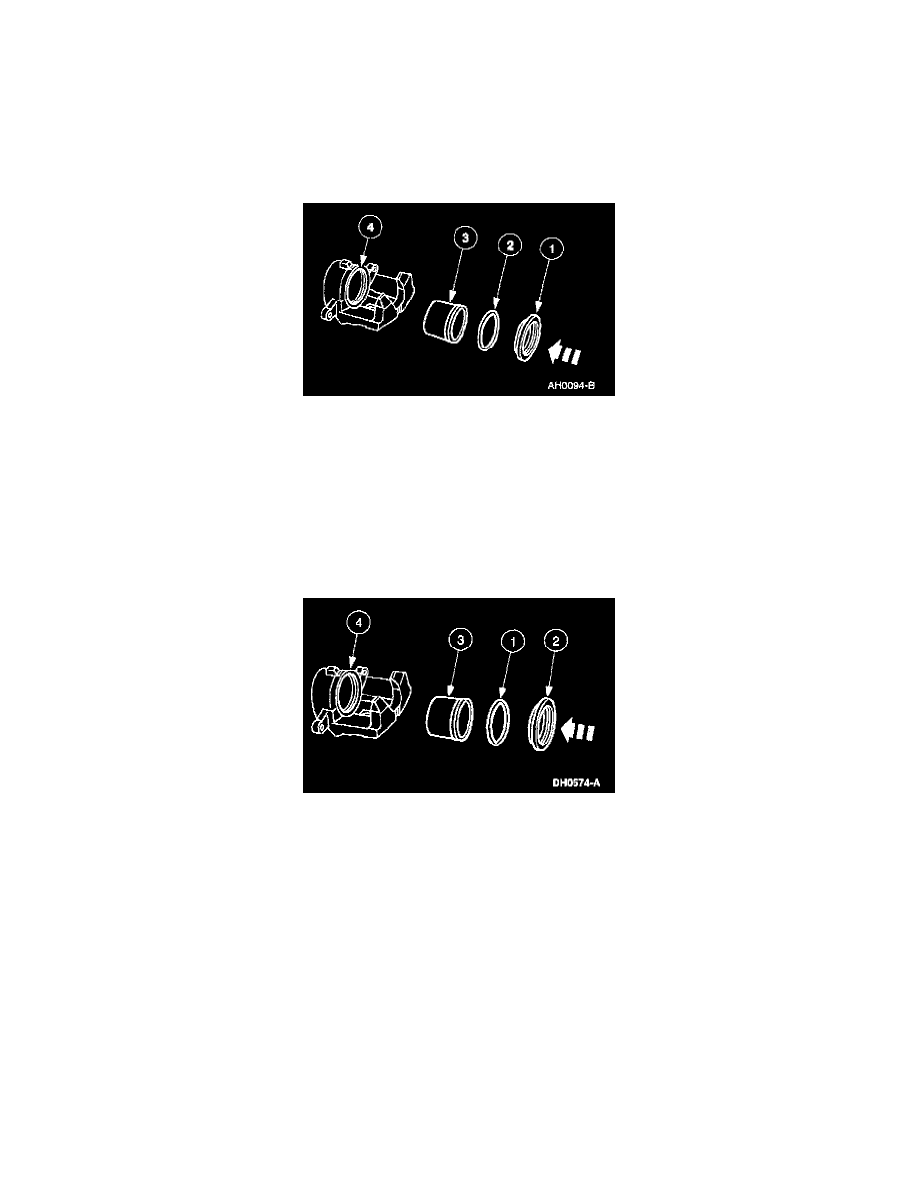
ASSEMBLY
1. Lubricate with High Performance DOT 3 Motor Vehicle Brake Fluid C6AZ-19542-AB or DOT 3 equivalent meeting Ford specification
ESA-M6C25-A, DOT 3, the following brake system components.
1
Piston dust boot.
2
Piston seal.
3
Caliper piston.
4
Caliper bore.
CAUTION: Do not reuse piston seals or dust boots. Damage to the vehicle can occur.
NOTE: Use new brake fluid for assembly and bleeding of the brake system.
2. Install the caliper piston.
1
Install the caliper piston seal.
2
Install the caliper piston dust boot.
3
Install the caliper piston into the caliper bore.
CAUTION: Use care when installing the caliper piston, or damage to the caliper piston seal or dust boot may occur.
4
Press the caliper piston into: the caliper bore. Use even pressure while making sure the piston does not cock.
3. Install the disc brake caliper.
Removal and Installation
REMOVAL
1. Raise and support the vehicle.
WARNING: THE ELECTRICAL POWER TO THE AIR SUSPENSION SYSTEM MUST BE SHUT OFF PRIOR TO HOISTING,
JACKING OR TOWING AN AIR SUSPENSION VEHICLE. THIS CAN BE ACCOMPLISHED BY TURNING OFF THE AIR
SUSPENSION SWITCH LOCATED IN THE REAR JACK STORAGE AREA. FAILURE TO DO SO CAN RESULT IN
UNEXPECTED INFLATION OR DEFLATION OF THE AIR SPRINGS, WHICH CAN RESULT IN SHIFTING OF THE VEHICLE