LS V8-3.9L VIN A (2003)

OVERVIEW
This program involves installing shims behind the rear seat back latches to improve latch alignment and reduce latching efforts.
SHIM INSTALLATION
1.
Open the trunk to access the latch release, then fold down both rear seat backs.
2.
Remove the rear seat back latch covers.
3.
Remove and discard the rear seat back latch bolts.
4.
CAUTION: Do not use power tools to install the bolts. The threads on the attached nut will strip out.
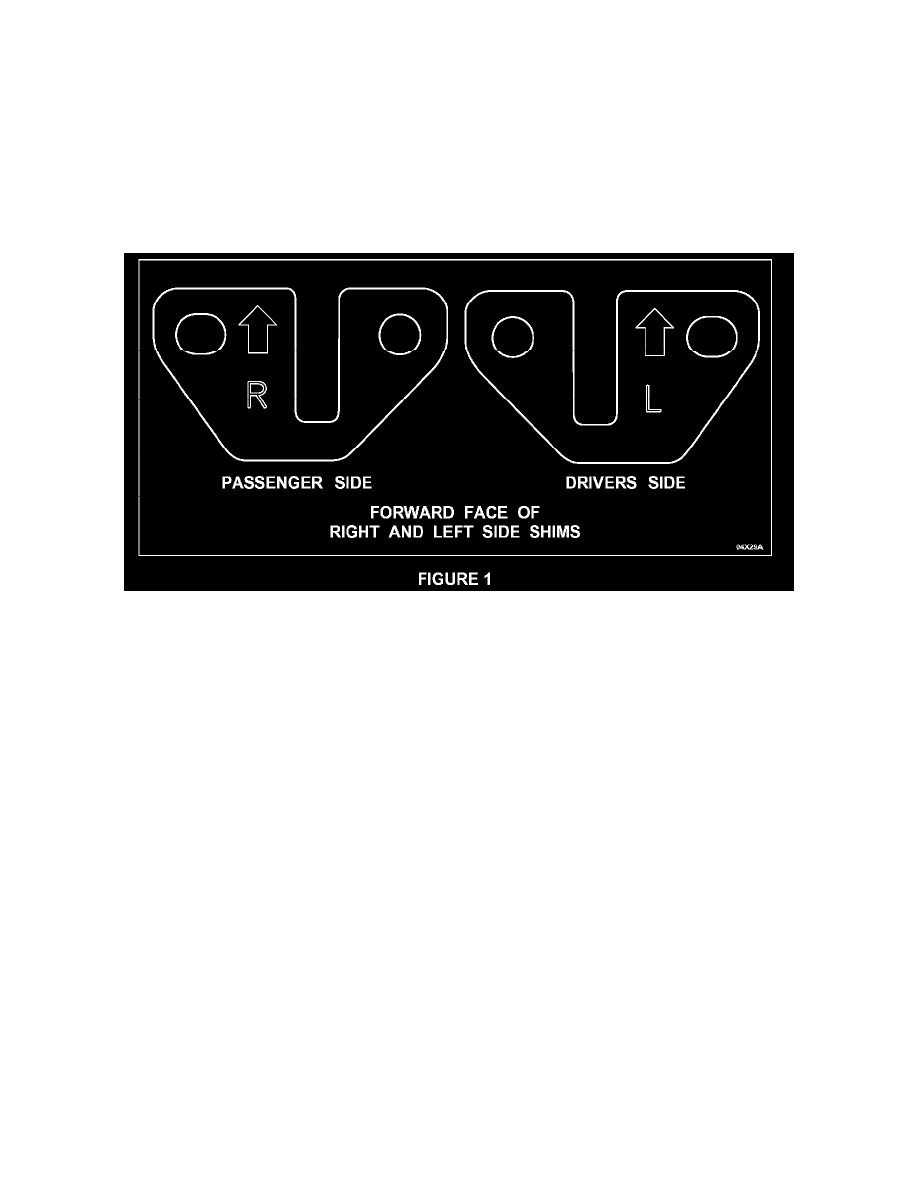
Right and left side shims are symmetrically opposite and are clearly marked "R" or "L". This marking must face the front of the vehicle when the
shim is installed. Also, an arrow pointing upward is stamped on the forward face of each shim to identify proper position. See Figure 1.
^
Install the shim on the left side (drivers side) of the vehicle with the "L" showing (facing towards the front of the vehicle).
^
Install the shim on the right side (passenger side) of the vehicle with the "R" showing (facing towards the front of the vehicle).
CAUTION:
If the shim is installed in the wrong location, the seat back will not latch and possible damage to the latch or shim may occur.
NOTE:
The new bolts are longer to compensate for the thickness of the shims.
