
LS V8-3.9L VIN A (2003)
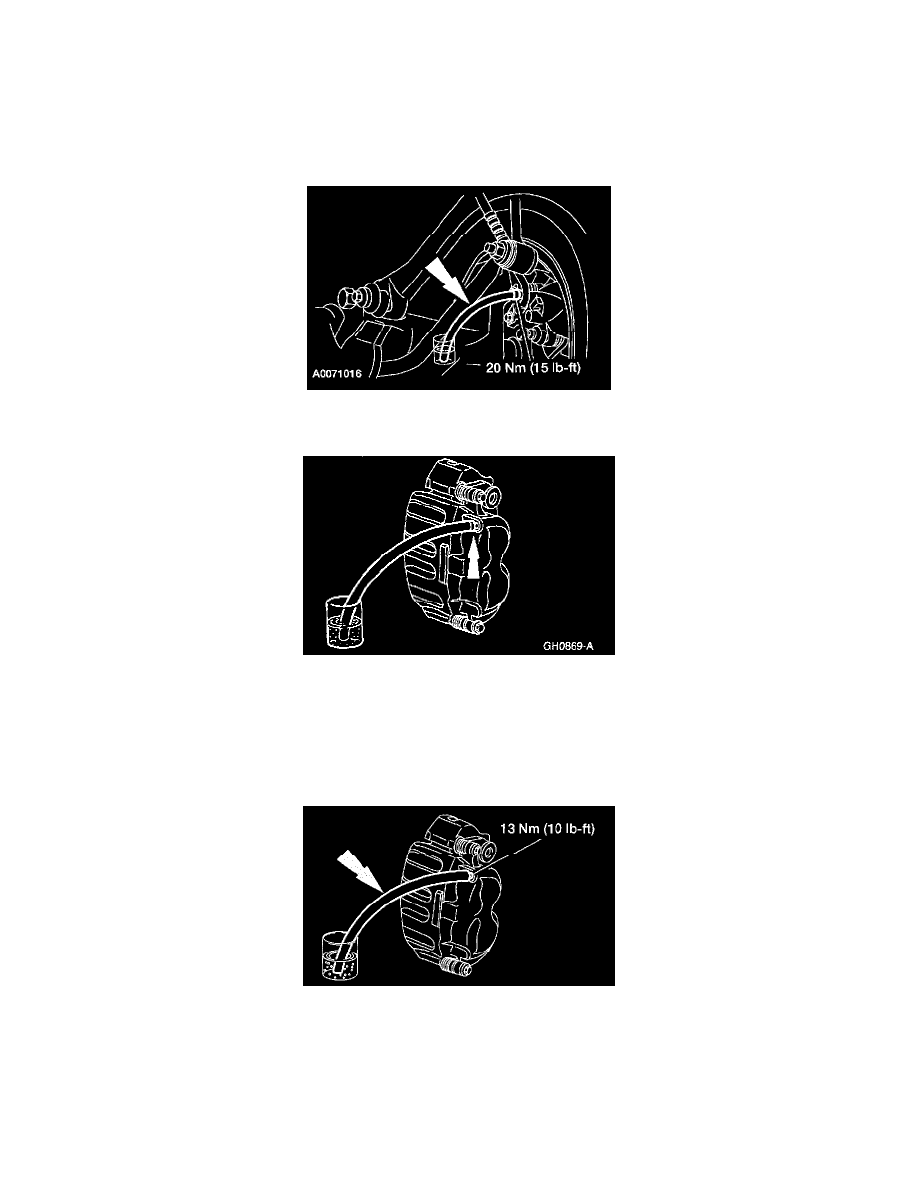
3. Place a box end wrench on the RH rear bleeder screw. Attach a rubber drain tube to the RH rear bleeder screw and submerge the free end of the
tube in a container partially filled with clean brake fluid.
4. Have an assistant hold firm pressure on the brake pedal.
5. Loosen the RH rear bleeder screw until a stream of brake fluid comes out. While the assistant maintains pressure on the brake pedal, tighten the
RH rear bleeder screw.
^
Repeat until clear, bubble-free fluid comes out.
^
Refill the brake master cylinder reservoir as necessary.
6. Tighten the RH rear bleeder screw.
7. Repeat Steps 3, 4, 5 and 6 for the LH rear bleeder screw.
8. Place a box end wrench on the RH front disc brake caliper bleeder screw. Attach a rubber drain tube to the RH front disc brake caliper bleeder
screw, and submerge the free end of the tube in a container partially filled with clean brake fluid.
9. Have an assistant hold firm pressure on the brake pedal.
10. Loosen the RH front disc brake caliper bleeder screw until a stream of brake fluid comes out. While the assistant maintains pressure on the brake
pedal, tighten the RH front disc brake caliper bleeder screw.
^
Repeat until clear, bubble-free fluid comes out.
^
Refill the brake master cylinder reservoir as necessary.
11. Tighten the RH front disc brake caliper bleeder screw.
12. Repeat Steps 8, 9, 10 and 11 for the LH front disc brake caliper bleeder screw.
Pressure
WARNING: use of any other than approved DOT 3 or DOT 4 brake fluid will cause permanent damage to brake components and will
render the brakes inoperative.