
LS V8-3.9L VIN A (2003)
2.
Remove the ignition coil cover bolts and cover.
3.
Remove the identified coil-on-plug from the spark plug.
4.
Connect the Vehicle Measurement Module (VMM) to the vehicle and the IDS.
5.
Turn the coil-on-plug upside down so it will not spark to ground during the test.
6.
Connect the coil-on-plug clip to the coil-on-plug and connect the other end of the VMM secondary ignition transducer cable to the VMM.
7.
Disconnect the fuel injector electrical connector from the cylinder being tested so raw fuel is not washing the cylinder.
8.
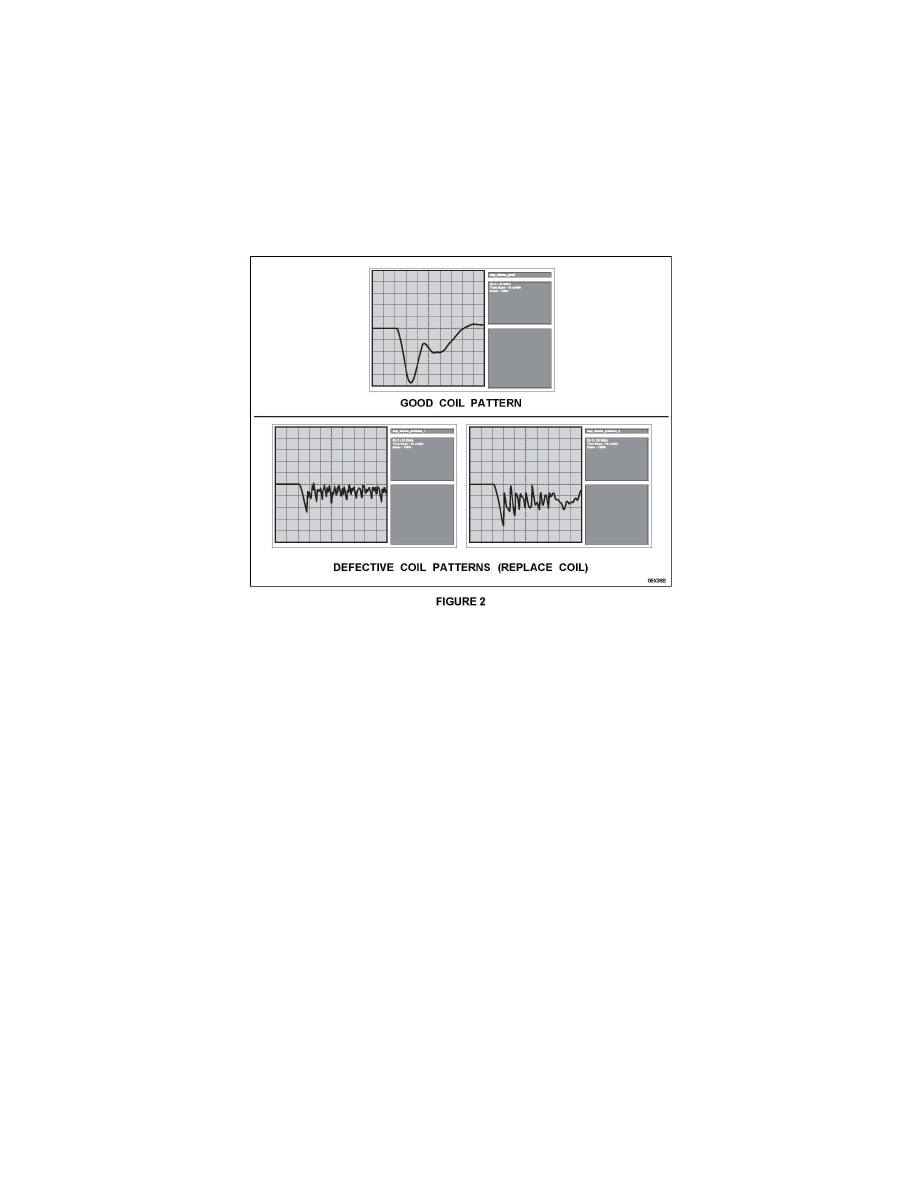
Start the vehicle and the scan oscilloscope. Record the data. Refer to Figure 2 showing the difference between a good coil pattern and defective
coil patterns.
9.
Turn the vehicle off.
10.
Reconnect the fuel injector electrical connector.
11.
Remove the coil-on-plug clip from the coil-on-plug.
REPLACE COIL(S) THAT FAILED STRESS TEST
1.
If the coil failed the stress test, install a new coil-on-plug assembly and spark plug.
^
Disconnect the coil-on-plug assembly electrical connector and remove the coil-on-plug assembly.
^
Remove the spark plug.
^
Install a new spark plug and tighten to 27 Nm (20 lb-ft).
^
Apply a light coat of dielectric compound XG-3-A or equivalent, to the inside of the new ignition coil boot. Install a new coil-on-plug
assembly and connect the electrical connector.
2.
Perform Coil Stress Test and replace failed coils on the remaining cylinders that are misfiring.
NOTE:
If more than 2 coils are defective, call the Special Support Service Center for prior approval.
3.
Clear DTCs.
INSTALL COIL-ON-PLUG COVER ASSEMBLIES