
LS V8-3.9L VIN A (2003)
Air Bag Control Module: Service and Repair
General Procedures
Missing Weld Nut
WELD NUT REPAIR - MISSING WELD NUT
CAUTION: Installing a J-nut in place of a weld nut is not a recommended repair.
NOTE: C-pillar repair shown, others similar.
1. Remove the component from where the weld nut is to be repaired. Refer to the appropriate removal and installation procedure.
2. Drill three equally spaced 5/64 in (1.75 mm) holes in close proximity to where the weld nut face will be plug welded back to the sheet metal.
3. Obtain the appropriate 6 mm (0.24 in) or 8 mm (0.32 in) weld nut.
4. Obtain the appropriate 6 mm (0.24 in) by 1.0 or 8 mm (0.32 in) by 1.25 grounding screw (self-tapping).
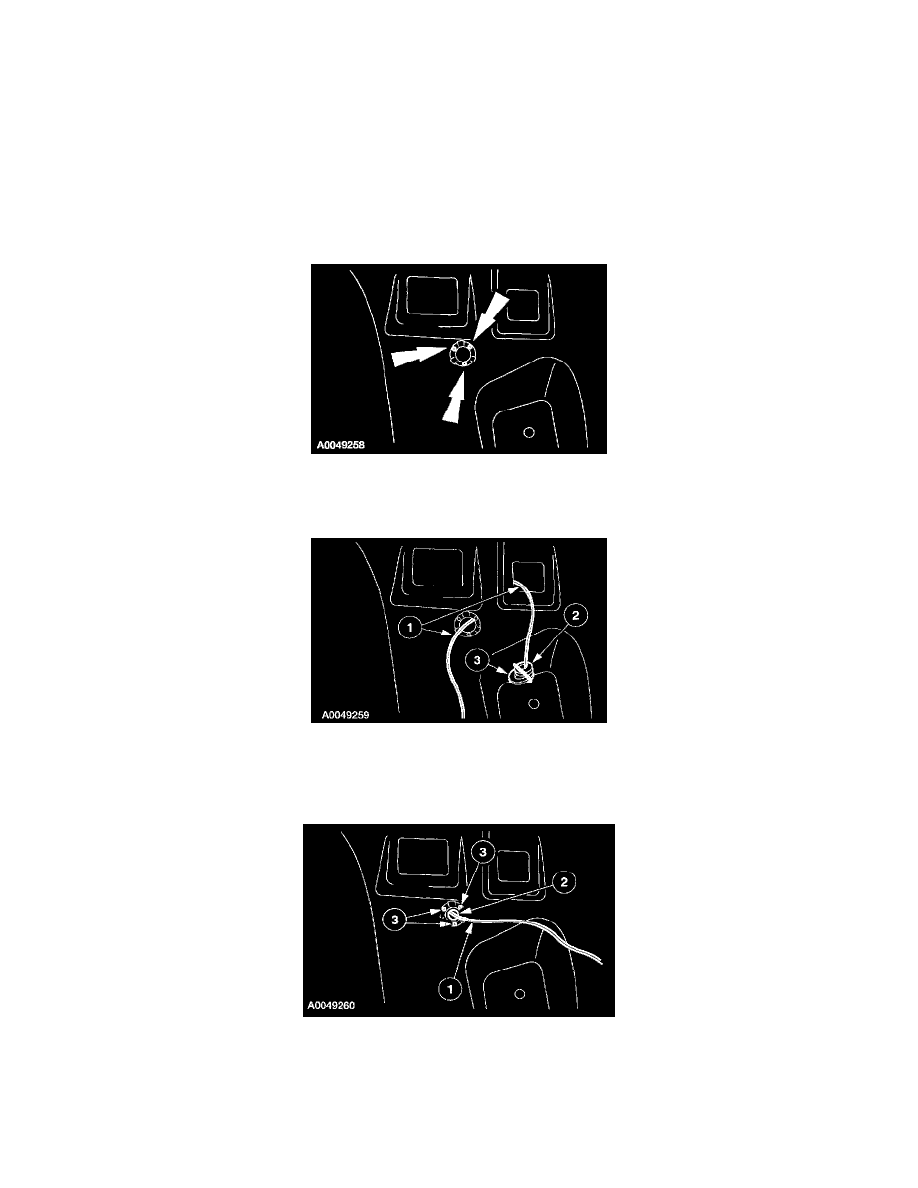
5. Set up for the positioning of the weld nut.
1
Route a sufficient length of wire through the weld nut clearance hole and back out an adjacent access hole.
2
Position a weld nut, shoulder end up, onto the wire.
3
Position a flat washer onto the wire and secure it so it cannot be pulled off.
6. Plug weld the weld nut into position.
1
Pull the welding wire back through the clearance hole, allowing the weld nut and flat washer to follow the welding wire through and stop
against the sheet metal.
2
Make sure the weld nut shoulder is aligned through the clearance hole in the sheet metal.
3
With the weld nut firmly held in position, plug weld the weld nut at the three holes drilled previously.
7. Metal finish as required.