
Mark VII V8-302 5.0L (1984)
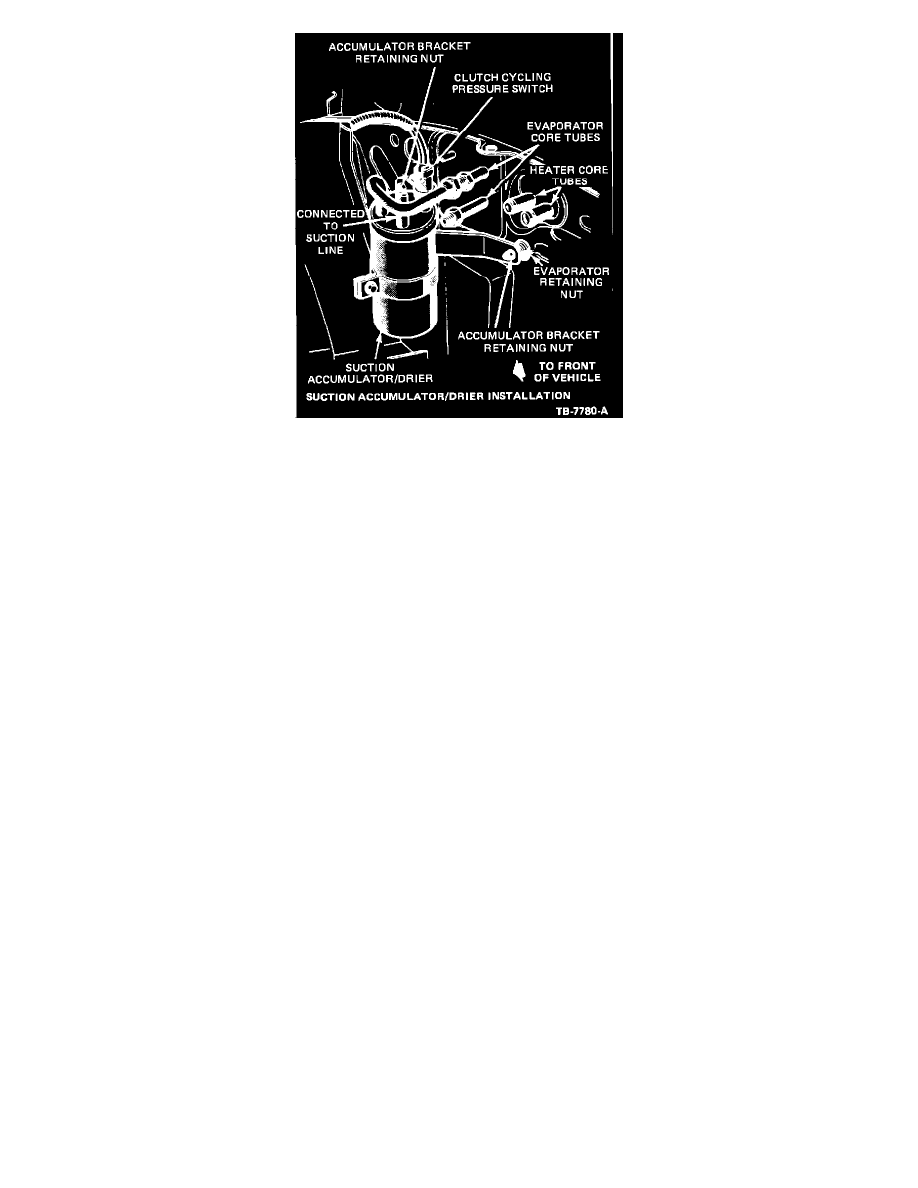
FIGURE 1
17.
Position the accumulator/drier mounting bracket over the studs on the dash panel (Figure 1) and
loosely install the two (2) nuts.
18.
Connect the accumulator/drier inlet tube to the evaporator core outlet tube using a new O-ring lubricated with clean refrigerant oil. Do not tighten
the connection.
19.
Connect the liquid line to the evaporator core inlet tube using a new O-ring lubricated with clean refrigerant oil. Do not tighten the connection.
20.
Tighten the two (2) nuts retaining the accumulator/drier to the dash panel (Figure 1).
21.
Tighten the two refrigerant line connections at the evaporator core to specification. Use a backup wrench to prevent component damage.
22.
Connect the harness connector to the clutch cycling pressure switch.
23.
Connect the heater hoses to the heater core.
24.
Fill the radiator to the specified level with a 50/50 mixture of coolant and water.
25.
Connect the ground cable to the battery negative (-) terminal.
26.
Install the carburetor air cleaner.
27.
Leak test, evacuate and charge the A/C system following the recommended procedures and safety precautions in Section 36-32 of the Shop
Manual.
28.
Check the EATC system and all instrument panel functions for proper operations.
Evaporator Assembly Removal
Continental
1.
Discharge the refrigerant from the A/C system following the recommended procedures (Shop Manual Section 36-32). Observe all safety
precautions.
2.
Disconnect the ground cable from the battery negative (-) terminal.
3.
Remove the carburetor air cleaner.
4.
Disconnect and plug the heater hoses at the heater core. Then, blow coolant from heater core.
5.
Disconnect the wire harness connector from the clutch cycling pressure switch located on top of the suction accumulator/drier.
6.
Disconnect the liquid line and the accumulator/ drier inlet tube from the evaporator core tubes. Use a back-up wrench to prevent component
damage. Cap all fittings to prevent the entrance of dirt and excessive moisture.