
Mark VIII V8-4.6L DOHC (1996)
INSTALLATION
1. Clean sealing surfaces of cylinder head and valve cover. Remove all traces of oil, dirt and previously applied sealant from engine front cover and
cylinder head sealing surfaces. Sealing surfaces must be clean and dry before applying sealant.
2. Install new spark plug bore to valve cover seals. Use of sealant is not required.
3. Position and, using a suitable adhesive, seal new valve cover gasket into valve cover.
4. Apply Silicone Gasket and Sealant F6AZ- 19562-A or equivalent meeting Ford specification WSE-M4G323-A6 in both places where engine front
cover meets cylinder head. Install valve cover onto cylinder head.
5. Install bolts and stud bolts into valve cover. Tighten bolts and studs to 8-12 N.m (71-106 lb-in), no more than four minutes after applying sealer.
6. Install spark plugs and ignition wires.
7. Install ignition wire cover and retaining nuts onto valve cover studs. Tighten retaining nuts to 2-4 N.m (18-35 lb-in).
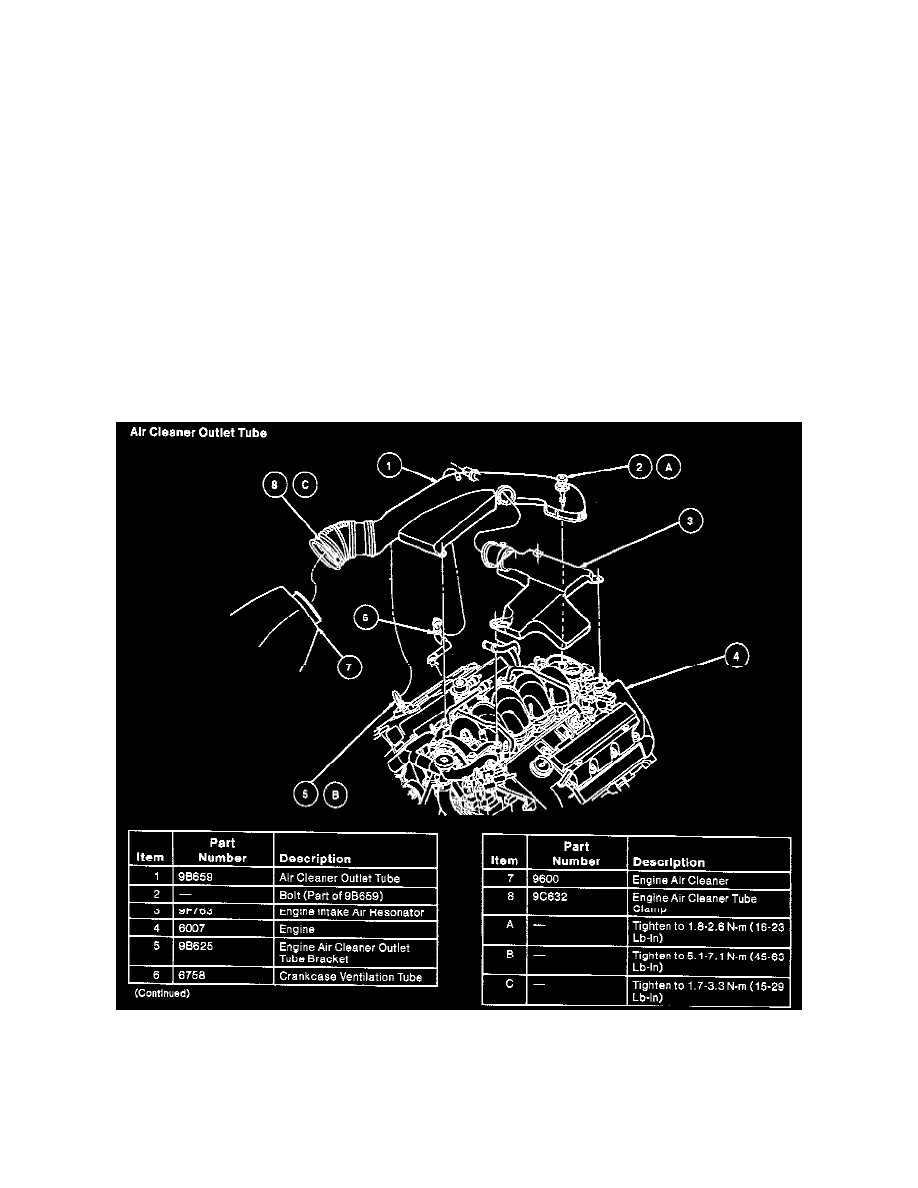
8. Install engine air cleaner outlet tube bracket onto cover retaining stud bolts and install nuts. Tighten retaining nuts to 8-12 N.m (71-106 lb-in).
9. Install air cleaner outlet tube and engine intake air resonator.
10. Install air cleaner outlet tube to throttle body bolt and tighten to 1.8-2.6 N.m (16-23 lb-in).
11. Install engine air cleaner outlet tube bracket and tighten to 5.1-7.1 N.m (45-63 lb-in).
12. Connect air cleaner outlet tube to engine air cleaner and tighten engine air cleaner tube clamp to 1.7-3.3 N.m (15-29 lb-in).
13. Connect engine control sensor wiring to the IAT sensor connector and crankcase ventilation tube to air cleaner outlet tube.