
Mark VIII V8-4.6L DOHC (1996)
Seat Belt: Service and Repair
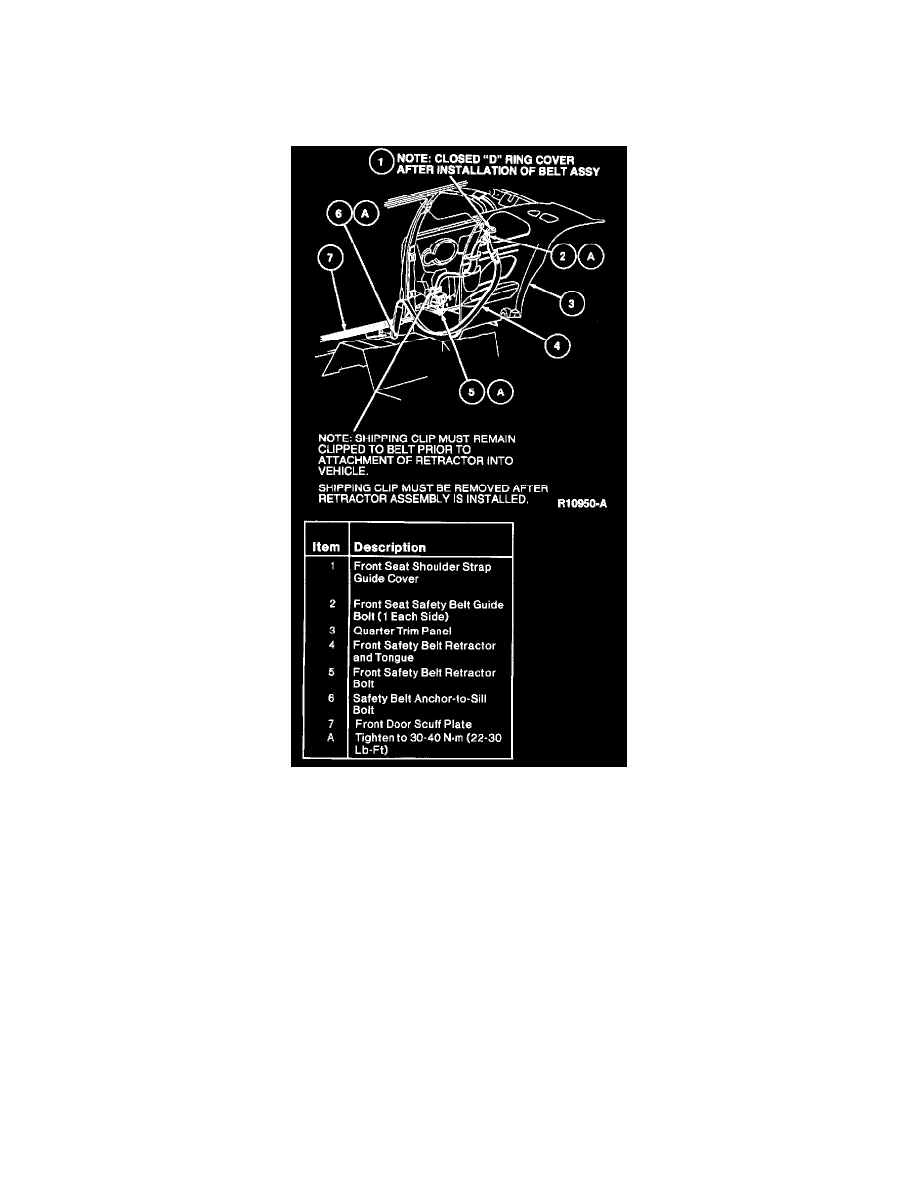
Removal and Installation
Front Seat Retractor and Tongue
SPECIAL SERVICE TOOL(S) REQUIRED
Description ...................................................................................................................................................................................................... Tool Number
Seat Belt Bolt Bit ............................................................................................................................................................................................. T77L-2 100-A
NOTE: Seat Belt Bolt Bit T77L-2100-A (No.50 TORX(R)) should be used for removal and installation of all safety belt assemblies.
Removal
1. Carefully open the front seat shoulder strap guide cover by slipping finger behind front seat shoulder strap guide cover at bottom of the bolt and
push it toward center of vehicle to dislodge from front safety belt guide. Lift front seat shoulder strap guide cover to access the bolt.
2. Insert Seat Belt Bolt Bit T77L-2 100-A (No.50 TORX(R)) and remove the front safety belt bolt.
3. Remove front safety belt anchor-to-sill bolt and rubber washer.
4. Snap out front shoulder belt bezel from quarter trim panel. Leave front shoulder belt bezel on front safety belt retractor and tongue assembly.
5. Snap out rear shoulder belt bezel from quarter trim panel. Leave rear shoulder belt bezel on rear front safety belt retractor and tongue assembly.
6. Remove rear seat back and cushion.
7. Remove the rear safety belt anchor-to-lower quarter trim panel bolt.
8. Remove quarter trim panel retaining screw behind rear shoulder belt bezel.
9. Remove quarter trim panel.
10. Remove safety belt anchor and bezel through slot in quarter trim panel.
11. Remove front safety belt retractor bolt.
12. Remove outboard front safety belt retractor and tongue from vehicle.