
MKS AWD V6-3.7L (2009)
Rear Door Panel: Service and Repair
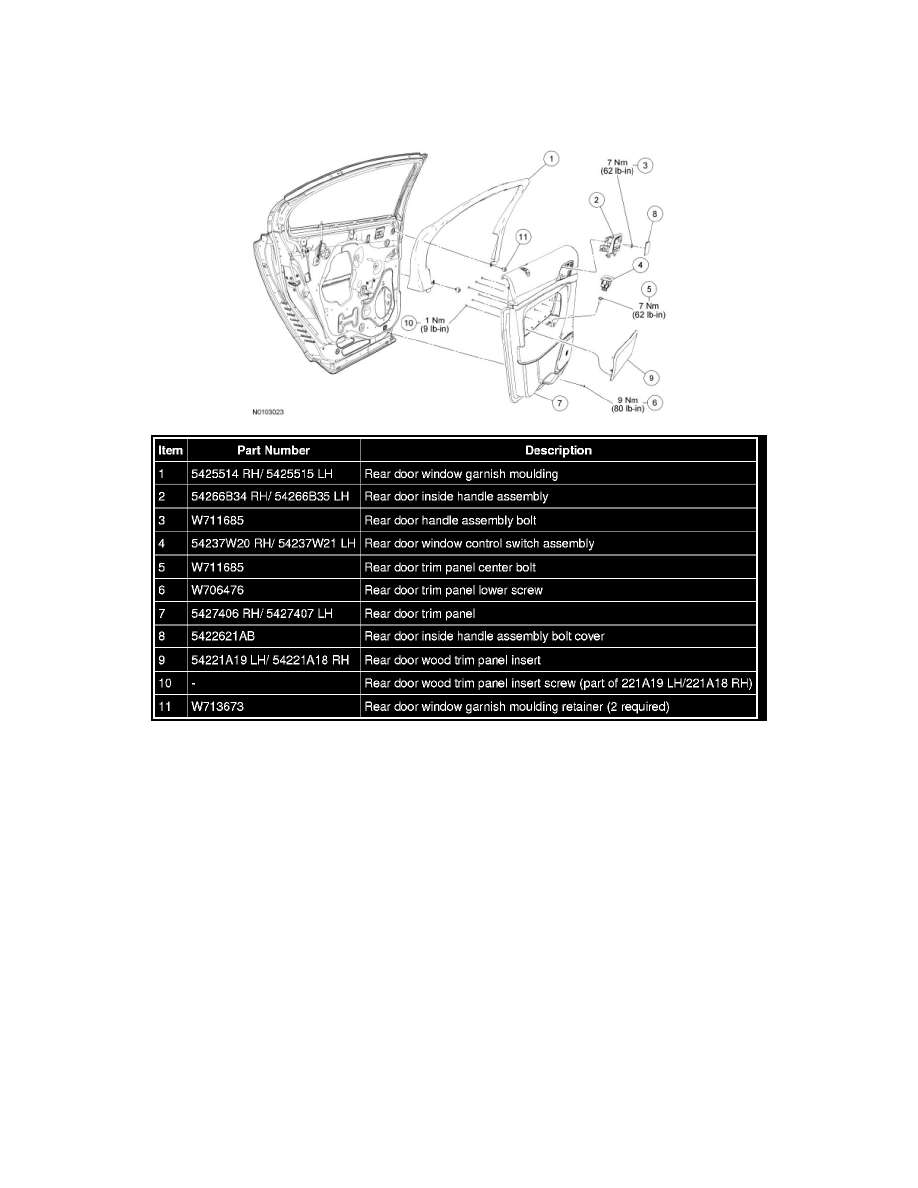
Door Trim Panel - Rear
NOTE: RH shown, LH similar.
Removal and Installation
Lower door trim panel
1. Remove the rear door inside handle assembly bolt cover.
2. Remove the rear door inside handle assembly bolt.
-
To install, tighten to 7 Nm (62 lb-in).
3. Using a suitable prying tool, pry upward to remove the window control switch.
4. Remove the rear door trim panel center bolt.
-
To install, tighten to 7 Nm (62 lb-in).
5. Remove the rear door trim panel lower screw.
6. NOTICE: Avoid pulling directly on the upper rear corner (vinyl portion) of the door trim panel during removal to prevent damage to the
door trim panel.
Remove the rear door trim panel.
-
Pull the rear door trim outward to release the retaining clips.
-
Remove the rear door handle assembly and disconnect the rear door handle assembly cable.