
MKS AWD V6-3.7L (2009)
Removal and Installation
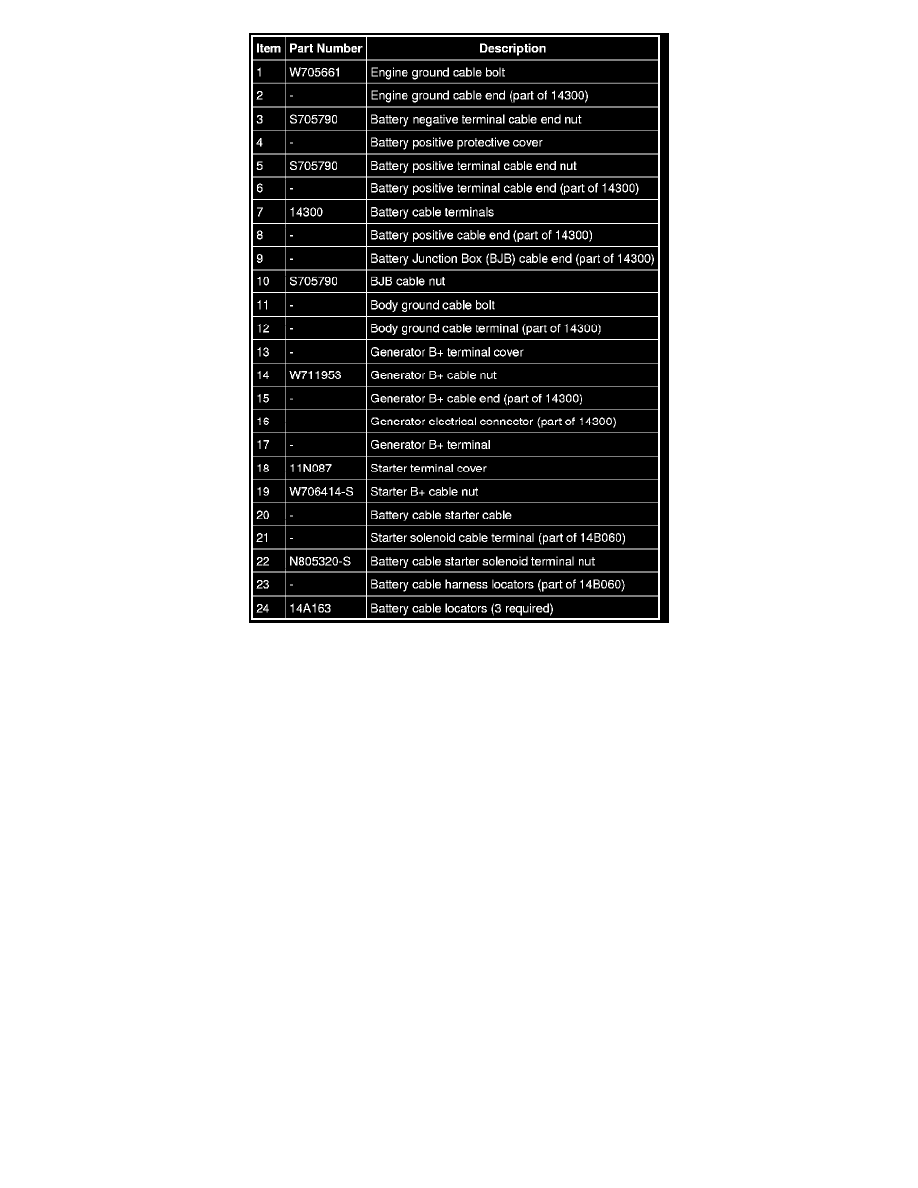
1. Remove the battery tray. For additional information, refer to Battery Tray See: Service and Repair/Battery Tray.
2. Remove the bolt and position the battery cable body ground terminal aside.
-
To install, tighten to 12 Nm (106 lb-in).
3. Remove the nut and position the Battery Junction Box (BJB) cable terminal aside.
-
To install, tighten to 8 Nm (71 lb-in).
4. Remove the starter solenoid terminal cover.
5. Remove the starter solenoid terminal nut and position the battery cable starter solenoid terminal aside.
-
To install, tighten to 12 Nm (106 lb-in).
6. Remove the starter B+ nut and position the battery cable starter motor terminal aside.
-
To install, tighten to 6 Nm (53 lb-in).
7. Release the battery cable locator from the engine.
8. Remove the bolt and position the battery cable engine ground terminal aside.
-
To install, tighten to 12 Nm (106 lb-in).
9. Release the battery cable from the top of the intake manifold.
10. Release the 3 battery cable locators from the LH valve cover.
11. Position the generator protective cover aside, remove the nut and position the generator B+ terminal aside.
-
To install, tighten to 17 Nm (150 lb-in).