
MKT FWD V6-3.7L (2010)
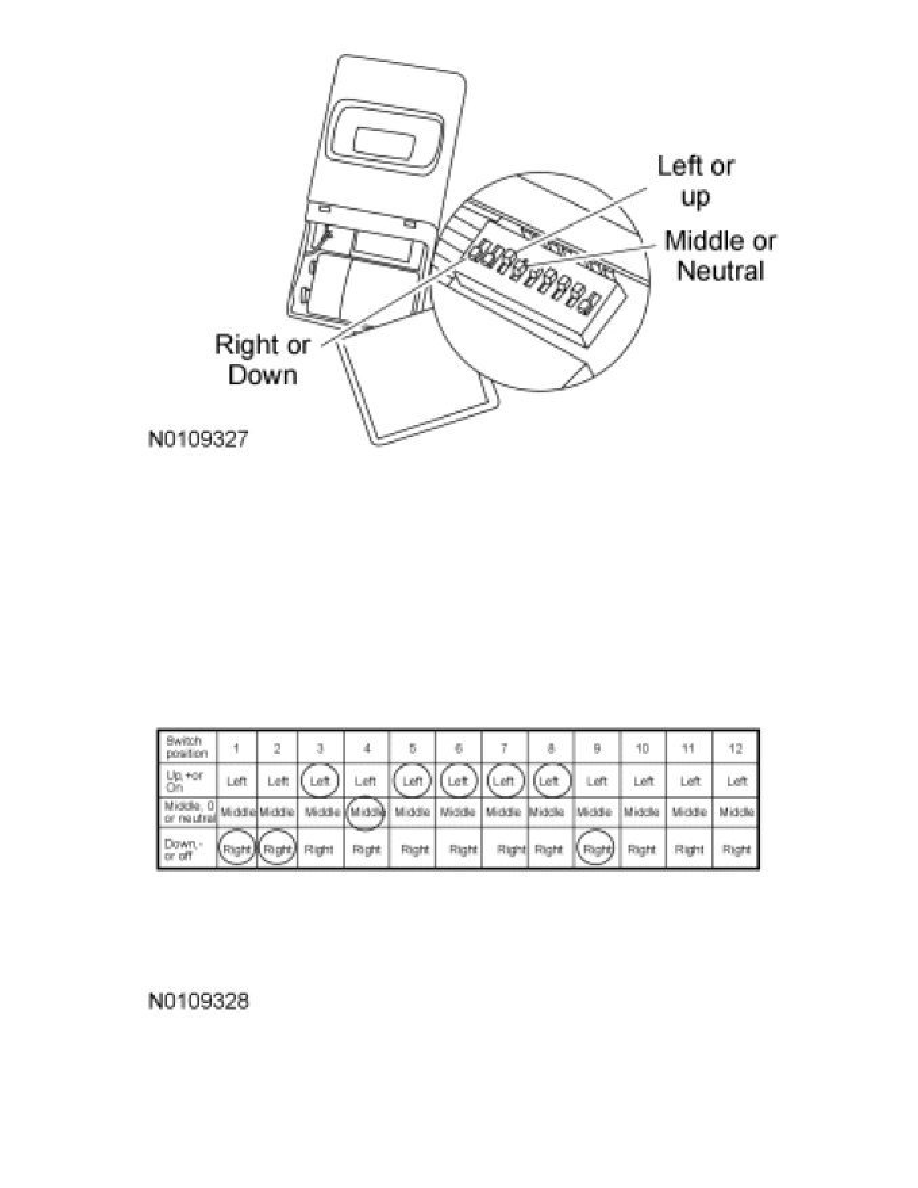
2. NOTE: When a coded dip switch is in the up, +, or on position, circle "Left" on the chart under the correct switch position number. When a switch
is in the middle, 0 or neutral position, circle "Middle" on the chart. When a switch is in the down, -, or off position, circle "Right" on the chart.
Record the dip switch settings on the copy of the switch settings chart by circling the setting under the correct switch position number. Do this
from left to right for all 8 to 12 switches (the number of switches varies between transmitter manufacturers). For additional information, refer to
the chart below or to the Switch Settings chart in Specifications.
3. Turn the ignition ON.
4. To input the dip switch settings into the Lear Car2U(R) System, press (at the same time) all 3 Lear Car2U(R) System buttons for a few seconds
and then release to put the device into the programming mode. The 3 red indicator lights blink slowly. Within 2.5 minutes, enter the corresponding
dip switch settings from left to right (starting with number 1) into the Lear Car2U(R) System by pressing and releasing the buttons corresponding
to the settings you circled.