
MKT FWD V6-3.7L (2010)
12. NOTICE: Do not tighten the front wheel hub nut with the vehicle on the ground. The nut must be tightened to specification before the
vehicle is lowered onto the wheels. Wheel bearing damage will occur if the wheel bearing is loaded with the weight of the vehicle applied.
NOTE: Apply the brake to keep the halfshaft from rotating.
Using the previously removed hub nut, seat the halfshaft.
-
Tighten to 350 Nm (258 lb-ft).
-
Remove and discard the hub nut.
13. NOTICE: The wheel hub nut contains a one-time locking chemical that is activated by the heat created when it is tightened. Install and
tighten the new wheel hub nut to specification within 5 minutes of starting it on the threads. Always install a new wheel hub nut after
loosening or when not tightened within the specified time or damage to the components can occur.
NOTE: Apply the brake to keep the halfshaft from rotating.
Install a new hub nut.
-
Tighten to 350 Nm (258 lb-ft).
14. Install the wheel and tire. For additional information, refer to Wheels and Tires.
15. Tighten the 4 upper strut mount nuts to 30 Nm (22 lb-ft).
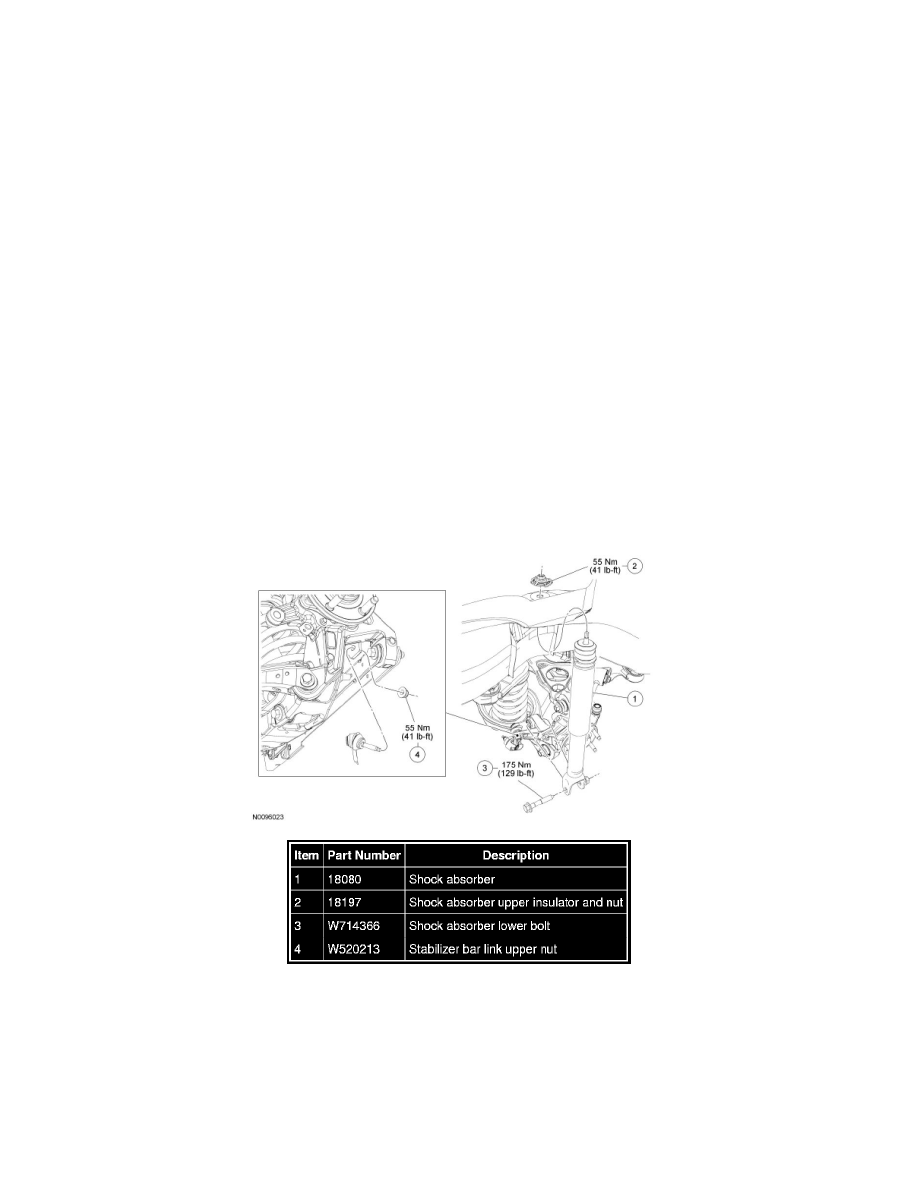
Rear Suspension
Shock Absorber
Removal and Installation
NOTICE: Suspension fasteners are critical parts because they affect performance of vital components and systems and their failure may result
in major service expense. New parts must be installed with the same part numbers or equivalent part, if replacement is necessary. Do not use a
replacement part of lesser quality or substitute design. Torque values must be used as specified during reassembly to make sure of correct
retention of these parts.
1. Remove the rear quarter trim panel trim insert.
2. Remove and discard the shock absorber upper insulator and nut.