
MKT FWD V6-3.7L (2010)
Pressure Regulating Solenoid: Service and Repair
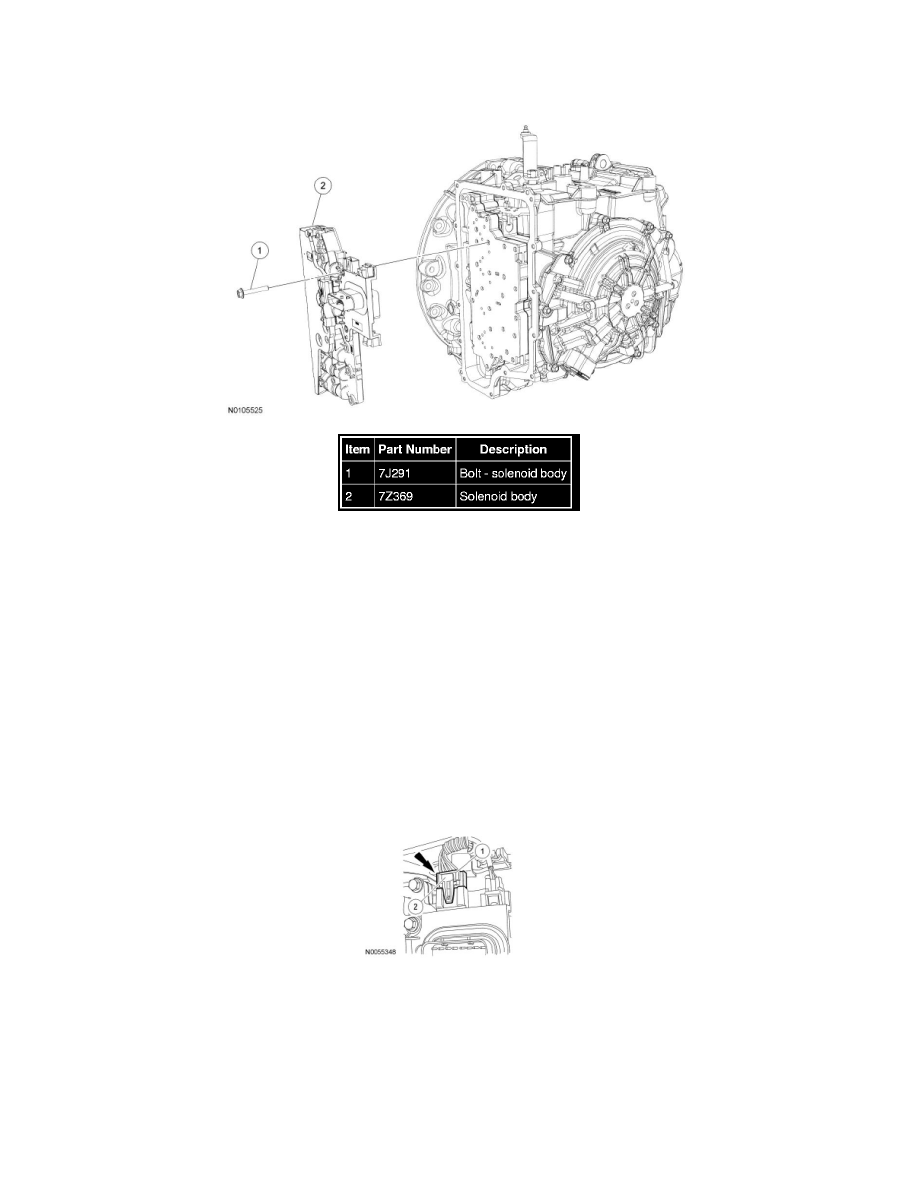
Solenoid Body Assembly
Removal
NOTE: The PCM must be updated with a new solenoid body strategy data file and solenoid body identification any time a new solenoid body is
installed. A new solenoid body service tag must be installed over the current solenoid body service tag on top of the transaxle case.
1. Remove the main control cover.
-
For vehicles equipped with a 3.7L engine, refer to Main Control Cover - 3.7L See: Automatic Transmission/Transaxle/Fluid Pan/Service and
Repair.
-
For vehicles equipped with a 3.5L Gasoline Turbocharged Direct Injection (GTDI) engine, refer to Main Control Cover - 3.5L GTDI See:
Automatic Transmission/Transaxle/Fluid Pan/Service and Repair.
2. Disconnect the Transmission Range (TR) sensor electrical connector.
1. Slide the lock over.
2. Press the tab and disconnect the connector.
3. Disconnect the Turbine Shaft Speed (TSS) and Output Shaft Speed (OSS) sensor electrical connectors.