
Navigator 2WD V8-5.4L (2007)
Removal and Installation
1. With the vehicle in NEUTRAL, position it on a hoist. For additional information, refer to Maintenance/Service and Repair.
2. Drain the engine cooling system. For additional information, refer to Cooling System.
3. Disconnect the lower radiator hose from the oil filter adapter and position it aside.
4. Disconnect the degas bottle coolant hose from the oil filter adapter and position it aside.
5. Remove and discard the engine oil filter.
^
To install, tighten to 15 Nm (11 ft. lbs.)
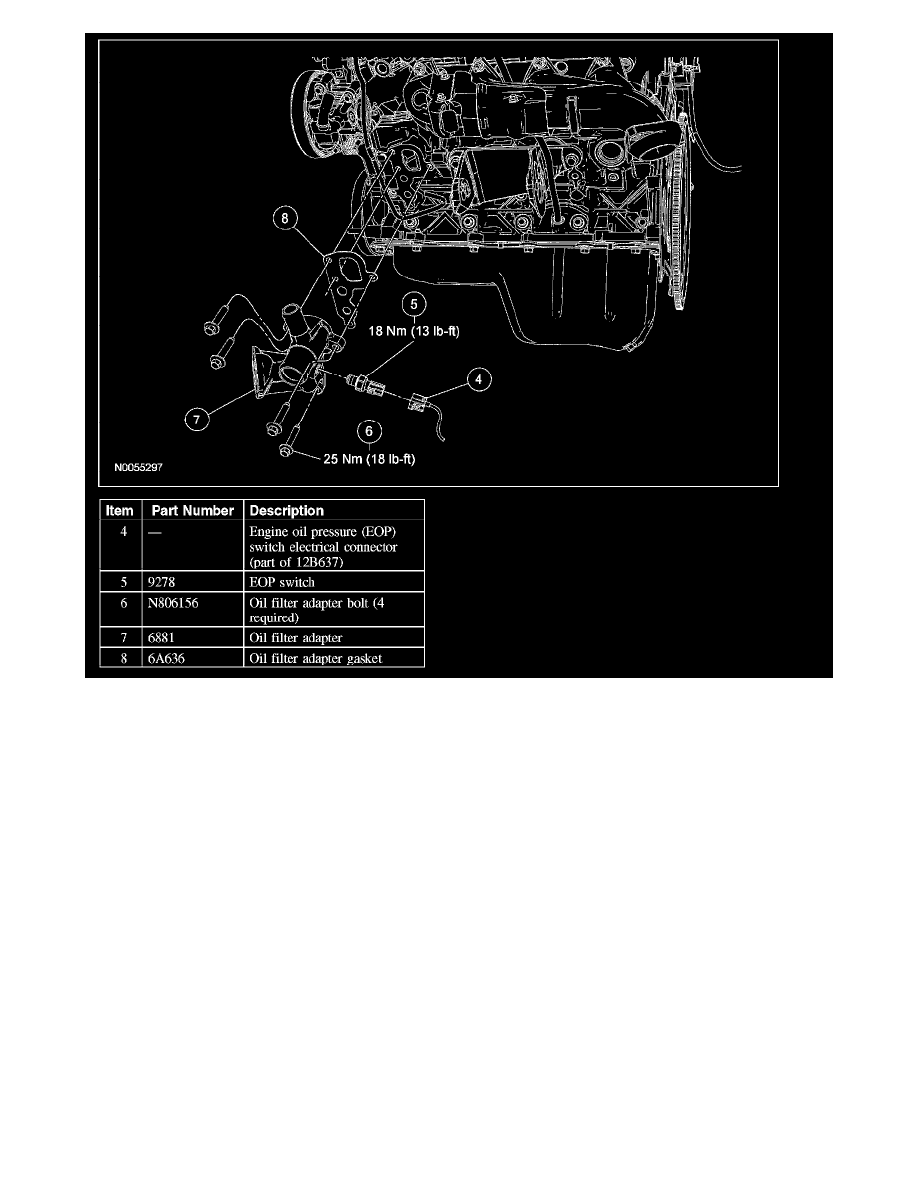
6. Disconnect the engine oil pressure (EOP) switch electrical connector.
7. Remove the EOP switch.
^
To install, tighten to 18 Nm (13 ft. lbs.)
8. Remove the 4 bolts and the oil filter adapter.
^
To install, tighten to 25 Nm (18 ft. lbs.)
9. CAUTION: Do not use metal scrapers, wire brushes, power abrasive discs or other abrasive means to clean the sealing surfaces. These
may cause scratches and gouges resulting in leak paths. Use a plastic scraper to clean the sealing surfaces.
Remove and discard the oil filter adapter gasket. Clean the sealing surfaces with silicone gasket remover and metal surface prep. Follow the
directions on the packaging. Inspect the mating surfaces.
10. To install, reverse the removal procedure.
^
Install a new oil filter.
^
Check the engine oil level and fill as necessary with clean engine oil.