
Navigator 2WD V8-5.4L DOHC VIN R (2001)
Compressor/Pump: Service and Repair
Removal and Installation
1. WARNING: Do not remove an air spring under any circumstances when there is pressure in the air spring. Do not remove any
components supporting an air spring without either exhausting the air or providing support for the air spring to prevent vehicle damage
or personal injury.
WARNING: Disconnecting an air line that is connected to the air compressor can cause personal injury or damage to components as
high pressure air is vented uncontrolled.
Using the New Generation STAR (NGS) Tester, vent the compressor/drier assembly.
2. Disconnect the battery ground cable.
3. Remove the windshield washer pump and reservoir.
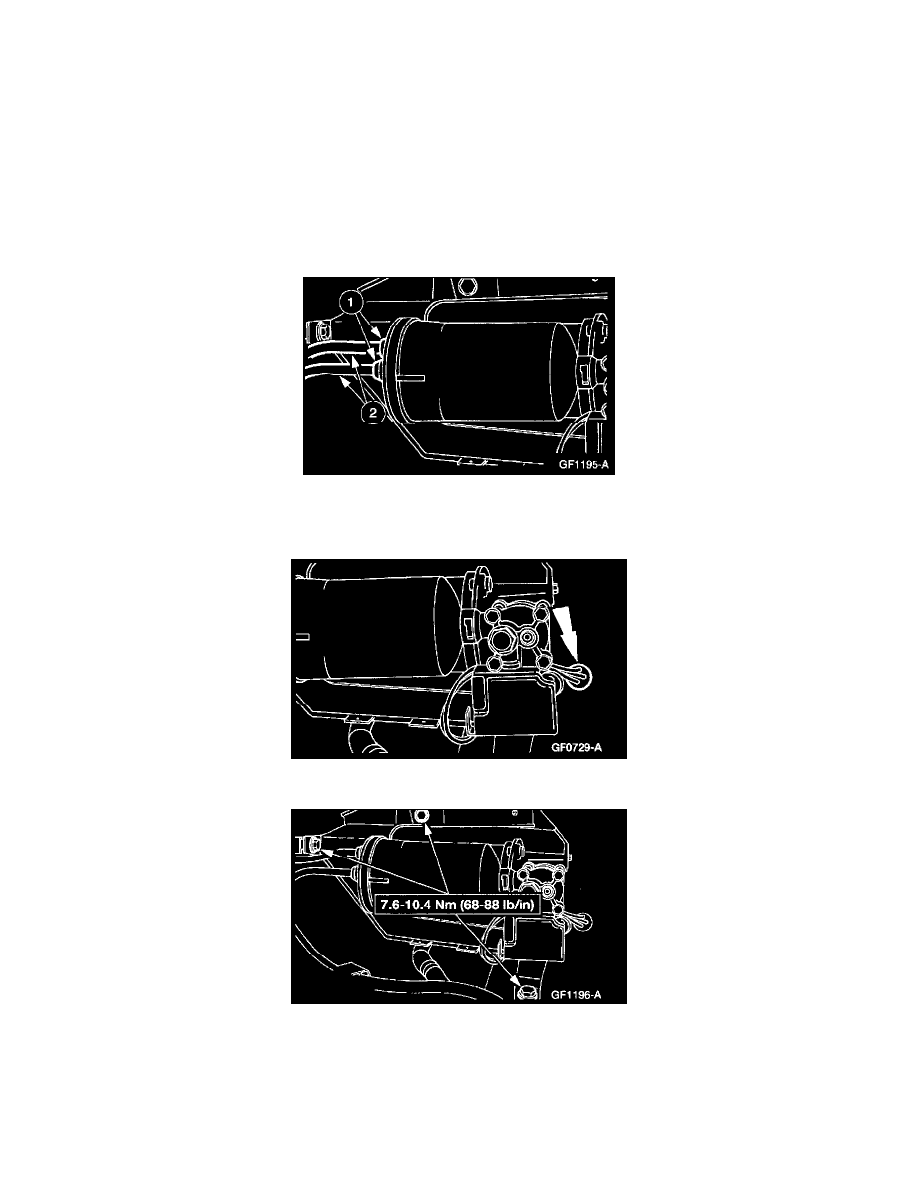
4. Disconnect the air lines from the air compressor.
1
Compress the quick connect locking rings and hold firmly while pulling out on the air lines.
2
Disconnect the air lines.
5. Disconnect the air compressor electrical connector.
6. Remove the air compressor bracket bolts and remove the air compressor/drier assembly.
7. NOTE: When installing the air lines, make sure the white air line is fully inserted into the fitting for correct installation.
NOTE: When the battery is disconnected and reconnected, some abnormal drive symptoms may occur while the vehicle relearns its adaptive
strategy. The vehicle may need to be driven 16 km (10 mi) or more to relearn the strategy.