
Navigator 2WD V8-5.4L SOHC VIN L (1999)
Remove the manual control lever shaft assembly.
1
Remove the nut.
2
Remove the manual control lever shaft assembly.
7. Remove the manual control lever seal.
1
Install the Puller.
2
Remove the seal.
Installation
1. NOTE: Prior to installing the manual control lever seal, clean the bore opening with mineral spirits.
Using the Shift Lever Seal Replacer to install the manual control lever seal.
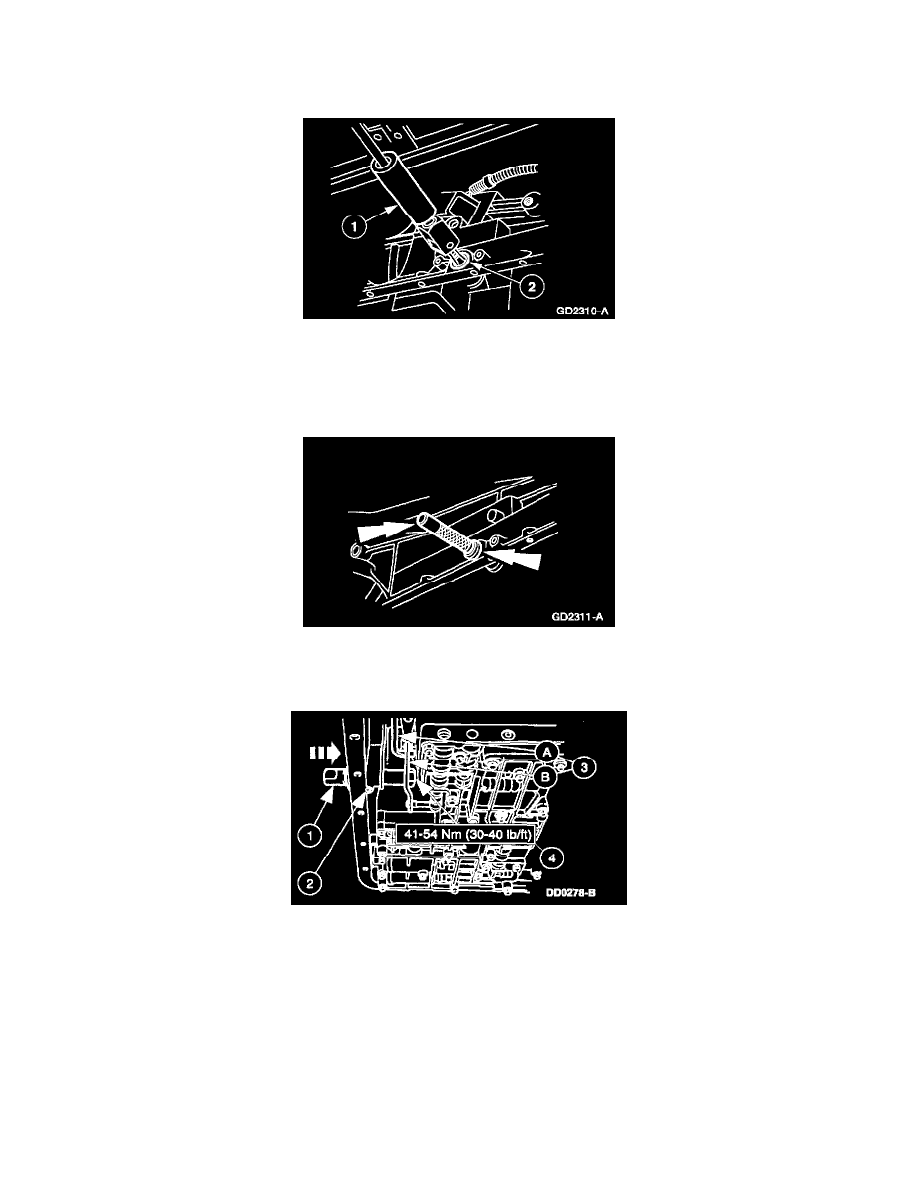
2. Install the manual control lever shaft assembly.
1
Install the manual control lever shaft assembly.
2
Install and seat the manual lever shaft retaining pin below the case surface.
3
NOTE: The inner manual valve detent lever must be seated on the flats of the manual control lever shaft assembly, and the parking pawl
actuating rod must be through the guide plate.
NOTE: The manual control valve detent lever spring must be on the inner manual valve detent lever, and the detent lever pin must align with
the manual shift valve.
Install the (A) parking pawl actuating rod and the (B) inner manual valve detent lever.
4
NOTE: Use a crescent wrench on the manual control lever or the outer flats of the manual control lever shaft assembly when installing the