
Navigator 4WD V8-5.4L (2010)
Disassembly
1. Remove the bolt and disconnect the quick connect coupling and remove the Evaporative Emission (EVAP) purge valve assembly.
2. Remove the 4 bolts and the fuel rail.
3. Remove the 8 fuel injector-to-fuel rail locking clips and separate the 8 fuel injectors from the fuel rail.
-
Discard the 2 O-ring seals from each fuel injector.
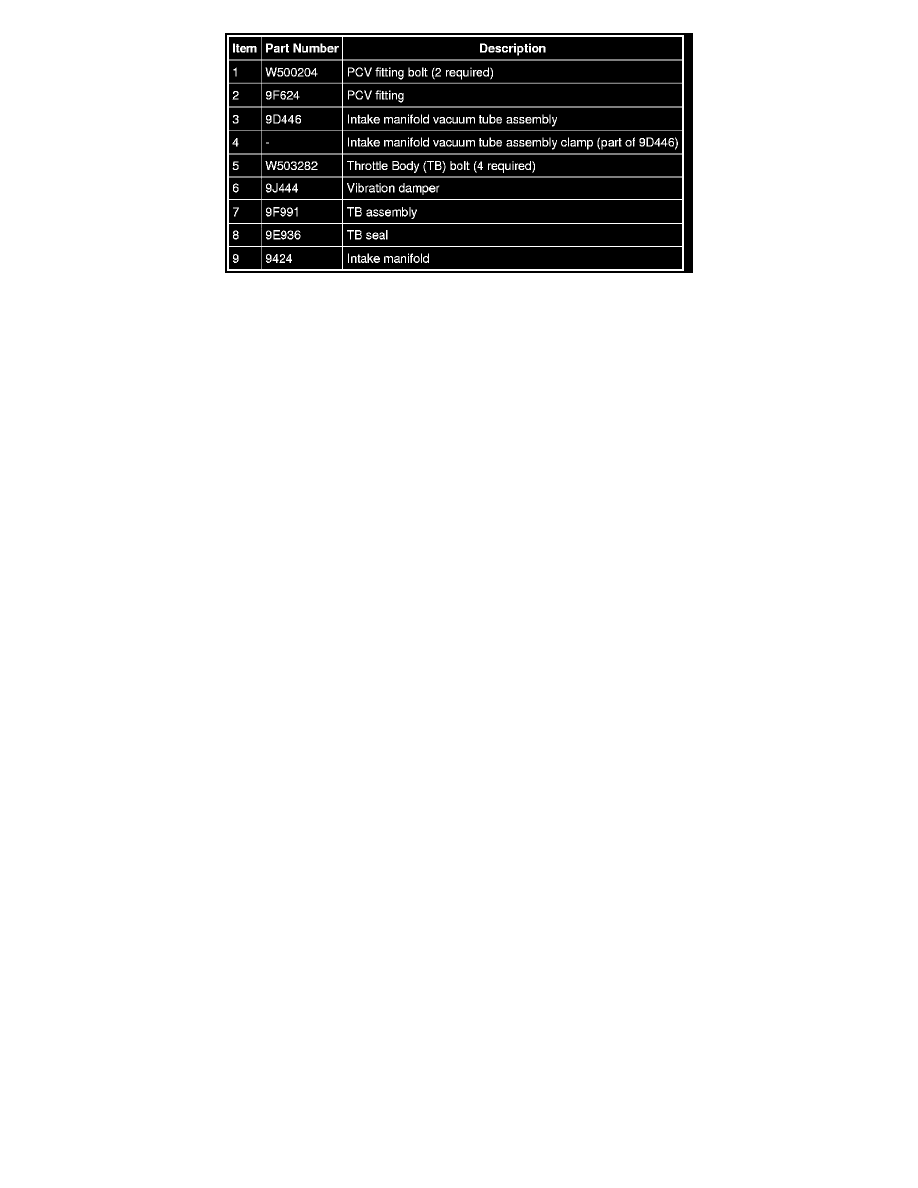
4. Remove the vacuum tube assembly from the intake manifold.
5. Remove the 2 bolts and the PCV fitting.
6. Remove the 4 bolts, the vibration damper and the Throttle Body (TB).
Assembly
1. NOTICE: If the engine is repaired or replaced because of upper engine failure, typically including valve or piston damage, check the
intake manifold for metal debris. If metal debris is found, install a new intake manifold. Failure to follow these instructions can result in
engine damage.
NOTE: Lubricate the O-ring seal with clean engine oil prior to installation.
Install the PCV fitting and the 2 bolts.
-
Tighten to 6 Nm (53 lb-in).
2. Install the vacuum tube assembly onto the intake manifold and position the clamp.
3. Install the TB, vibration damper and tighten the 4 bolts in 2 stages.
-
Stage 1: Tighten to 9 Nm (80 lb-in).
-
Stage 2: Tighten an additional 90 degrees.
4. NOTE: Lubricate the new O-ring seals with clean engine oil prior to installation.
Install 16 new O-ring seals on each of the fuel injectors.
5. Assemble the 8 fuel injectors onto the fuel rail and install the 8 locking clips.
6. Install the fuel rail and fuel injector as an assembly onto the intake manifold.
7. Install the 4 fuel rail bolts.
-
Tighten to 10 Nm (89 lb-in).
8. Position the Evaporative Emission (EVAP) purge valve assembly and connect the quick connect coupling and install the bolt.
-
Tighten to 10 Nm (89 lb-in).