
Navigator 4WD V8-5.4L (2010)
5. Remove the 4 (2 LH and 2 RH) exhaust manifold-to-catalytic converter nuts.
Four-Wheel Drive (4WD) vehicles
6. Remove the front driveshaft. For additional information, refer to Drive/Propeller Shafts, Bearings and Joints.
All vehicles
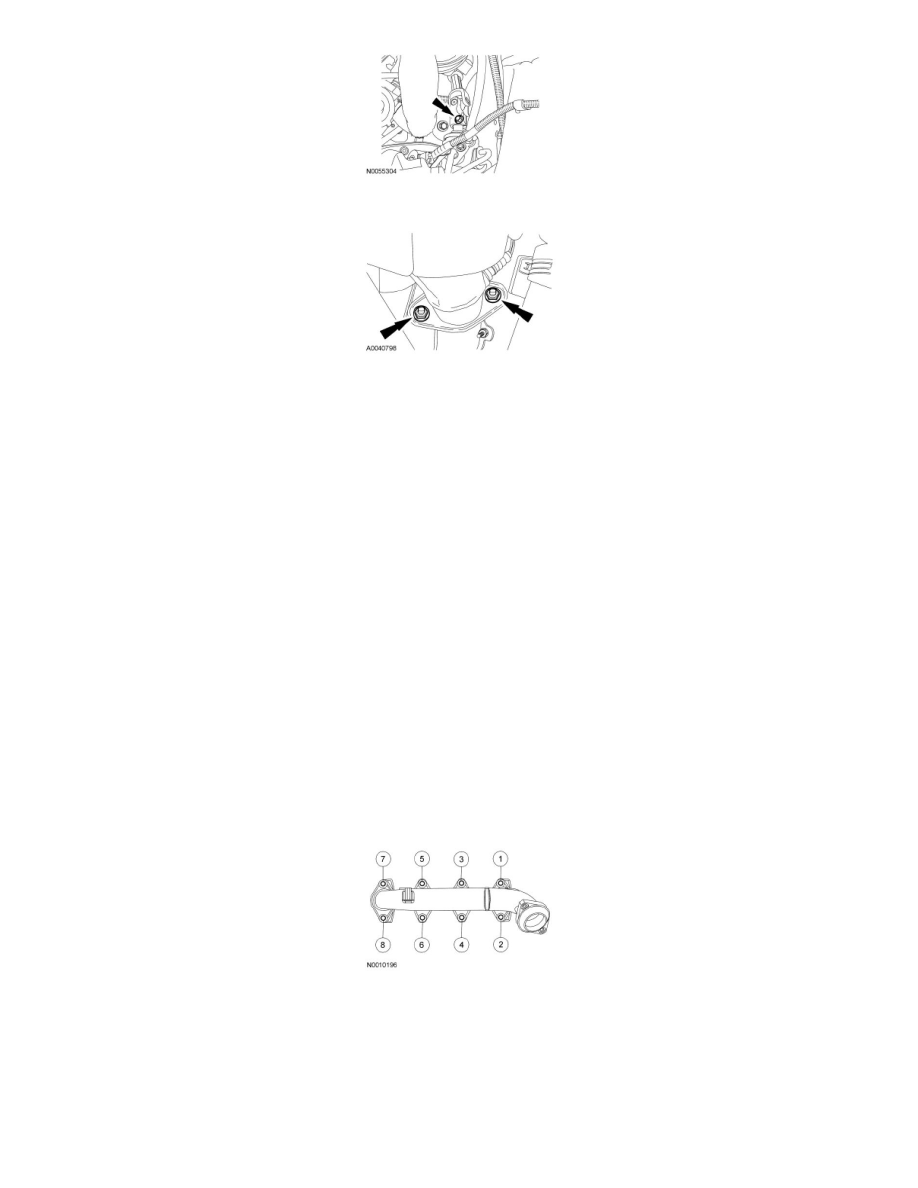
7. Remove the 8 exhaust manifold nuts, the 8 studs and the exhaust manifold.
-
Discard the exhaust manifold nuts and studs.
8. NOTICE: Do not use metal scrapers, wire brushes, power abrasive discs or other abrasive means to clean the sealing surfaces. These may
cause scratches and gouges resulting in leak paths. Use a plastic scraper to clean the sealing surfaces.
NOTE: Clean the sealing surfaces with metal surface prep. Follow the directions on the packaging.
Remove and discard the 2 exhaust manifold gaskets. Clean the sealing surfaces with metal surface prep.
9. Inspect the exhaust manifold. For additional information, refer to Engine System - General Information.
Installation
All vehicles
1. Using 2 new exhaust manifold gaskets and 8 new studs, position the 2 gaskets and exhaust manifold and install the 8 studs.
-
Tighten to 12 Nm (106 lb-in).
2. Using new exhaust manifold nuts, install the 8 nuts.
-
Tighten to 25 Nm (18 lb-ft) in the sequence shown.
Exhaust Manifold - LH
4WD vehicles
3. Install the front driveshaft. For additional information, refer to Drive/Propeller Shafts, Bearings and Joints.
All vehicles
4. NOTICE: Do not allow the steering column shaft to rotate while the intermediate shaft is disconnected or damage to the clockspring can