
Town Car V8-281 4.6L SOHC (1991)
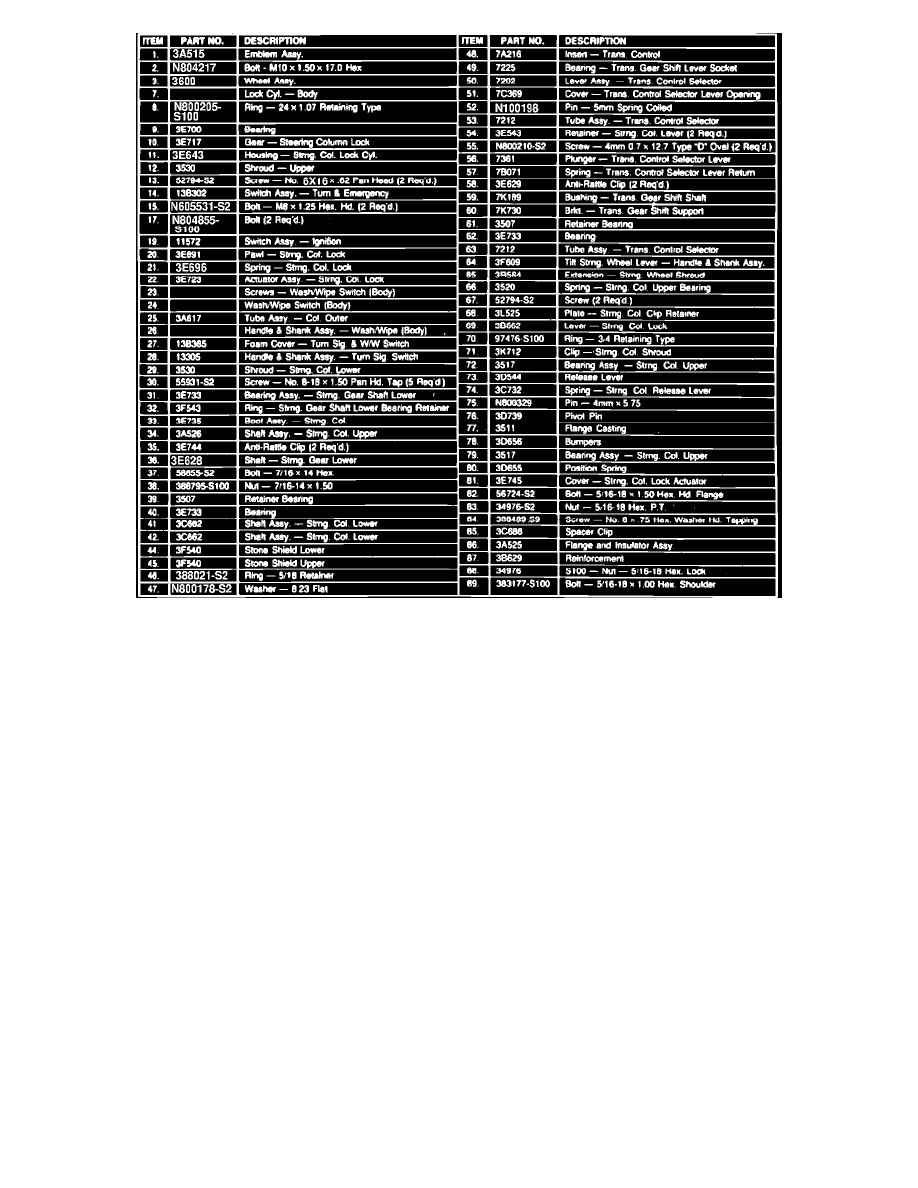
Fig. 2 Tilt Steering Column Installation (Part 2 Of 2)
Refer to Figs. 2 and 3 for component identification.
Removal
1.
Remove steering column assembly as described under STEERING COLUMN.
2.
On models with column shift, remove shift cane assembly.
3.
Remove windshield wiper/washer switch, then remove steering wheel.
4.
Remove upper conical spring, bearing plate and C-clip ring.
5.
Move tilt column to the uppermost position to unload spring.
6.
Using tool No. T67P-3D739B, or equivalent, remove tilt pivot pins. Use care when removing pivot pins, the tilt spring is still under pressure.
7.
Remove upper casting from lock cylinder housing.
8.
On all except Ford & Mercury full size, remove bolt and nut attaching lower U-joint shaft assembly to steering column shaft.
9.
On all models, remove steering shaft assembly from steering column.
10.
Remove two bolts attaching lock cylinder housing to outer tube flange bracket, then rotate ignition key to Start position and pull actuator interlock
out of clearance hole in tube.
11.
Remove ignition lock drive gear and actuator.