
Town Car V8-302 5.0L (1987)
Servo Motor Assembly: Service and Repair
REMOVAL
1. Disconnect the ground cable from the battery negative (-) terminal.
2. Disconnect the glove compartment door stop (one screw) and let the door hang by the hinges.
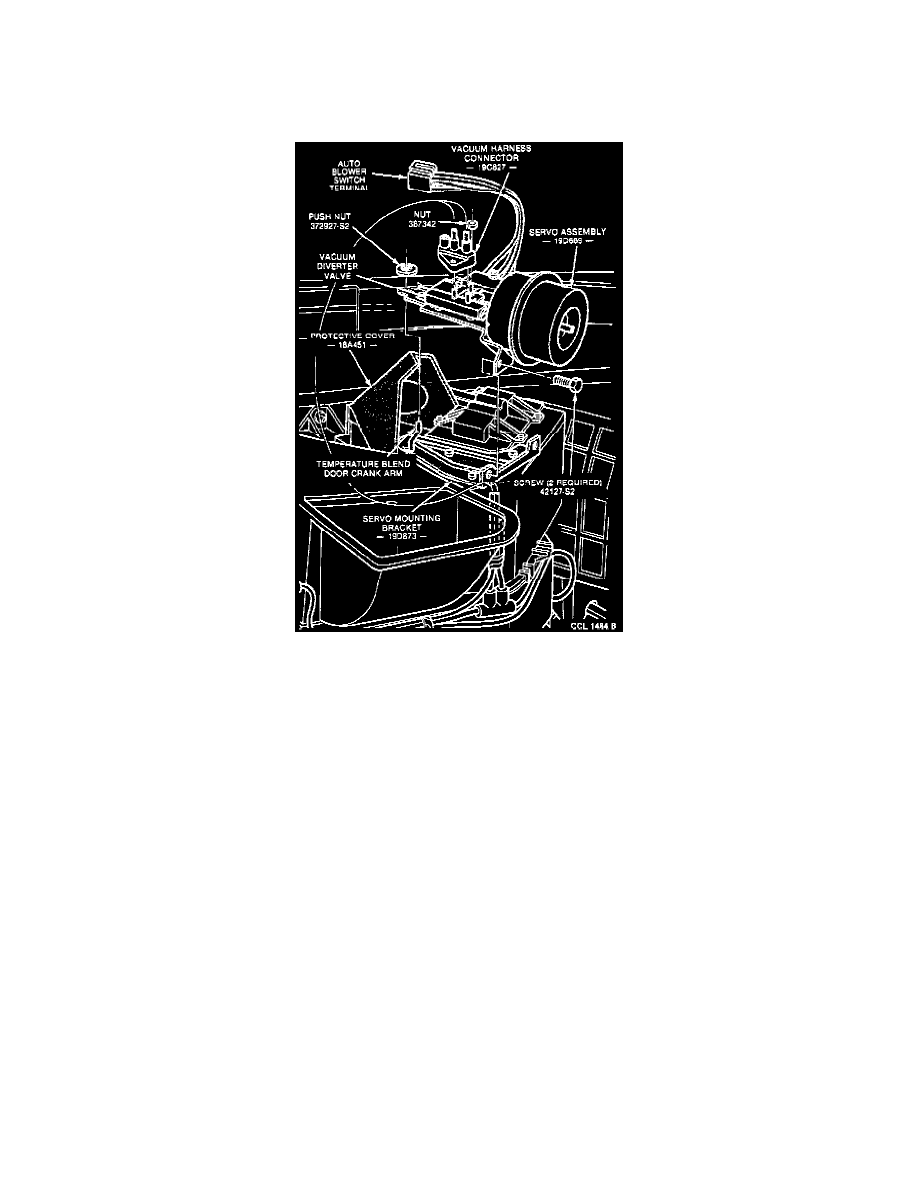
Servo Motor Assembly
3. Remove the vacuum hose from the servo motor and unplug the electrical harness connectors.
4. Remove the two screws from the servo motor assembly mounting bracket and position the servo for access to the vacuum diverter valve.
5. Remove the retaining push nut and vacuum connector clip, unplug the multiple vacuum connector from the vacuum diverter valve.
6. Remove the push nut that retains the servo motor overtravel spring and arm link to the blend door crank arm and remove the servo assembly from
the vehicle.
INSTALLATION
1. Connect the servo motor overtravel spring and arm link to the blend door crank arm and install a new push nut.
2. Connect the multiple vacuum connector to the vacuum diverter valve and secure it with a vacuum connector and a new retaining push nut.
3. Position the servo motor and install the two mounting screws.
4. Connect the vacuum hose to the servo motor and connect the electrical connector to the harness.
5. Replace the glove compartment door stop screw.
6. Connect the ground cable to the negative (-) battery terminal.
NOTE: On vehicles equipped with Electronic Engine Control (EEC), when the battery has been disconnected and reconnected, some abnormal
drive symptoms may occur while the EEC processor relearns its adaptive strategy. The vehicle may need to be driven 10 miles or more to relearn
the strategy.
7. Check the A/C system for proper operation.