
Town Car V8-4.6L VIN V Flex Fuel (2006)
Evaporative Emission Control Canister: Service and Repair
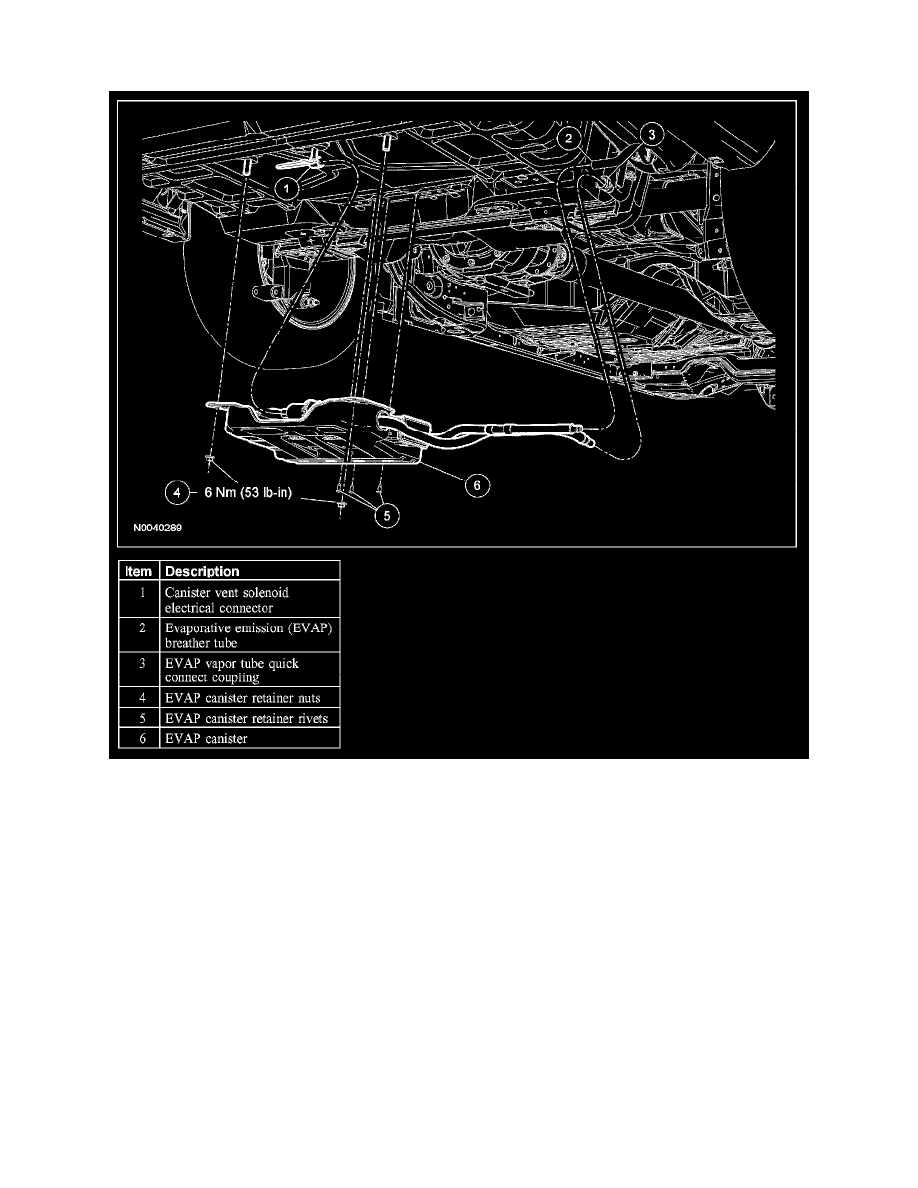
EVAPORATIVE EMISSION CANISTER
Removal and Installation
1. WARNING: The evaporative emission system contains fuel vapor and condensed fuel vapor. Although not present in large quantities, it
still presents the danger of explosion or fire. Disconnect the battery ground cable from the battery to minimize the possibility of an
electrical spark occurring, possibly causing a fire or explosion if fuel vapor or fuel liquid is present in the area. Failure to follow these
instructions may result in personal injury.
With the vehicle in NEUTRAL, position it on a hoist.
2. Disconnect the battery ground cable.
3. Disconnect the evaporative emission (EVAP) breather tube.
4. Disconnect the EVAP vapor tube quick connect coupling.
5. Remove the 2 EVAP canister retaining nuts.
-
To install, tighten to 6 Nm (53 lb-in).
6. Disconnect the canister vent solenoid electrical connector.
7. Remove the 3 EVAP canister retaining rivets.
-
Drill out the center of the original rivets to remove and replace with new rivets upon installation.
8. Remove the EVAP canister.
9. To install, reverse the removal procedure.
-
Leak test the system. See: Testing and Inspection/Evaporative Emission System Leak Test