
Town Car V8-4.6L VIN W (1997)
Front Door Panel: Service and Repair
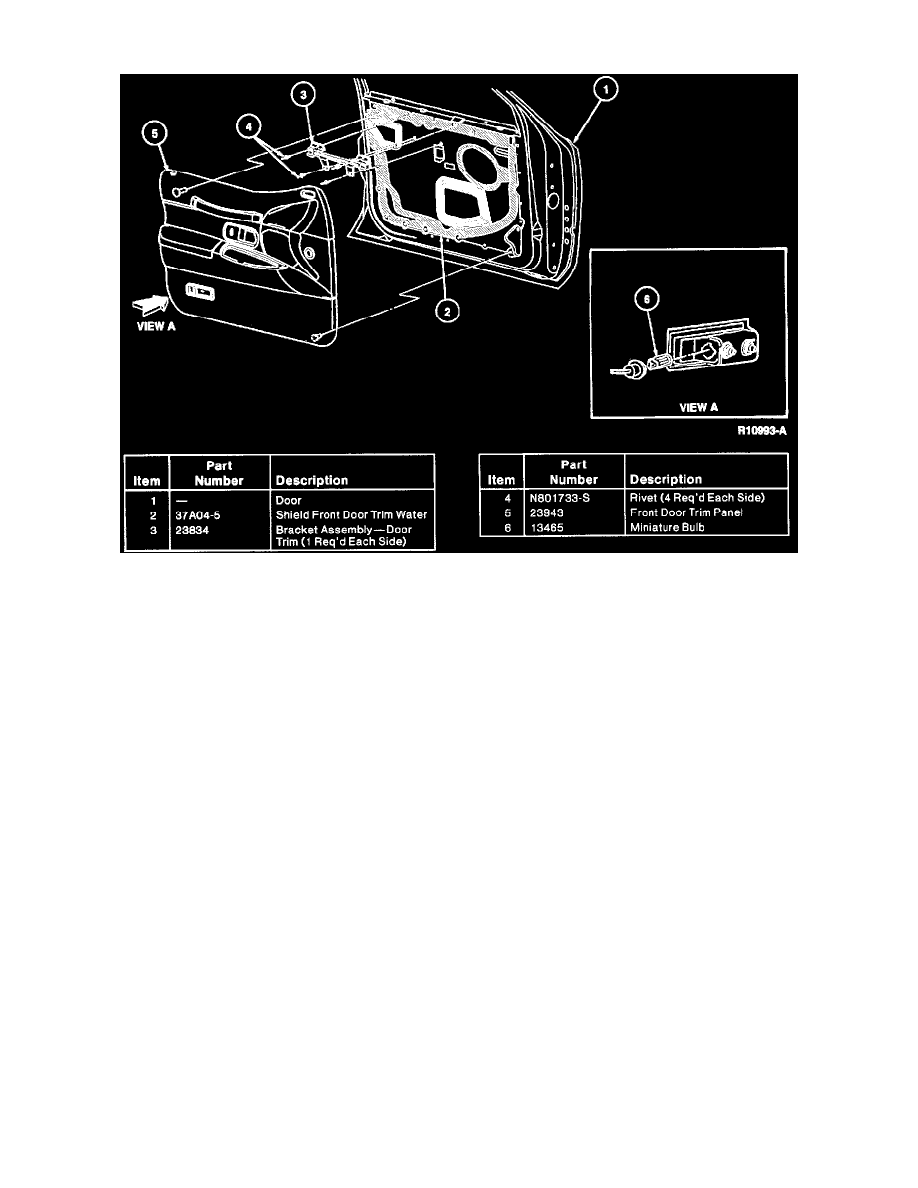
Front Door
Removal
CAUTION: To avoid breakage of door pull cover(s), insert a screwdriver diagonally between pull strap and chrome bracket. Snap out both sides then
remove.
1. Snap out two door pull strap retaining screw covers. Remove screws.
2. Remove two screws on front and rear side of front door trim panel.
NOTE: The following procedure must be used during removal and installation of the door armrest and trim panel. Refer to the appropriate illustrations
for component and vehicle model identification.
3. Using the Trim Pad Removing Tool from Rotunda Windshield and Moulding/Trim Removal Kit 107-R0401 or equivalent, pry the trim panel
retaining clips from the door inner panel.
NOTE: Do not use front door trim panel to remove trim clips from door inner panel. Replace any bent, damaged or missing push pins.
4. Remove window regulator control switch housing from back of front door trim panel. Lift up housing, remove retaining screws and disconnect
all connectors.
5. Disconnect driver seat regulator control processor switch (driver door only) if equipped.
6. Twist out interior lamp wire assembly and remove the front door trim panel.
Installation
1. Ensure plastic watershield is secured to door panel.
2. Position front door trim panel to door. Connect interior lamp wiring.