
Town Car V8-4.6L VIN W (1997)
REMOVAL
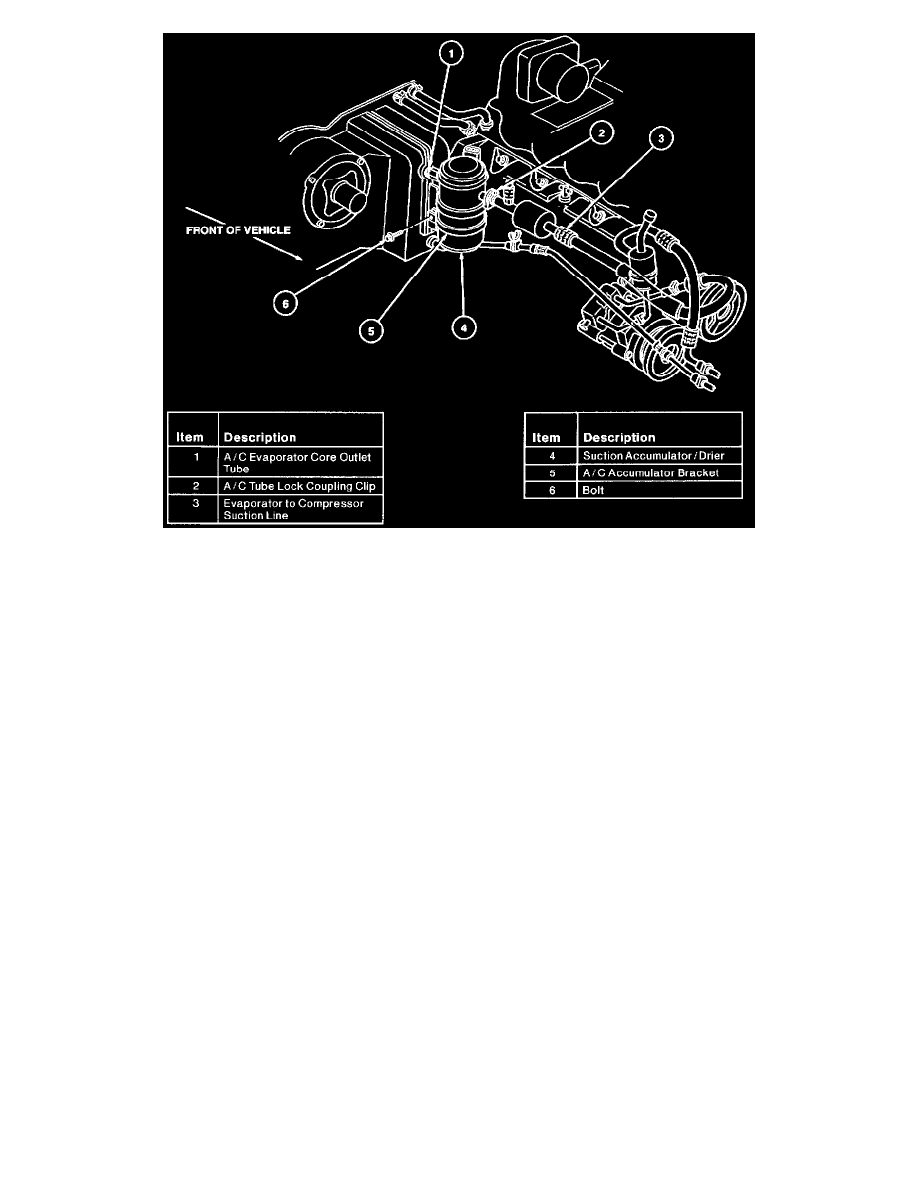
1. Discharge the refrigerant from the A/C system. Observe all safety precautions.
2. Disconnect the evaporator to compressor suction line from the suction accumulator/drier using Spring Lock Coupling Disconnect Tool.
3. Loosen the fitting connecting the suction accumulator/drier to the A/C evaporator core. Use two wrenches to prevent component damage.
4. Remove the bolt retaining the A/C accumulator bracket to the mounting bracket located on the A/C evaporator core housing.
5. Disconnect and remove the suction accumulator/drier from the A/C evaporator core.
6. Remove the A/C accumulator bracket from the suction accumulator/drier.
INSTALLATION
1. Using a new O-ring seal lubricated with clean Motorcraft YN-12b refrigerant oil or equivalent meeting Ford specification WSH-M1C231-B,
connect the suction accumulator/drier to the A/C evaporator core outlet tube. Tighten connection finger-tight only.
2. Position the A/C accumulator bracket on the suction accumulator/drier. Align the A/C accumulator bracket with the mounting bracket located on
the A/C evaporator core housing and install the retaining bolt. Loosen the connection of the suction accumulator/drier to the A/C evaporator core
if it is necessary to reposition the suction accumulator/drier.
3. Tighten the suction accumulator/drier to A/C evaporator core fitting using two wrenches.
4. Tighten mounting bracket retaining bolt to 6.6-9.4 N-m (59-83 lb-in).
5. Using a new O-ring seal lubricated with clean Motorcraft YN-12b refrigerant oil or equivalent meeting Ford specification WSH-M1C231-B,
connect the evaporator to compressor suction line to the suction accumulator/drier.
6. Leak-test, evacuate and charge the system. Observe all safety precautions.See: Service and Repair/Evacuation
7. Check the system for proper operation.