
Town Car V8-4.6L VIN W (1997)
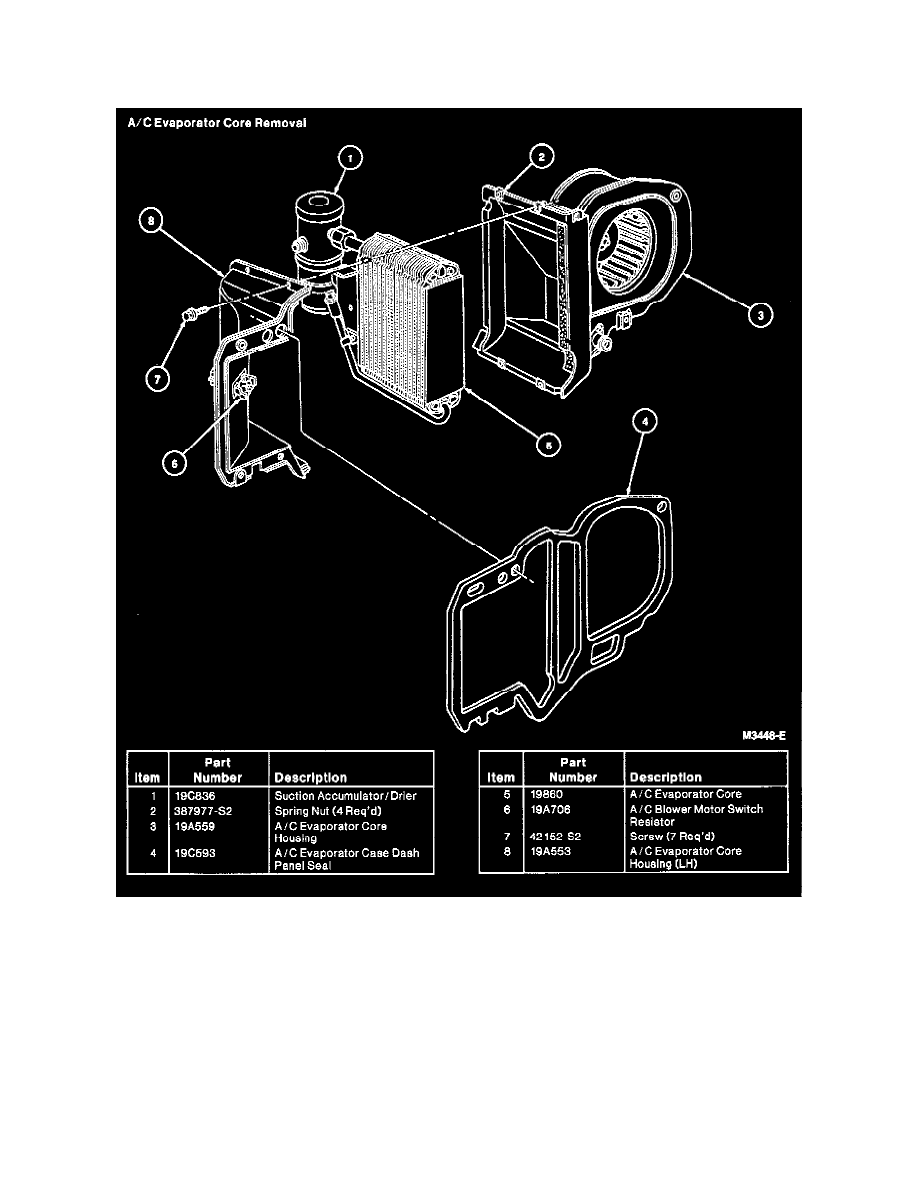
Evaporator Core: Service and Repair
NOTE: If an A/C evaporator core leak is suspected, the A/C evaporator core must be leak-tested before it is removed from the vehicle.
NOTE: Whenever the A/C evaporator core is replaced, it will be necessary to replace the suction accumulator/drier.
REMOVAL
1. Remove the A/C evaporator core housing from the vehicle.
2. Remove six screws retaining the two halves of the A/C evaporator core housing together.
3. Separate the two halves of the A/C evaporator core housing and, using a razor blade, carefully cut the A/C evaporator case dash panel seal at the
seams.
4. Disconnect the suction accumulator/drier inlet from the evaporator core outlet tube.
5. Remove the retaining screw from the suction accumulator/drier and evaporator core mounting bracket. Remove the suction accumulator/drier from
the A/C evaporator core.
6. Remove retaining screw from inlet tube bracket and remove A/C evaporator core.
INSTALLATION
1. Pour 89 ml (3 ounces) of clean Motorcraft YN-12b refrigerant oil or equivalent meeting Ford specification WSH-M1C231-B directly into the inlet
pipe of the replacement A/C evaporator core. Hold the pipe vertically so the oil will drain into the A/C evaporator core.