Town Car V8-4.6L VIN W (1997)

Universal Joint: Service and Repair
CAUTION: Under no circumstance is the driveshaft assembly to be clamped in the jaws of a vise or similar holding fixture. Denting or localized
fracture of the tube may result causing driveshaft failure during vehicle operation.
DISASSEMBLY
1. Place driveshaft on a suitable work bench. Be careful not to damage tube.
2. Prior to disassembly, mark the positions of the driveshaft components relative to the driveshaft tube. All components must be reassembled in the
same relationship to maintain proper balance.
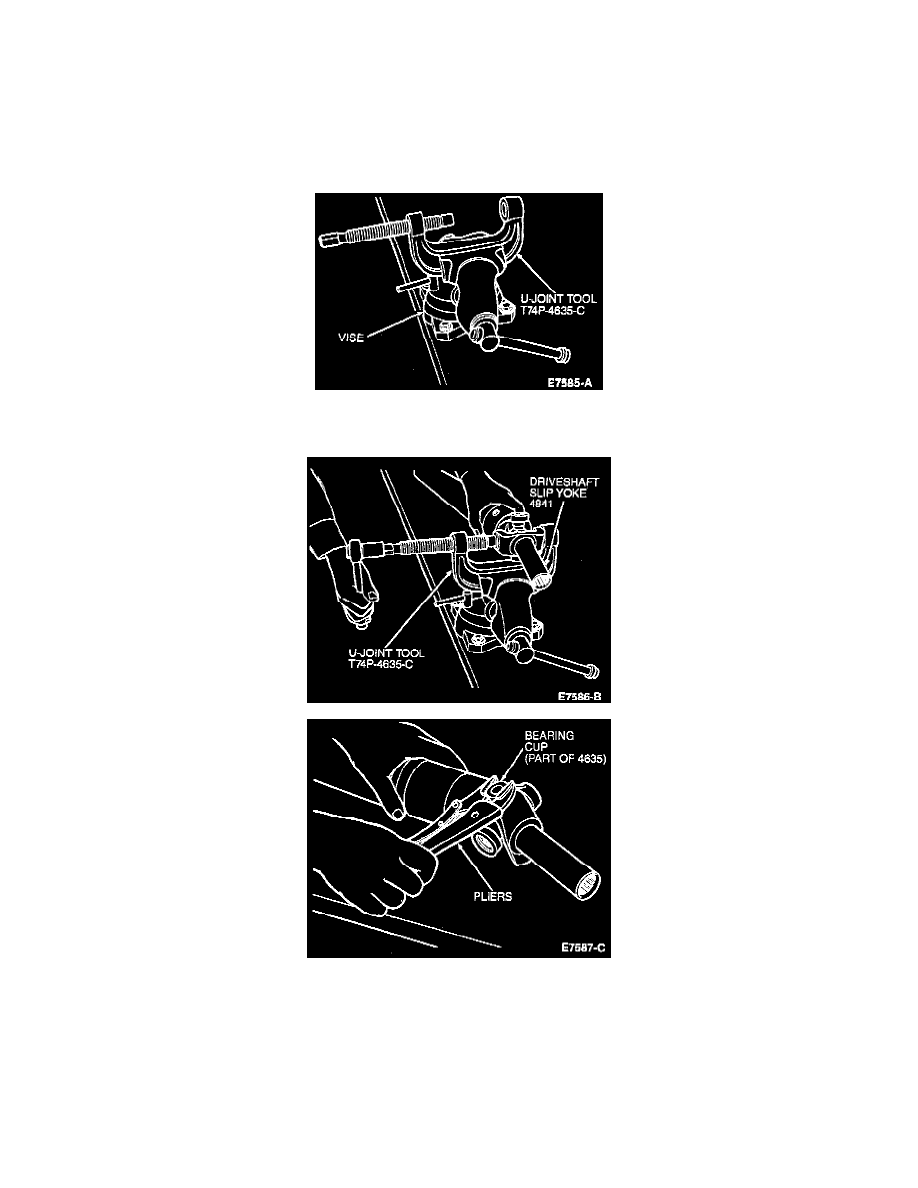
3. Clamp U-Joint Tool T74P-4635-C in vise.
4. Remove the four snap rings that retain the bearing cups.
5. Position the driveshaft slip yoke in U-Joint Tool and press out bearing cup. If bearing cup cannot be pressed all the way out of the driveshaft slip
yoke, remove it with vise grip or channel-lock pliers.
6. Reposition the driveshaft slip yoke in U-Joint Tool 180° to press on the spider and remove the remaining bearing cup from the opposite side.
7. Remove driveshaft slip yoke from the spider, clean all foreign matter from driveshaft slip yoke.
8. Remove the remaining bearing cups and spiders from the driveshaft slip yoke in the same manner.
9. Repeat Steps 1 through 8 to remove driveshaft centering socket yoke.
ASSEMBLY
NOTE: Universal joint service kits are to be installed as complete assemblies only. Do not mix components from other universal joints.
