
Zephyr V6-3.0L VIN 1 (2006)
Installation
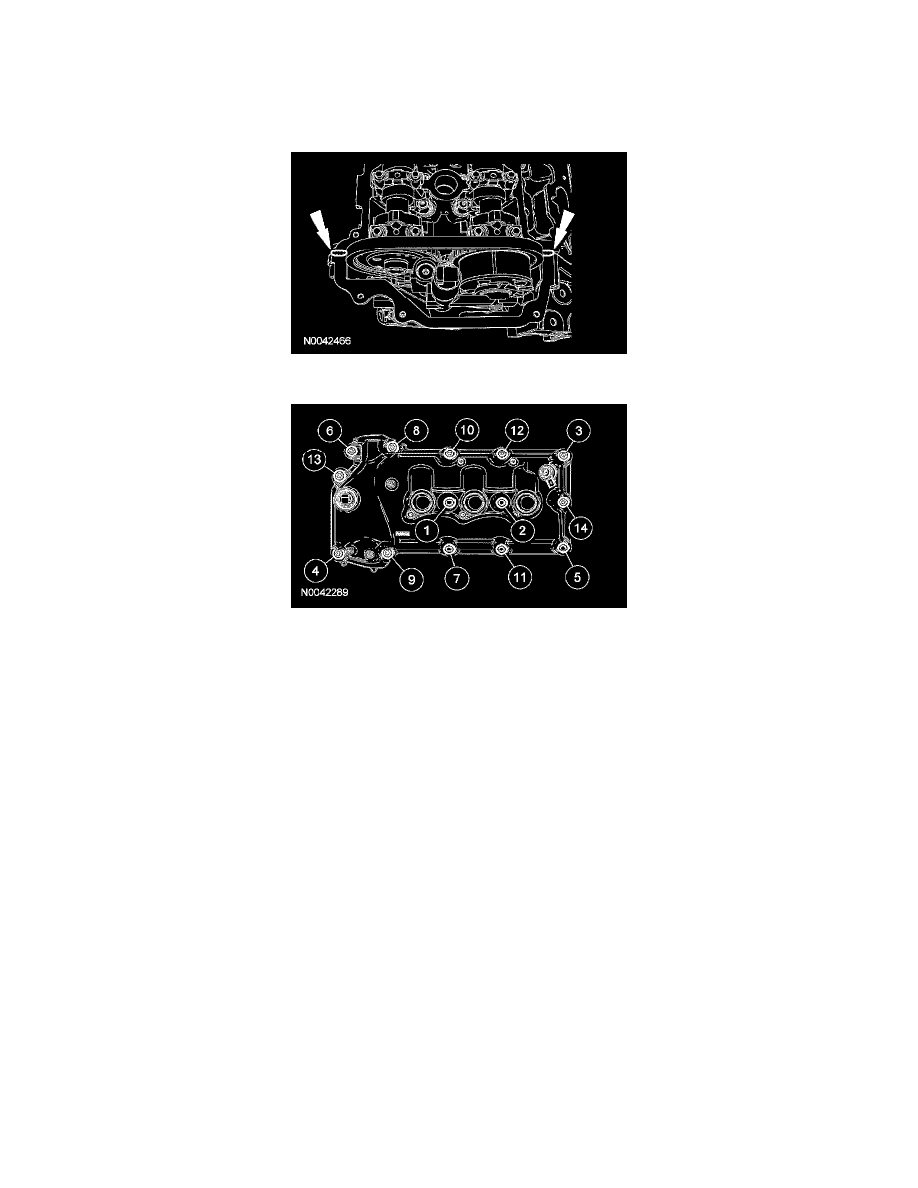
1. Clean the valve cover, cylinder head and front cover sealing surfaces with metal surface cleaner and install a new valve cover and spark plug
cavity gaskets.
2. NOTE: The valve cover must be installed and the bolts and stud bolts tightened within 4 minutes of sealant application.
Apply an 8 mm (0.31 inch) dot of silicone gasket sealant to the front cover-to-cylinder head joints.
3. Position the valve cover and install the bolts and stud bolts.
^
Tighten in the sequence shown to 10 Nm (89 inch lbs.).
4. Position the wiring harness and attach the 2 pin-type retainers to the valve cover.
5. Install the radio frequency interference capacitor and the nut.
^
Tighten to 6 Nm (53 inch lbs.).
6. Attach the 2 wiring harness retainers to the stud bolts.
7. Connect the VCT solenoid electrical connector.
8. Position the power steering reservoir and connect the reservoir-to-pump hose.
9. Install the PSP tube bracket-to-cylinder head bolt.
^
Tighten to 9 Nm (80 inch lbs.).
10. Install the PSP tube bracket-to-reservoir bolt.
^
Tighten to 9 Nm (80 inch lbs.).
11. Install the 3 power steering reservoir nuts.
^
Tighten to 9 Nm (80 inch lbs.).
12. Connect the power steering hose to the reservoir.
13. Connect the PCV valve electrical connector.
14. Install the PCV tube.
15. Install the RH ignition coil-on-plugs. For additional information, refer to Ignition System.
16. Install the lower cowl panel.
17. Connect the battery ground cable. For additional information, refer to Battery.
18. Fill the power steering system.