
3 L4-2.5L (2010)
Antenna Amplifier: Service and Repair
ANTENNA AMPLIFIER REMOVAL/INSTALLATION
1. Disconnect the negative battery cable.
2. Remove the following parts:
a. Sunroof seaming welt (vehicles with sunroof)
b. A-pillar trim See: Body and Frame/Interior Moulding / Trim/Trim Panel/Service and Repair/A-Pillar Trim Removal/Installation
c. Front scuff plate See: Body and Frame/Interior Moulding / Trim/Scuff Plate/Service and Repair/Front Scuff Plate Removal/Installation
d. Rear scuff plate See: Body and Frame/Interior Moulding / Trim/Scuff Plate/Service and Repair/Rear Scuff Plate Removal/Installation
e. B-pillar lower trim See: Body and Frame/Interior Moulding / Trim/Trim Panel/Service and Repair/B-Pillar Lower Trim Removal/Installation
f.
Upper anchor of the front seat belt See: Restraint Systems/Seat Belt Systems/Seat Belt/Service and Repair/Front Seat Belt
Removal/Installation
g. B-pillar upper trim See: Body and Frame/Interior Moulding / Trim/Trim Panel/Service and Repair/B-Pillar Upper Trim Removal/Installation
h. Rear seat cushion See: Body and Frame/Seats/Seat Cushion/Service and Repair/Rear Seat Cushion Removal/Installation
i.
Tire house trim See: Body and Frame/Interior Moulding / Trim/Trim Panel/Service and Repair/Tire House Trim Removal/Installation
j.
C-pillar trim See: Body and Frame/Interior Moulding / Trim/Trim Panel/Service and Repair/C-Pillar Trim Removal/Installation
k. Map light See: Lighting and Horns/Map Light/Service and Repair/Map Light Removal/Installation
l.
Sunvisor See: Body and Frame/Interior Moulding / Trim/Sun Visor/Service and Repair
m. Assist handle See: Body and Frame/Interior Moulding / Trim/Passenger Assist Handle/Service and Repair
n. Headliner See: Body and Frame/Interior Moulding / Trim/Headliner/Service and Repair
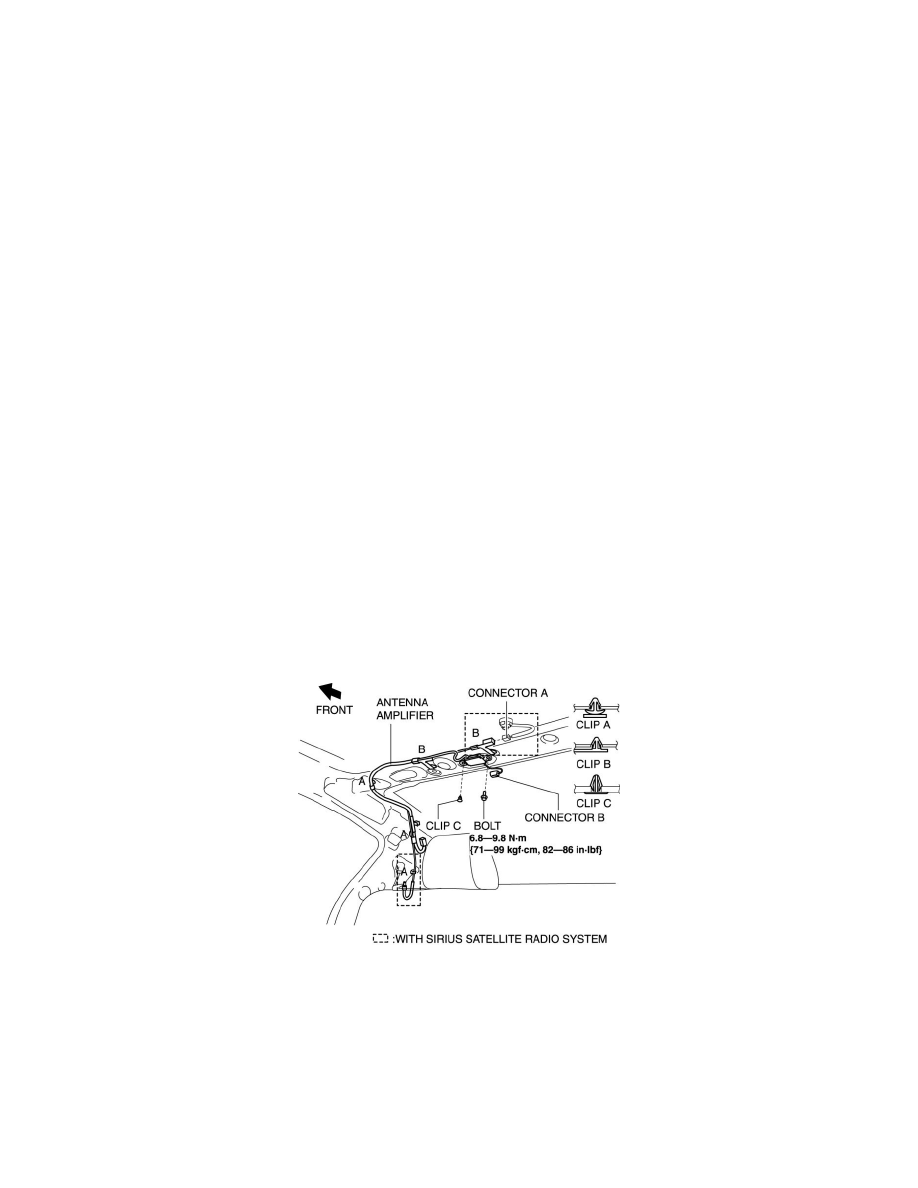
3. Remove the clip A and B.
4. Disconnect the connector A. (with SIRIUS satellite radio system)
5. Disconnect the connector B.
6. Remove the clip C.
7. Remove the bolt.
8. Remove the Antenna amplifier.
9. Install in the reverse order of removal.