
3 L4-2.5L (2010)
Speaker: Testing and Inspection
Rear Speaker Inspection
REAR SPEAKER INSPECTION
4SD
1. Disconnect the negative battery cable.
2. Remove the following parts:
a. Rear seat cushion See: Body and Frame/Seats/Seat Cushion/Service and Repair/Rear Seat Cushion Removal/Installation
b. Rear scuff plate See: Body and Frame/Interior Moulding / Trim/Scuff Plate/Service and Repair/Rear Scuff Plate Removal/Installation
c. Tire house trim See: Body and Frame/Interior Moulding / Trim/Trim Panel/Service and Repair/Tire House Trim Removal/Installation
d. C-pillar trim See: Body and Frame/Interior Moulding / Trim/Trim Panel/Service and Repair/C-Pillar Trim Removal/Installation
e. Rear package trim See: Body and Frame/Interior Moulding / Trim/Rear Shelf/Service and Repair
f.
Rear speaker See: Service and Repair/Rear Speaker Removal/Installation
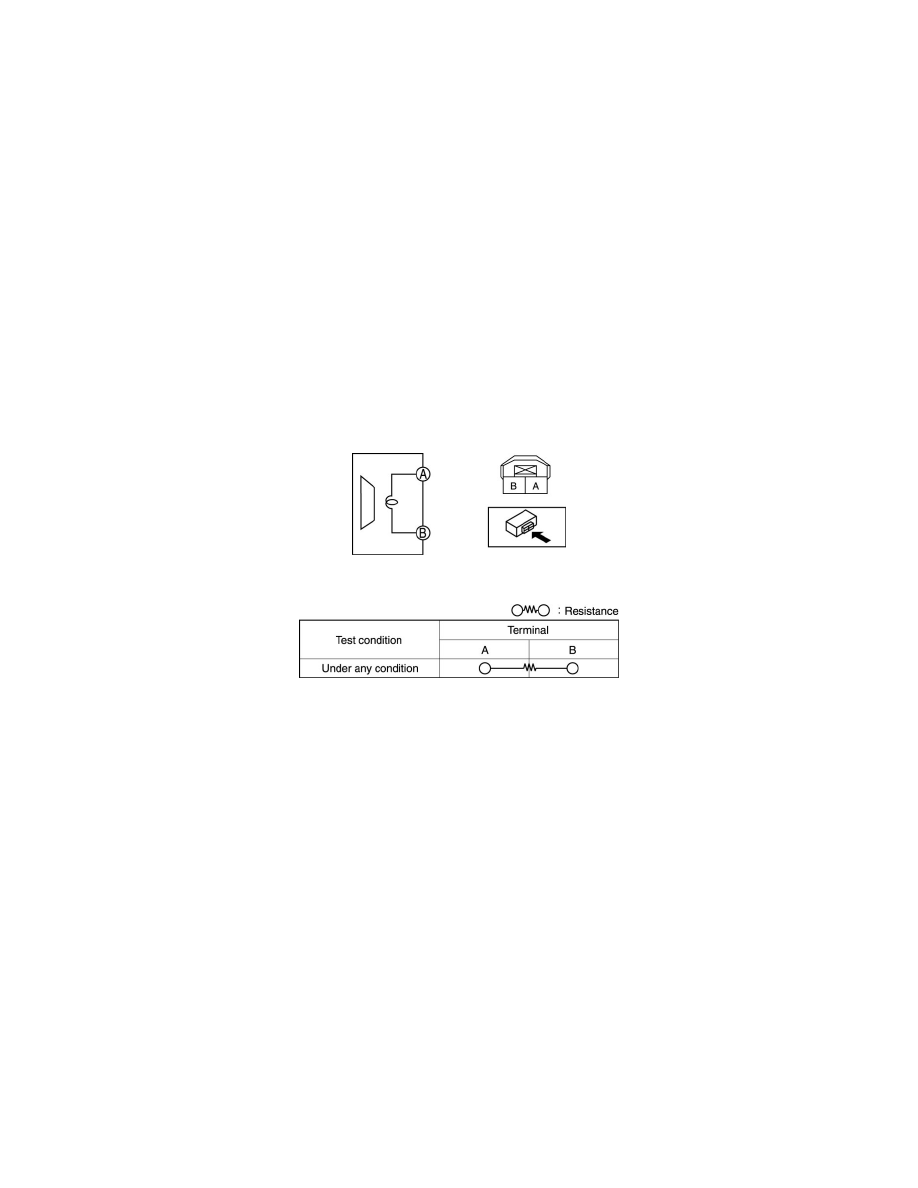
3. Verify the resistance between the rear speaker terminals.
-
If not within the specification, replace the rear speaker.
Resistance
-
3.6 ohms
5HB
1. Disconnect the negative battery cable.
2. Remove the following parts:
a. Rear scuff plate See: Body and Frame/Interior Moulding / Trim/Scuff Plate/Service and Repair/Rear Scuff Plate Removal/Installation
b. Tire house trim See: Body and Frame/Interior Moulding / Trim/Trim Panel/Service and Repair/Tire House Trim Removal/Installation
c. Trunk side upper trim
d. Trunk side trim
e. C-pillar trim See: Body and Frame/Interior Moulding / Trim/Trim Panel/Service and Repair/C-Pillar Trim Removal/Installation
f.
Rear speaker See: Service and Repair/Rear Speaker Removal/Installation
3. Verify the resistance between the rear speaker terminals.