
3 L4-2.5L (2010)
-
Front scuff plate (LH) (See See: Interior Moulding / Trim/Scuff Plate/Service and Repair/Front Scuff Plate Removal/Installation)
-
Front side trim (LH) See: Interior Moulding / Trim/Trim Panel/Service and Repair/Front Side Trim Removal/Installation
-
Upper panel See: Interior Moulding / Trim/Console/Service and Repair/Upper Panel Removal/Installation
-
Shift knob See: Transmission and Drivetrain/Manual Transmission/Transaxle/Shifter M/T/Service and Repair
-
Shift panel See: Interior Moulding / Trim/Console/Service and Repair/Shift Panel Removal/Installation
-
Side wall See: Interior Moulding / Trim/Dashboard / Instrument Panel/Service and Repair/Removal and Replacement/Side Wall
Removal/Installation
-
Console See: Interior Moulding / Trim/Console/Service and Repair/Console Removal/Installation
4. Set the hood release lever out of the way. See: Doors, Hood and Trunk/Hood/Hood Latch Release/Service and Repair
5. Remove the lower panel. (driver-side) See: Interior Moulding / Trim/Dashboard / Instrument Panel/Service and Repair/Removal and
Replacement/Lower Panel Removal/Installation
6. Remove the starter cut relay. (with advanced keyless entry and push button start system) (see See: Accessories and Optional Equipment/Antitheft
and Alarm Systems/Starter Cut Relay/Service and Repair.)
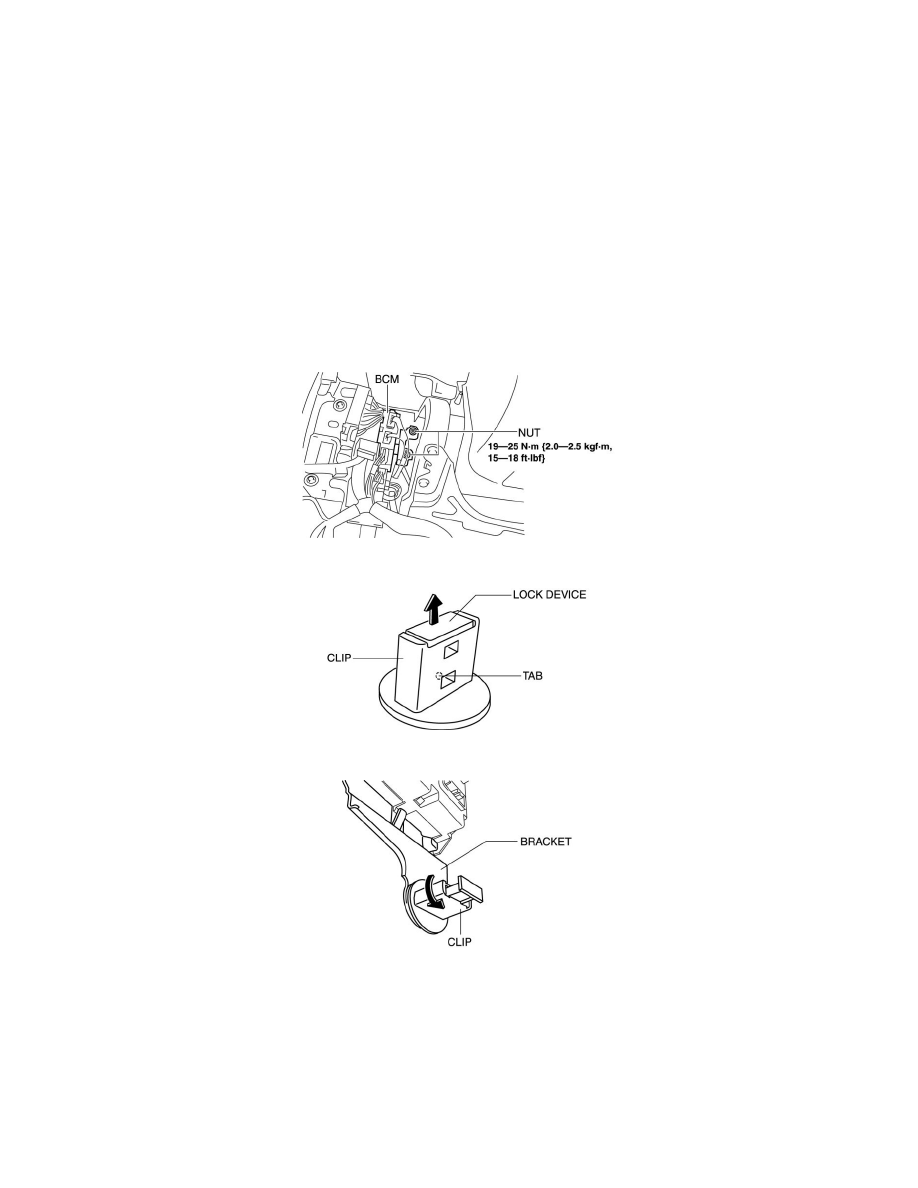
7. Remove the nuts shown in the figure.
8. Pry off the lock device of the clip while pressing the tab in the position shown in the figure.
9. Rotate the clip in the direction of the arrow shown in the figure.
10. Remove the clip by pulling it in the direction of the arrow shown in the figure.