
3 L4-2.5L (2010)
Trunk / Liftgate Latch Release Cable: Service and Repair
TRUNK LID OPENER CABLE REMOVAL/INSTALLATION
1. Disconnect the negative battery cable.
2. Remove the following parts:
a. Front seat (LH) See: Seats/Service and Repair/Removal and Replacement
b. Front scuff plate (LH) See: Interior Moulding / Trim/Scuff Plate/Service and Repair/Front Scuff Plate Removal/Installation
c. Rear scuff plate See: Interior Moulding / Trim/Scuff Plate/Service and Repair/Rear Scuff Plate Removal/Installation
d. B-pillar lower trim See: Interior Moulding / Trim/Trim Panel/Service and Repair/B-Pillar Lower Trim Removal/Installation
e. Rear seat cushion See: Seats/Seat Cushion/Service and Repair/Rear Seat Cushion Removal/Installation
f.
Rear seat back See: Seats/Service and Repair/Overhaul/Rear Seat Back Removal/Installation
g. Tire house trim (LH) See: Interior Moulding / Trim/Trim Panel/Service and Repair/Tire House Trim Removal/Installation
h. Trunk end trim See: Interior Moulding / Trim/Scuff Plate/Service and Repair/Trunk End Trim Removal/Installation
i.
Trunk side trim (LH)
j.
Trunk lid opener lever See: Trunk / Liftgate Release Lever/Service and Repair
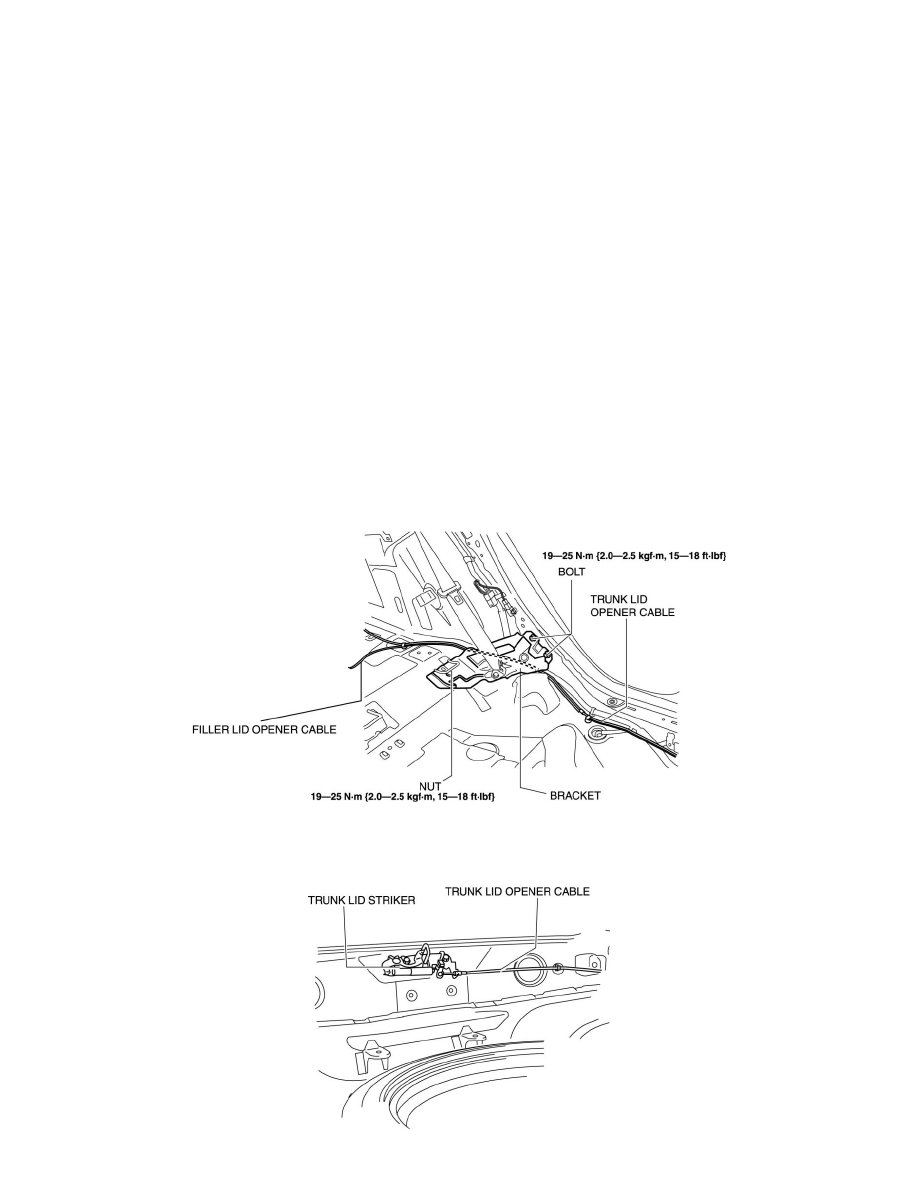
3. Remove the blots and nut.
4. Remove the bracket.
5. Disconnect the trunk lid striker from the trunk lid opener cable.