
3 L4-2.5L (2010)
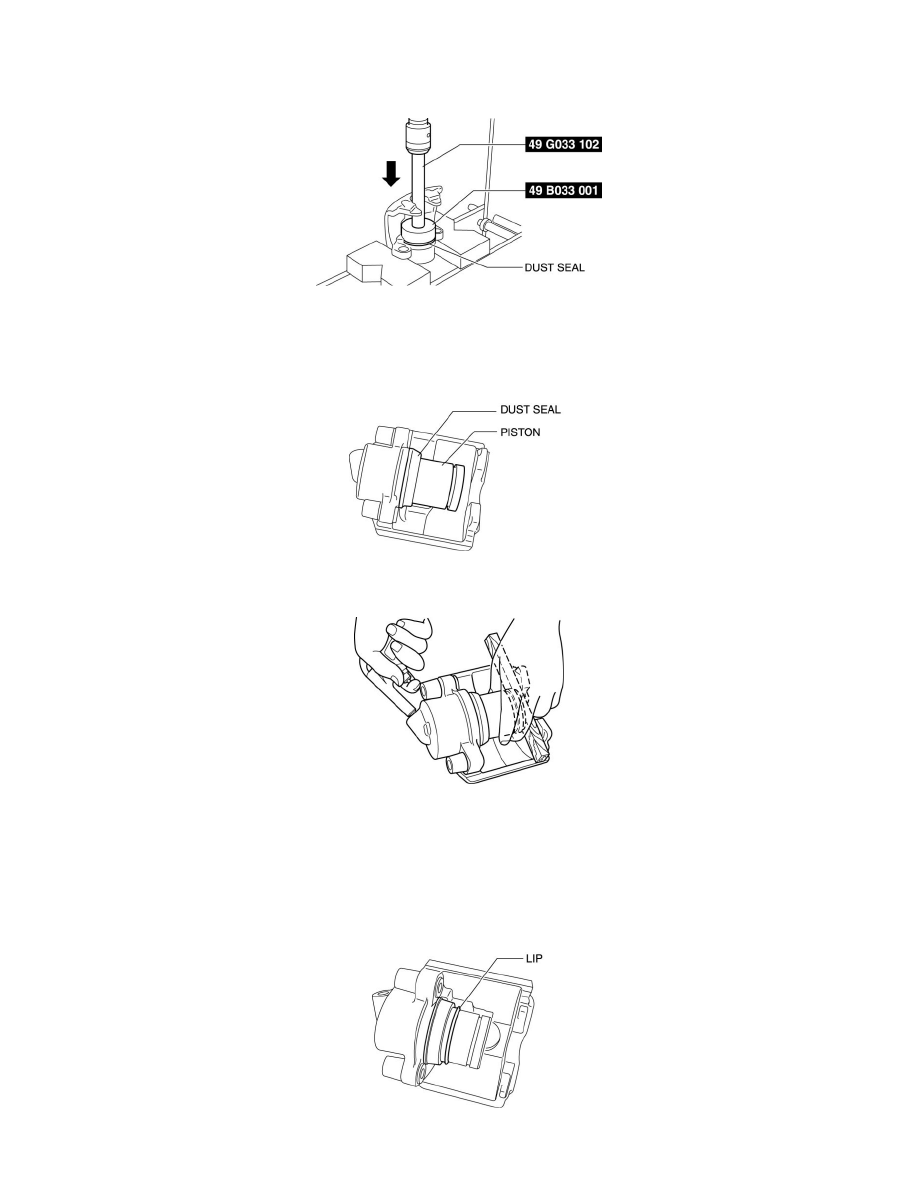
Dust Seal Assembly Note
1. Assemble a new dust seal to the caliper using the
SSTs and a press with a press-in force of 834 N {85 kgf, 187 in-lbf}.
2. Verify that there is no gap between the dust seal and caliper body.
Piston Assembly Note
1. Press the piston into the dust seal opening as shown in the figure.
2. Insert a piece of wood between the caliper body and the piston, and while supporting the piston by hand, blow compressed air through the brake
hose installation hole.
WARNING:
-
When blowing compressed air into the caliper body, the piston may pop out and cause injury if not supported at the correct point. Securely
support the piston friction surface by hand when blowing compressed air.
NOTE:
-
By blowing compressed air, the dust seal expands due to air pressure and covers the piston end.
3. Verify that the dust seal lip covers the piston end as shown in the figure.
4. Press the piston into the caliper body completely.