
3 L4-2.5L (2010)
Condenser HVAC: Service and Repair
CONDENSER REMOVAL/INSTALLATION
1. Disconnect the negative battery cable.
2. Remove the under cover.
3. Discharge the refrigerant. See: Service and Repair/Refrigerant Charging
4. Drain the engine coolant. See: Engine, Cooling and Exhaust/Cooling System/Coolant/Service and Repair See: Engine, Cooling and
Exhaust/Cooling System/Coolant/Service and Repair
5. Remove the air cleaner. See: Engine, Cooling and Exhaust/Engine/Intake Manifold/Service and Repair See: Engine, Cooling and
Exhaust/Engine/Intake Manifold/Service and Repair
6. Remove the front bumper. See: Body and Frame/Bumper/Front Bumper/Service and Repair/Removal and Replacement/Front Bumper
Removal/Installation
7. Disconnect the radiator hose from the radiator.
8. Remove the cooling fan component. See: Engine, Cooling and Exhaust/Cooling System/Radiator Cooling Fan/Service and Repair See: Engine,
Cooling and Exhaust/Cooling System/Radiator Cooling Fan/Service and Repair
9. Remove the radiator. See: Engine, Cooling and Exhaust/Cooling System/Radiator/Service and Repair See: Engine, Cooling and Exhaust/Cooling
System/Radiator/Service and Repair
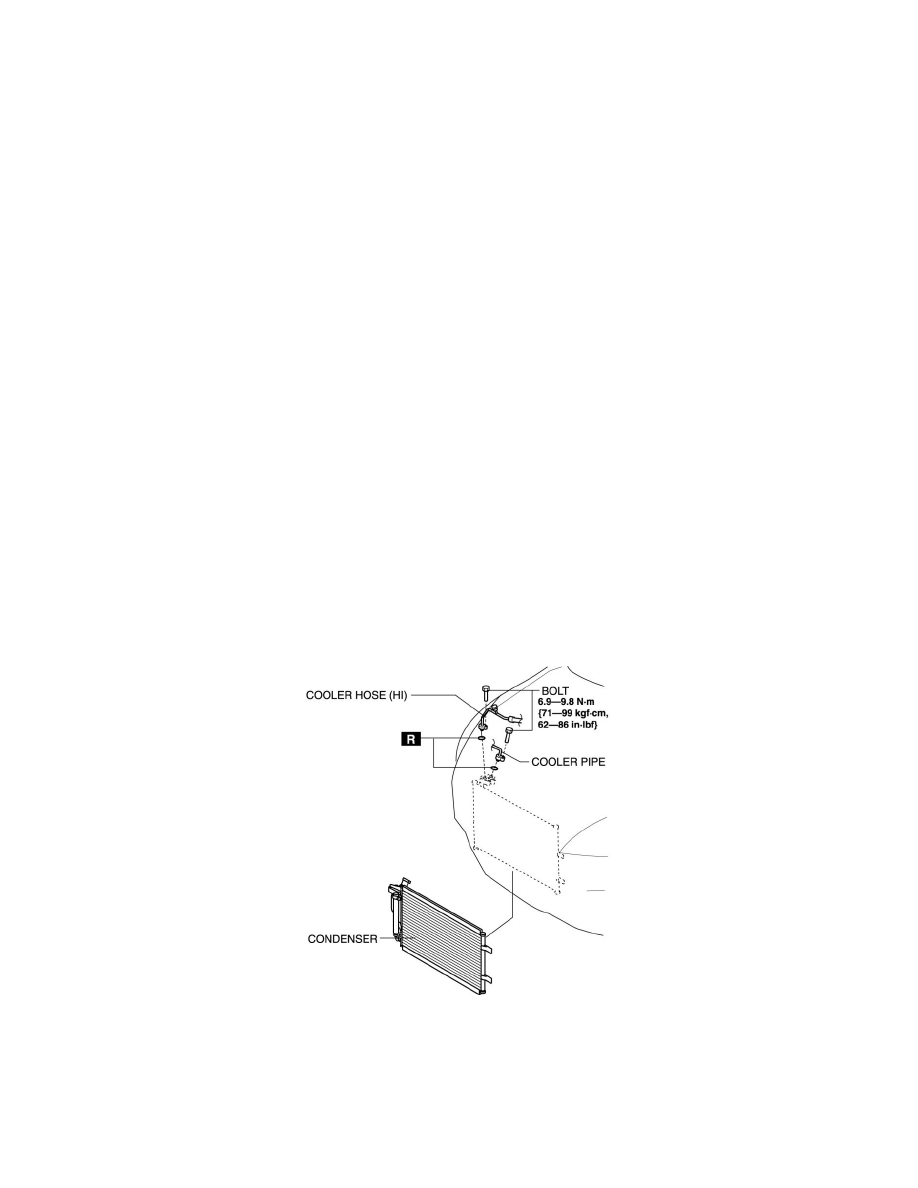
10. Disconnect the cooler hose (HI) and cooler pipe. Do not allow remaining compressor oil in the refrigerant line to spill. See: Hose/Line
HVAC/Service and Repair
CAUTION:
-
If moisture or foreign material enters the refrigeration cycle, cooling ability will be lowered and abnormal noise or other malfunction could
occur. Always plug open fittings immediately after removing any refrigeration cycle parts.
11. Remove the condenser, being careful not to allow remaining compressor oil in the condenser to spill.
4SD
5HB