
3 L4-2.5L (2010)
CAUTION:
-
If moisture or foreign material enters the refrigeration cycle, cooling ability will be lowered and abnormal noise or other malfunction could
occur. Always plug open fittings immediately after removing any refrigeration cycle parts.
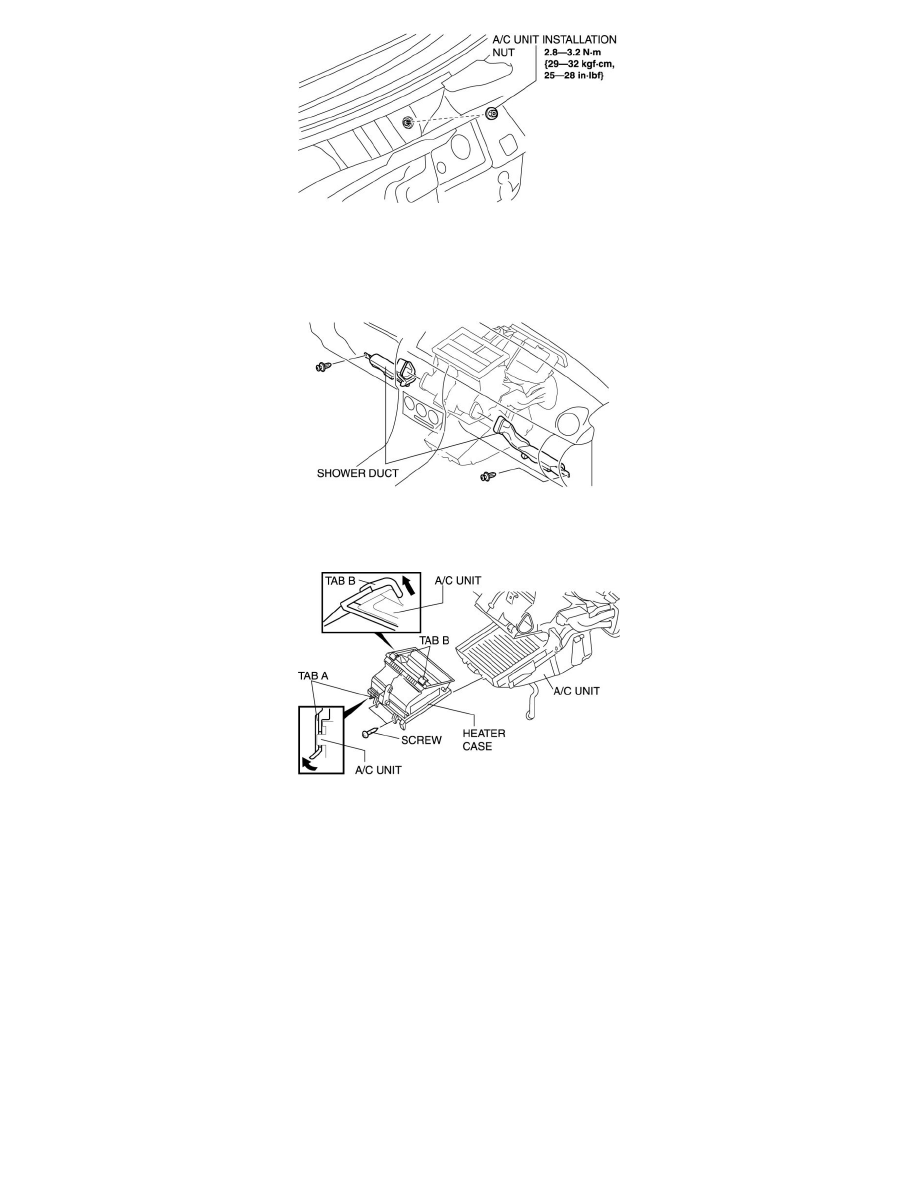
12. Remove the shower ducts.
13. Remove the rear heat duct (1).
14. Remove the heater case.
-
Remove the screws.
-
Pull up tab A in the direction shown by the arrow in the figure and remove it from the A/C unit.
-
Pull up tabs B in the direction shown by the arrow in the figure and remove it from the A/C unit.
15. Disconnect the drain hose connected to the A/C unit.
16. Remove the nuts and bolts for installing the dashboard to the body.
17. Remove the dashboard with A/C unit. See: Body and Frame/Interior Moulding / Trim/Dashboard / Instrument Panel/Service and Repair/Removal
and Replacement/Dashboard Removal/Installation
18. Disconnect the following connectors:
-
Blower motor connector
-
Power MOS FET connector (Full-auto air conditioner)
-
Resistor connector (Manual air conditioner)
-
Evaporator temperature sensor connector
-
Air intake actuator connector
-
Air mix actuator connector (Full-auto air conditioner)
-
Airflow mode actuator connector (Full-auto air conditioner)