
3 L4-2.5L (2010)
Receiver Dryer: Service and Repair
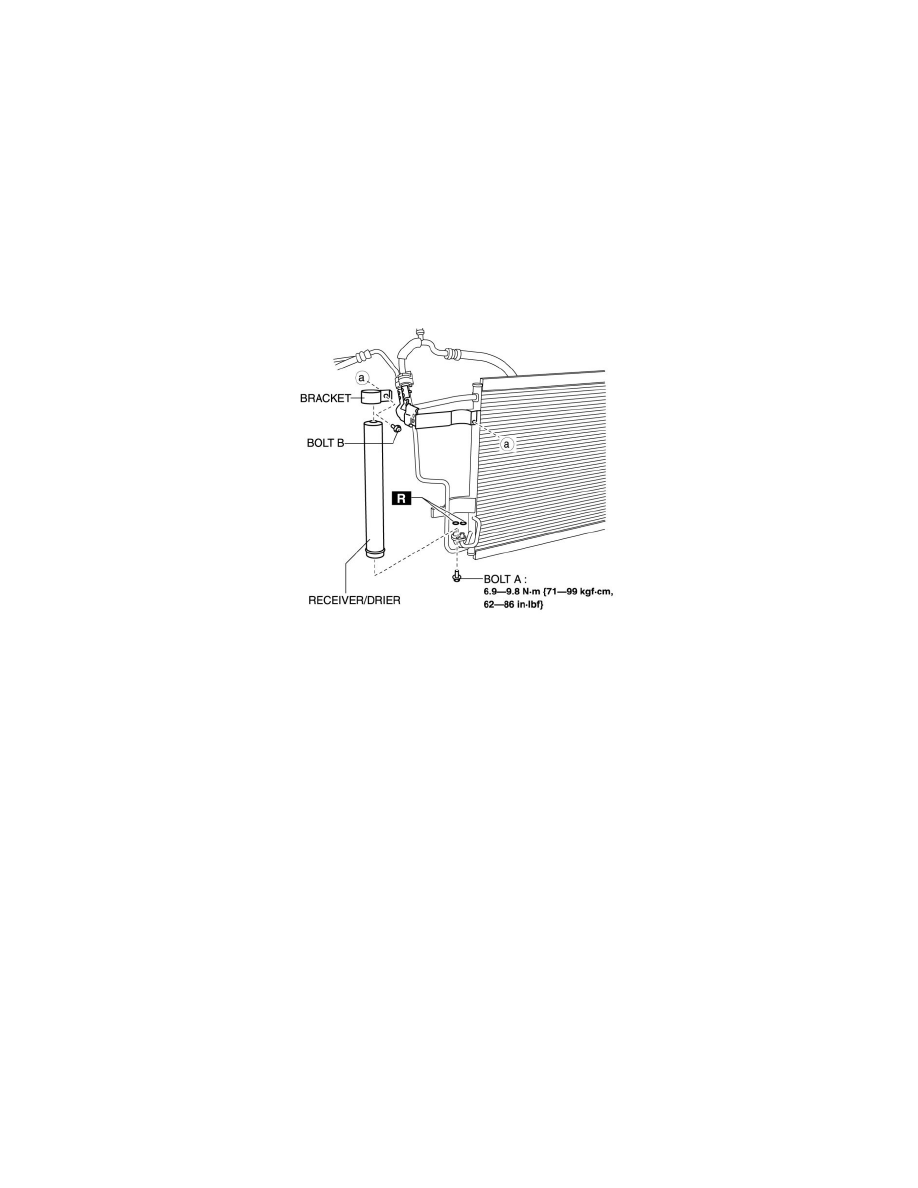
RECEIVER/DRIER REMOVAL/INSTALLATION
4SD
1. Disconnect the negative battery cable.
2. Discharge the refrigerant. See: Service and Repair/Refrigerant Charging
3. Remove the under cover.
4. Remove the front bumper. See: Body and Frame/Bumper/Front Bumper/Service and Repair/Removal and Replacement/Front Bumper
Removal/Installation
5. Disconnect the block joint type pipes by grasping female side of the block with hand holding firmly then loosen the connection bolt A.
6. Remove the bolt B.
7. Remove the bracket.
8. Remove the receiver/drier. Do not allow compressor oil to spill.
CAUTION:
-
If moisture or foreign material enters the refrigeration cycle, cooling ability will be lowered and abnormal noise will occur. Always
immediately plug all open fittings after removing any refrigeration cycle parts to keep moisture or foreign material out of the cycle.
9. Install in the reverse order of removal.
10. Perform the refrigerant system performance test. See: Testing and Inspection/Component Tests and General Diagnostics/Refrigerant System
Performance Test
5HB
1. Disconnect the negative battery cable.
2. Discharge the refrigerant. See: Service and Repair/Refrigerant Charging
3. Remove the under cover.
4. Remove the front bumper. See: Body and Frame/Bumper/Front Bumper/Service and Repair/Removal and Replacement/Front Bumper
Removal/Installation
5. Disconnect the block joint type pipes by grasping female side of the block with hand holding firmly then loosen the connection bolt A.