
3 L4-2.5L (2010)
Fuel Gauge Sender: Testing and Inspection
FUEL GAUGE SENDER UNIT INSPECTION
1. Disconnect the negative battery cable.
2. Remove the rear seat cushion. See: Body and Frame/Seats/Seat Cushion/Service and Repair/Rear Seat Cushion Removal/Installation
3. Remove the fuel pump unit. See: Powertrain Management/Fuel Delivery and Air Induction/Fuel Pump/Service and Repair/Removal and
Replacement See: Powertrain Management/Fuel Delivery and Air Induction/Fuel Pump/Service and Repair/Removal and Replacement
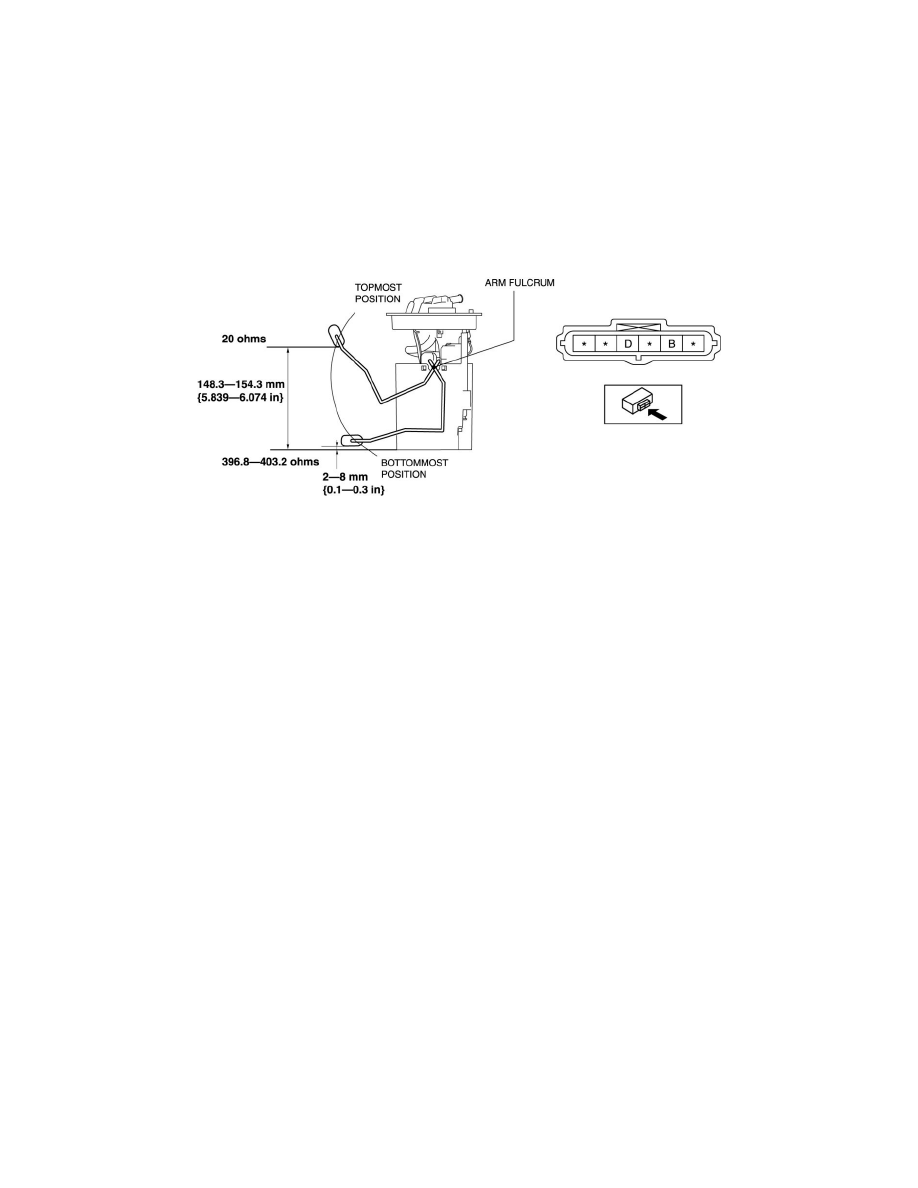
4. Move the float to the topmost and bottommost positions, and verify that the resistance between terminals B and D of the fuel gauge sender unit and
the position of the float are as shown in the figure.
-
If they are not as shown in the figure, replace the fuel pump unit. (See See: Powertrain Management/Fuel Delivery and Air Induction/Fuel
Pump/Service and Repair/Removal and Replacement) See: Powertrain Management/Fuel Delivery and Air Induction/Fuel Pump/Service and
Repair/Removal and Replacement