
3 L4-2.5L (2010)
Engine Control Module: Removal and Replacement
PCM REMOVAL/INSTALLATION [LF, L5]
1. Remove the battery cover. See: Starting and Charging/Battery/Service and Repair/Removal and Replacement
2. Disconnect the negative battery cable.
3. Remove the battery and battery tray. See: Starting and Charging/Battery/Service and Repair/Removal and Replacement
4. Remove the following items: See: Starting and Charging/Battery/Service and Repair/Removal and Replacement
-
Battery
-
PCM cover No.1
5. Disconnect the PCM connector.
6. Remove the battery tray and PCM component. See: Starting and Charging/Battery/Service and Repair/Removal and Replacement
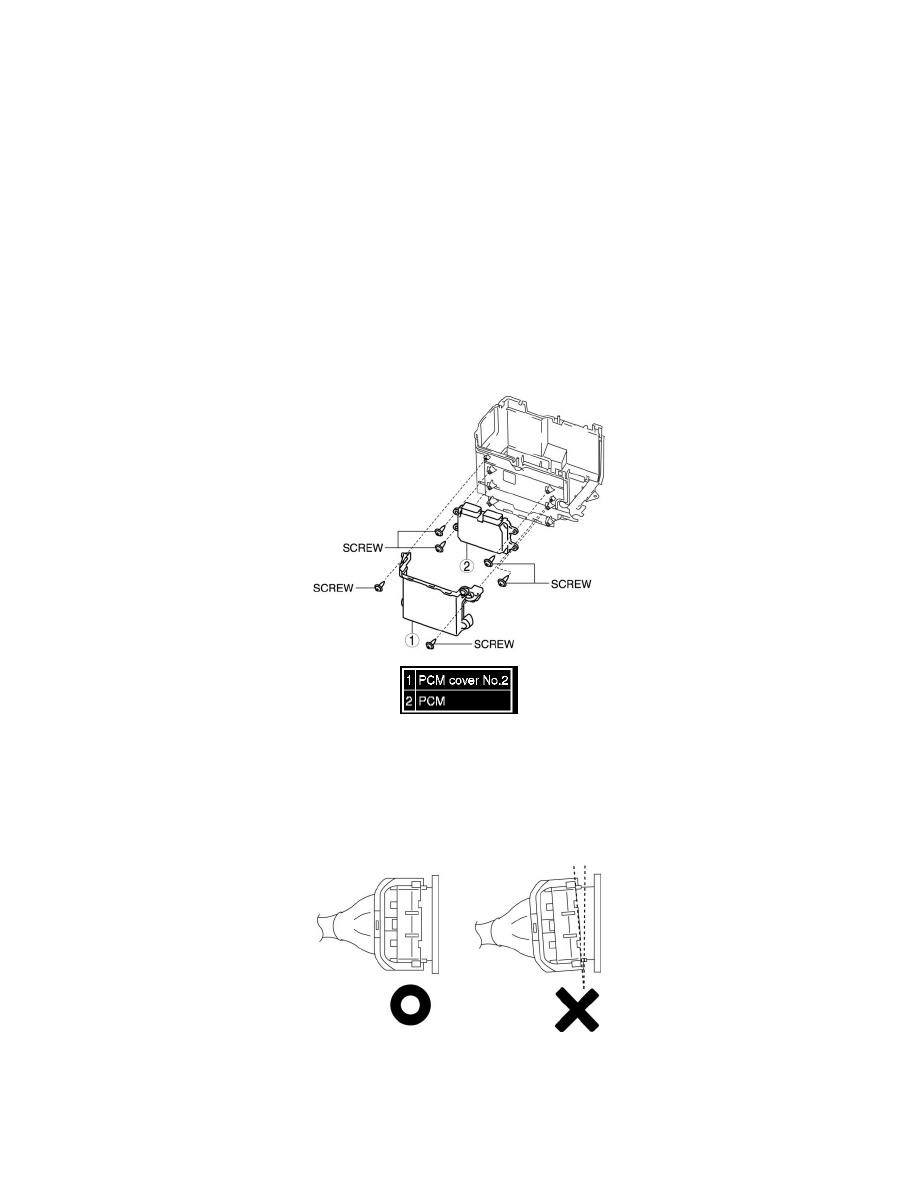
7. Remove in the order indicated in the table.
8. Install in the reverse order of removal.
CAUTION:
-
If the PCM connector is connected incorrectly it could be damaged. When connecting the PCM connector, connect it using the following
procedure.
-
If the PCM connector is inserted at an angle and the lever is moved, the connector could be damaged. Verify that the PCM connector is
inserted straight.
9. Verify that the PCM connector lever is tilted towards the wiring harness side as shown in the figure.