
3 L4-2.5L (2010)
Seat Belt: Service and Repair
Rear Seat Belt Removal/Installation
REAR SEAT BELT REMOVAL/INSTALLATION
CAUTION:
-
The ELR (emergency locking retractor) has a spring that will unwind if the retractor cover is removed. The spring cannot be rewound by hand. If
this occurs, the ELR will not work properly. Therefore, do not disassemble the retractor.
4SD
1. Remove the following parts:
a. Rear scuff plate See: Body and Frame/Interior Moulding / Trim/Scuff Plate/Service and Repair/Rear Scuff Plate Removal/Installation
b. Rear seat cushion See: Body and Frame/Seats/Seat Cushion/Service and Repair/Rear Seat Cushion Removal/Installation
c. Rear seat back See: Body and Frame/Seats/Service and Repair/Overhaul/Rear Seat Back Removal/Installation
d. Tire house trim See: Body and Frame/Interior Moulding / Trim/Trim Panel/Service and Repair/Tire House Trim Removal/Installation
e. C-pillar trim. See: Body and Frame/Interior Moulding / Trim/Trim Panel/Service and Repair/C-Pillar Trim Removal/Installation
f.
Rear package trim. See: Body and Frame/Interior Moulding / Trim/Rear Shelf/Service and Repair
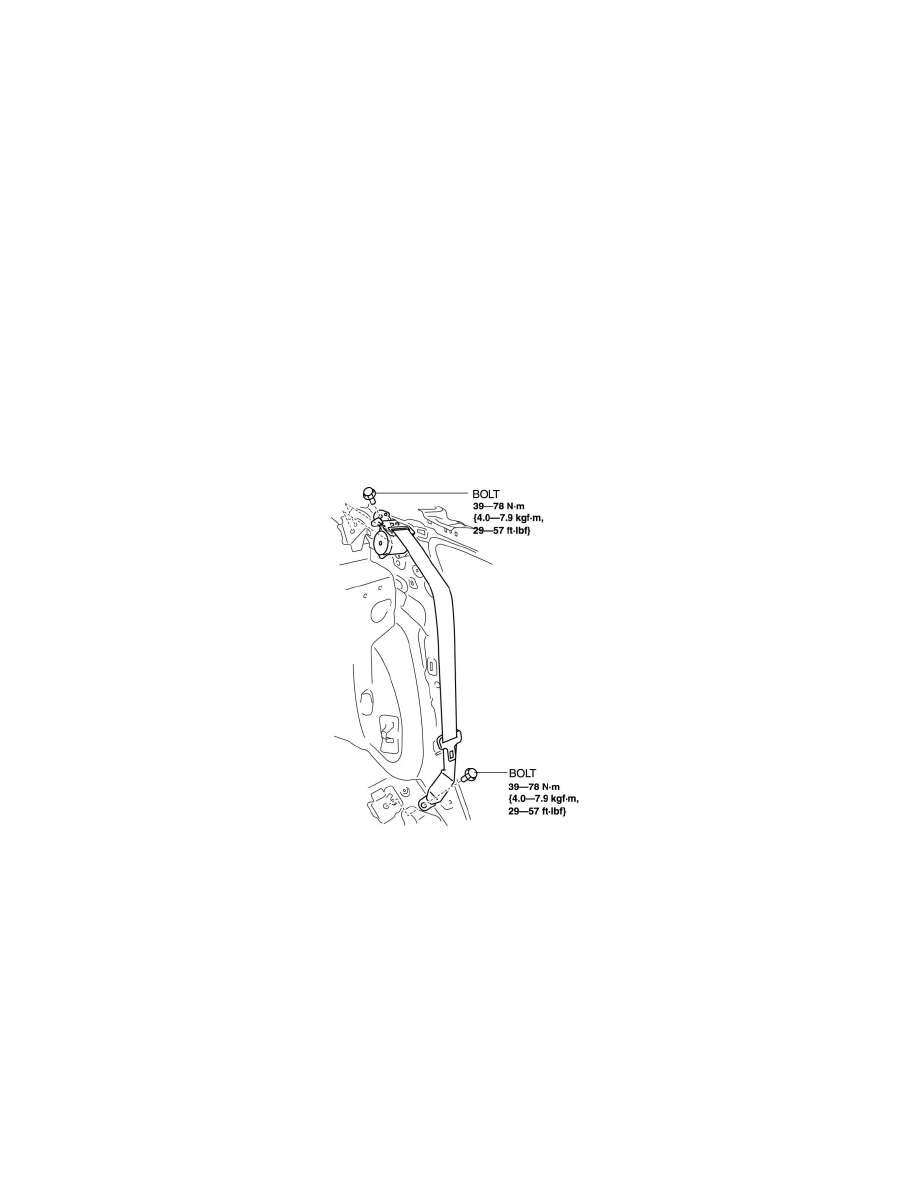
2. Remove the bolt.
3. Remove the rear seat belt.
4. Install in the reverse order of removal.
5HB
1. Remove the following parts:
a. Rear scuff plate See: Body and Frame/Interior Moulding / Trim/Scuff Plate/Service and Repair/Rear Scuff Plate Removal/Installation
b. Rear seat cushion See: Body and Frame/Seats/Seat Cushion/Service and Repair/Rear Seat Cushion Removal/Installation
c. Rear seat back See: Body and Frame/Seats/Service and Repair/Overhaul/Rear Seat Back Removal/Installation
d. Tire house trim See: Body and Frame/Interior Moulding / Trim/Trim Panel/Service and Repair/Tire House Trim Removal/Installation
e. Trunk side upper trim. See: Body and Frame/Interior Moulding / Trim/Trim Panel/Service and Repair/C-Pillar Trim Removal/Installation
f.
C-pillar trim. See: Body and Frame/Interior Moulding / Trim/Trim Panel/Service and Repair/C-Pillar Trim Removal/Installation