
3 L4-2.5L (2010)
Clutch Master Cylinder: Service and Repair
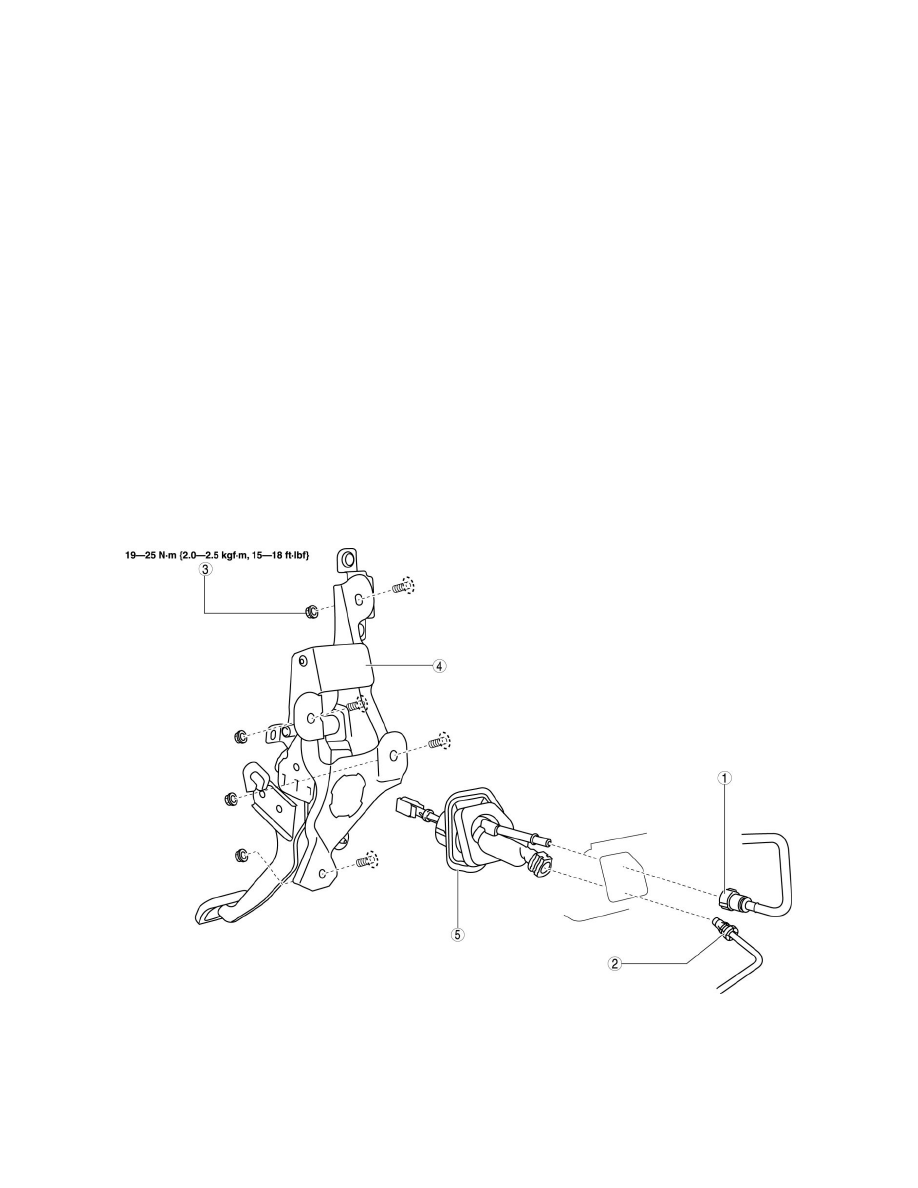
CLUTCH MASTER CYLINDER REMOVAL/INSTALLATION
CAUTION:
-
Fluid will damage painted surfaces. Be careful not to spill any on painted surfaces. If it is spilled, wipe it off immediately.
1. Remove the battery cover. See: Starting and Charging/Battery/Service and Repair/Removal and Replacement See: Starting and
Charging/Battery/Service and Repair/Removal and Replacement
2. Disconnect the negative battery cable. See: Starting and Charging/Battery/Service and Repair/Removal and Replacement See: Starting and
Charging/Battery/Service and Repair/Removal and Replacement
3. Remove the battery component. (ex: battery, battery tray and PCM component) See: Starting and Charging/Battery/Service and Repair/Removal
and Replacement See: Starting and Charging/Battery/Service and Repair/Removal and Replacement
4. Separate the steering shaft. See: Steering and Suspension/Steering/Steering Column/Service and Repair/Steering Wheel And Column
Removal/Installation - Without Advanced Keyless Entry And Push Button Start System See: Steering and Suspension/Steering/Steering
Column/Service and Repair/Steering Wheel And Column Removal/Installation - With Advanced Keyless Entry And Push Button Start System
5. Remove in the order indicated in the table.
6. Plug the clutch pipe after removing it to avoid leakage.
7. Install in the reverse order of removal.
8. Bleed the air from the system. See: Service and Repair
9. After installation, inspect the clutch pedal. See: Clutch Pedal Assembly/Adjustments