
3 L4-2.5L (2010)
Clutch Slave Cylinder: Service and Repair
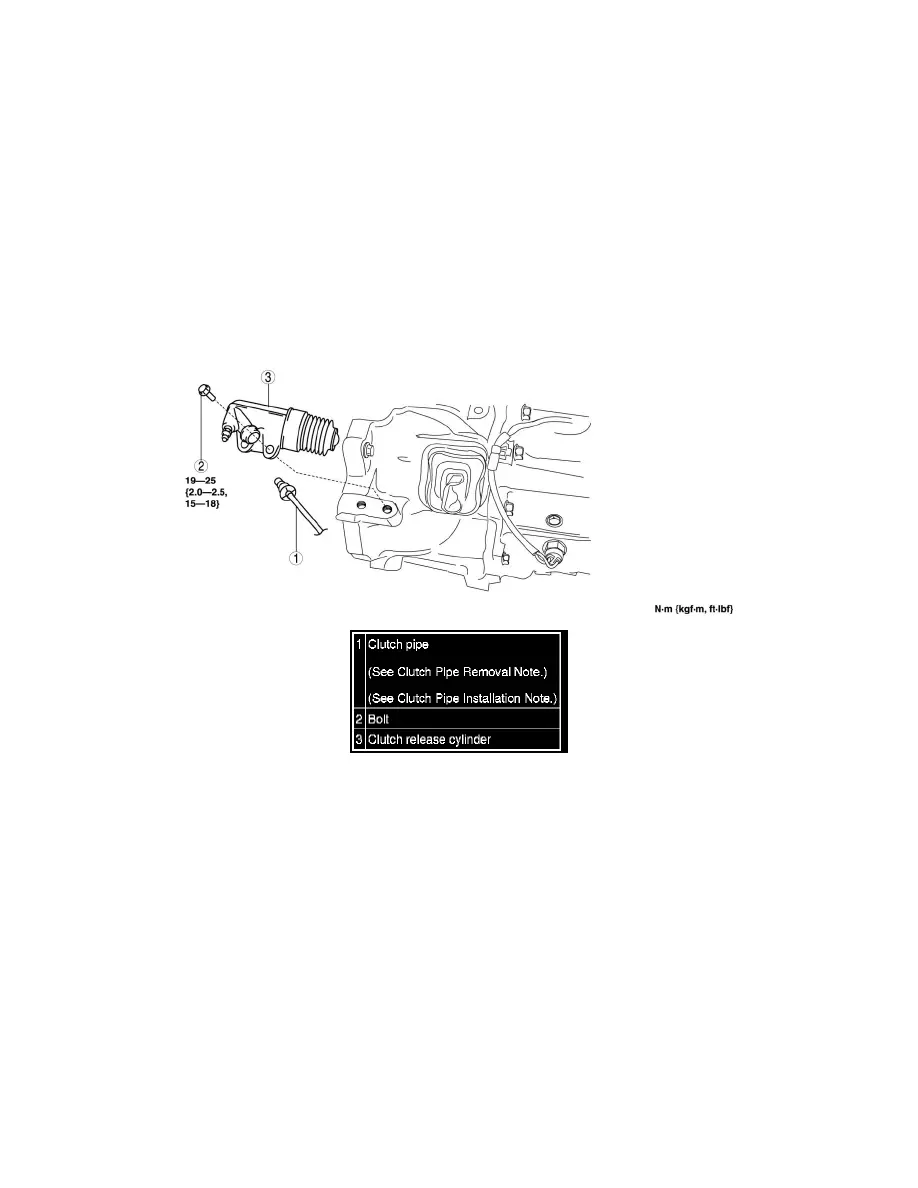
Clutch Release Cylinder Removal/Installation [G35M-R, G66M-R]
CLUTCH RELEASE CYLINDER REMOVAL/INSTALLATION [G35M-R, G66M-R]
CAUTION:
-
Fluid will damage painted surfaces. Be careful not to spill any on painted surfaces. If it is spilled, wipe it off immediately.
1. Remove the aerodynamic under cover No.2. See: Body and Frame/Splash Guard/Service and Repair/Aerodynamic Under Cover No.2
Removal/Installation
2. Remove in the order indicated in the table.
3. Install in the reverse order of removal.
4. Bleed the air from the system. See: Service and Repair
5. After installation, inspect the clutch pedal. See: Clutch Pedal Assembly/Adjustments
Clutch Pipe Removal Note
CAUTION:
-
When disconnecting the clutch pipe, the seal ring installed to the end of the clutch pipe connector may fall off or remain on the clutch release
cylinder side. If the clutch pipe is assembled with the seal ring not installed, it may cause fluid leakage from the clutch pipe connector or the clutch
may not operate normally. When disconnecting the clutch pipe, remove the seal ring and clutch pipe connector as a single unit.
NOTE:
-
A seal ring has been installed to the mid-connector between the clutch master cylinder and clutch release cylinder. Verify that the clutch pipe is
removed together with the seal ring when disconnecting the mid-connector.
-
The O-ring type mid-connector seal ring is installed to the groove at the end of the clutch pipe.
1. Pull out the clip and, then pull out the clutch pipe connector straight to detach it.