
3 L4-2.5L (2010)
Front Door Window Motor: Service and Repair
POWER WINDOW MOTOR REMOVAL/INSTALLATION
Front Power Window Motor
1. Fully lower the front door glass.
2. Disconnect the negative battery cable.
3. Remove the inner garnish. See: Body and Frame/Doors, Hood and Trunk/Doors/Front Door/Front Door Panel/Service and Repair/Removal and
Replacement/Inner Garnish Removal/Installation
4. Remove the front door trim. See: Body and Frame/Doors, Hood and Trunk/Doors/Front Door/Front Door Panel/Service and Repair/Removal and
Replacement/Front Door Trim Removal/Installation
5. Remove the front door speaker. See: Accessories and Optional Equipment/Radio, Stereo, and Compact Disc/Speaker/Service and Repair/Front
Door Speaker Removal/Installation
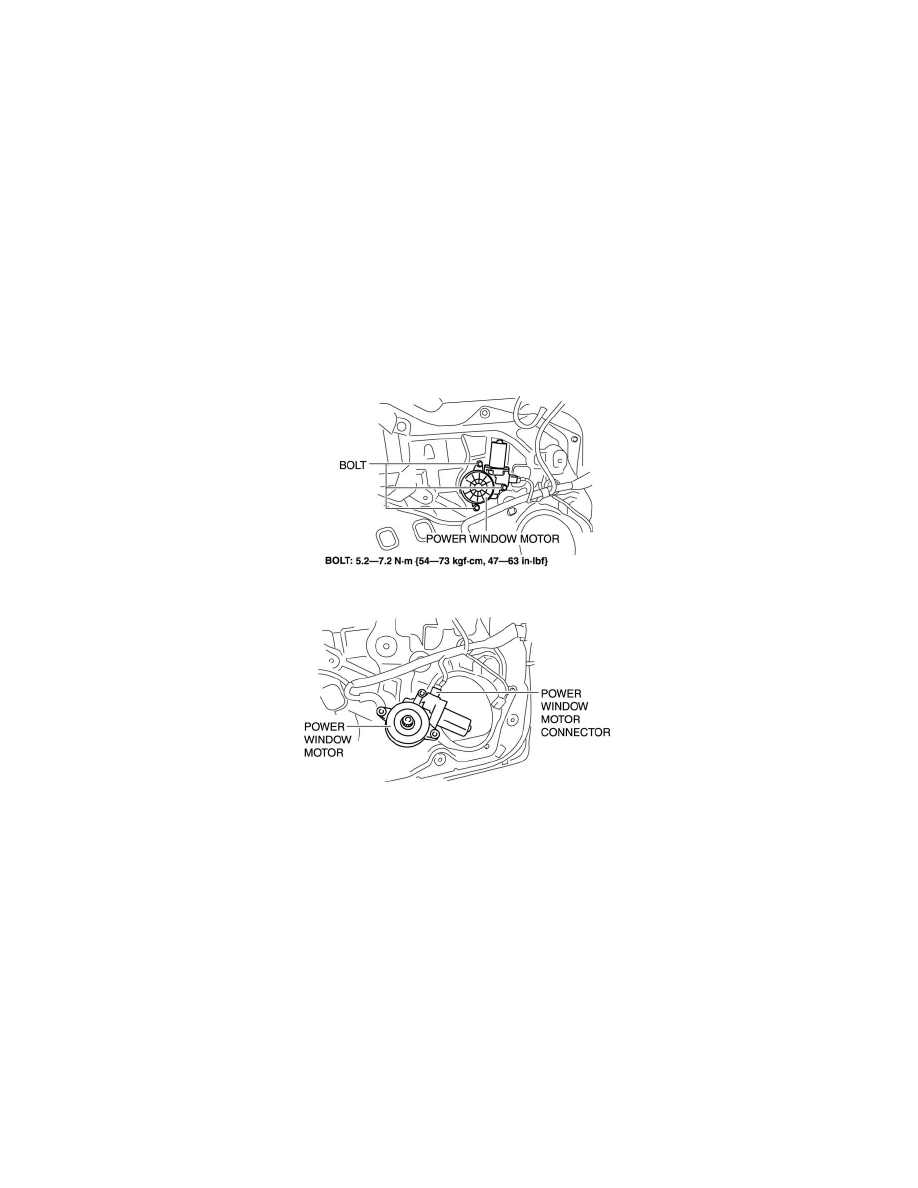
6. Remove the bolts.
7. Disconnect the front power window motor connector.
8. Install in the reverse order of removal.
NOTE:
-
When installing the front power window motor to the front power window regulator drum, the drum housing hooks may detach from the door
module. If this happens, remove the front door speaker, insert your hand in the speaker installation hole, connect the drum housing hooks, and
while supporting the drum housing, install the front power window motor to the drum.