
3 L4-2.5L (2010)
Rear Door Window Motor: Testing and Inspection
POWER WINDOW MOTOR INSPECTION
Front Driver Side
1. Disconnect the negative battery cable.
2. Remove the inner garnish. See: Body and Frame/Doors, Hood and Trunk/Doors/Front Door/Front Door Panel/Service and Repair/Removal and
Replacement/Inner Garnish Removal/Installation
3. Remove the front door trim. See: Body and Frame/Doors, Hood and Trunk/Doors/Front Door/Front Door Panel/Service and Repair/Removal and
Replacement/Front Door Trim Removal/Installation
4. Disconnect the power window motor connector.
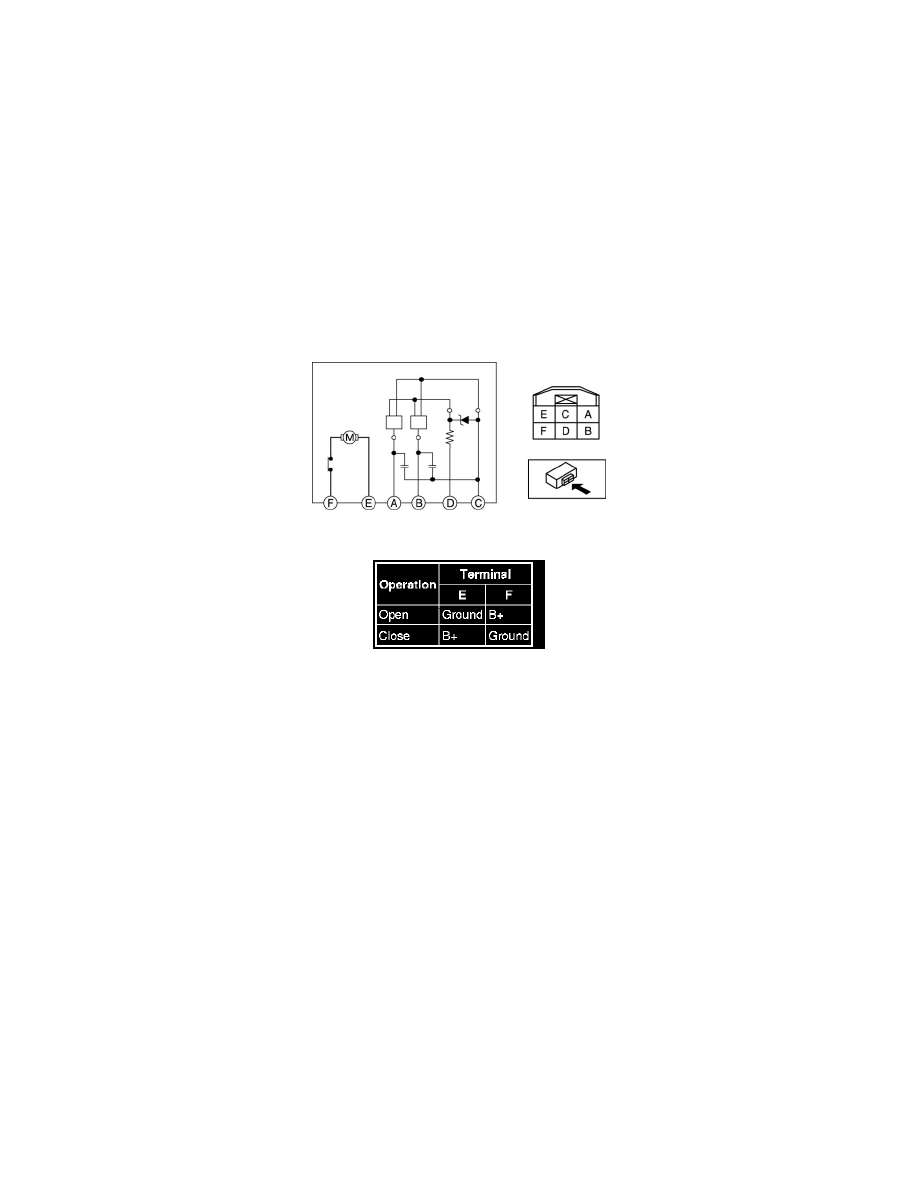
5. Apply battery positive voltage and connect the ground to power window motor terminals E and F, and then inspect the power window motor
operation.
-
If the power window motor does not operate as indicated in the table, replace the power window motor.
6. Connect the battery positive voltage to power window motor terminal D and connect terminal C to ground.
7. Operate the power window motor and measure the voltage at terminals A and B.
-
If there is any malfunction, replace the power window motor.
Voltage
-
Pulse: max. 5 V/min. 0 V
Front Passenger Side
1. Disconnect the negative battery cable.
2. Remove the inner garnish. See: Body and Frame/Doors, Hood and Trunk/Doors/Front Door/Front Door Panel/Service and Repair/Removal and
Replacement/Inner Garnish Removal/Installation
3. Remove the front door trim. See: Body and Frame/Doors, Hood and Trunk/Doors/Front Door/Front Door Panel/Service and Repair/Removal and
Replacement/Front Door Trim Removal/Installation
4. Disconnect the power window motor connector.
5. Apply battery positive voltage and connect the ground to power window motor terminals E and F, and then inspect the power window motor
operation.