
3 L4-2.5L (2010)
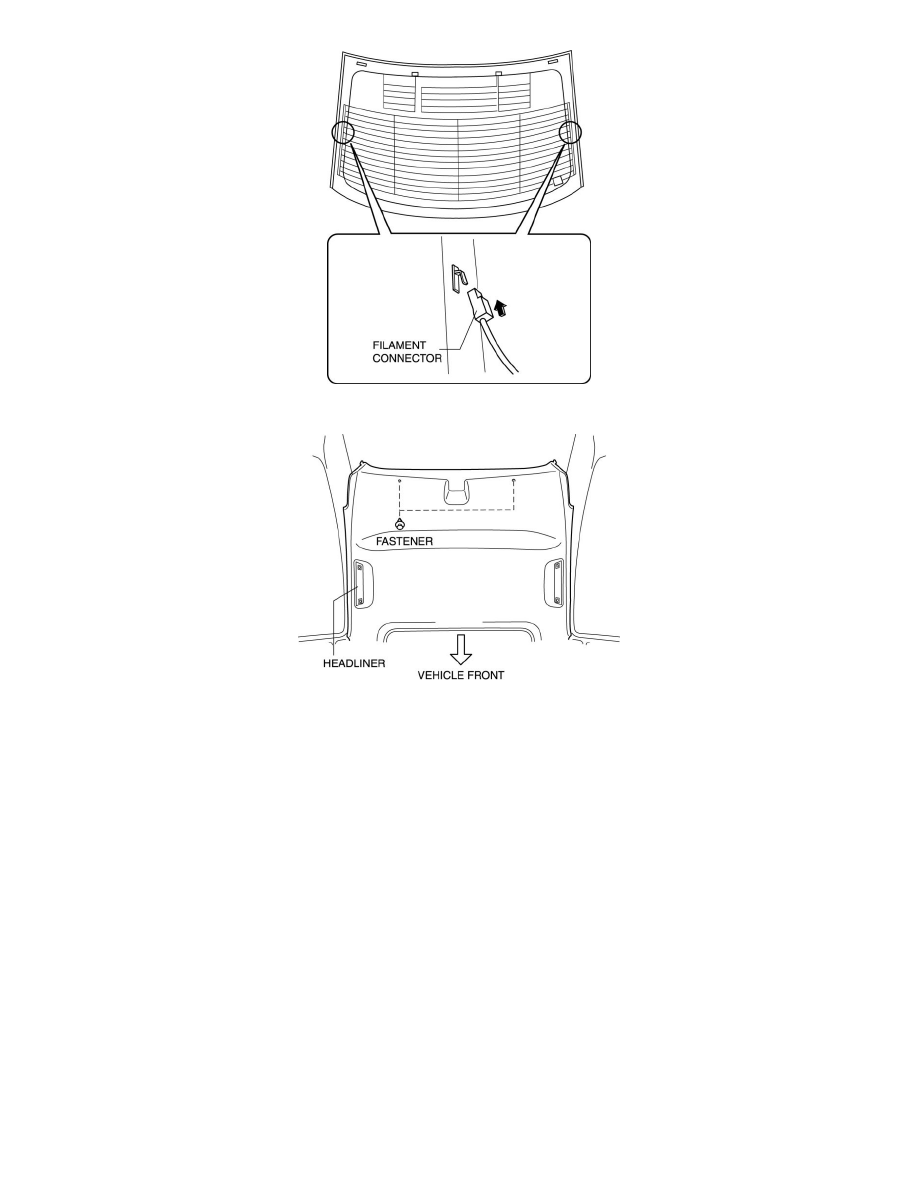
15. Install the fasteners.
16. Install the following parts:
a. Tire house trims See: Body and Frame/Interior Moulding / Trim/Trim Panel/Service and Repair/Tire House Trim Removal/Installation
b. Rear package trim See: Body and Frame/Interior Moulding / Trim/Rear Shelf/Service and Repair
c. C-pillar trims See: Body and Frame/Interior Moulding / Trim/Trim Panel/Service and Repair/C-Pillar Trim Removal/Installation
d. Rear side seat back See: Body and Frame/Seats/Service and Repair/Overhaul/Rear Seat Back Removal/Installation
e. Rear scuff plate See: Body and Frame/Interior Moulding / Trim/Scuff Plate/Service and Repair/Rear Scuff Plate Removal/Installation
f.
Rear seat cushion See: Body and Frame/Seats/Seat Cushion/Service and Repair/Rear Seat Cushion Removal/Installation
17. Allow the sealant to harden completely. Sealant hardening time: 24 h
5HB
1. Remove sealant along the perimeter of the glass using a utility knife or scraper. (When reusing the glass)
2. Clean and degrease an approx. 50 mm {2.0 in} wide strip along the perimeter of the glass.
3. Inspect the glass for cracks. If it is cracked, chamfer it using sandpaper.
4. Install the spacers, and pins to the glass as shown in the figure.