
5 L4-2.3L (2007)
1. Detach clips A.
2. Remove the rear package tray lid.
3. Install in the reverse order of removal.
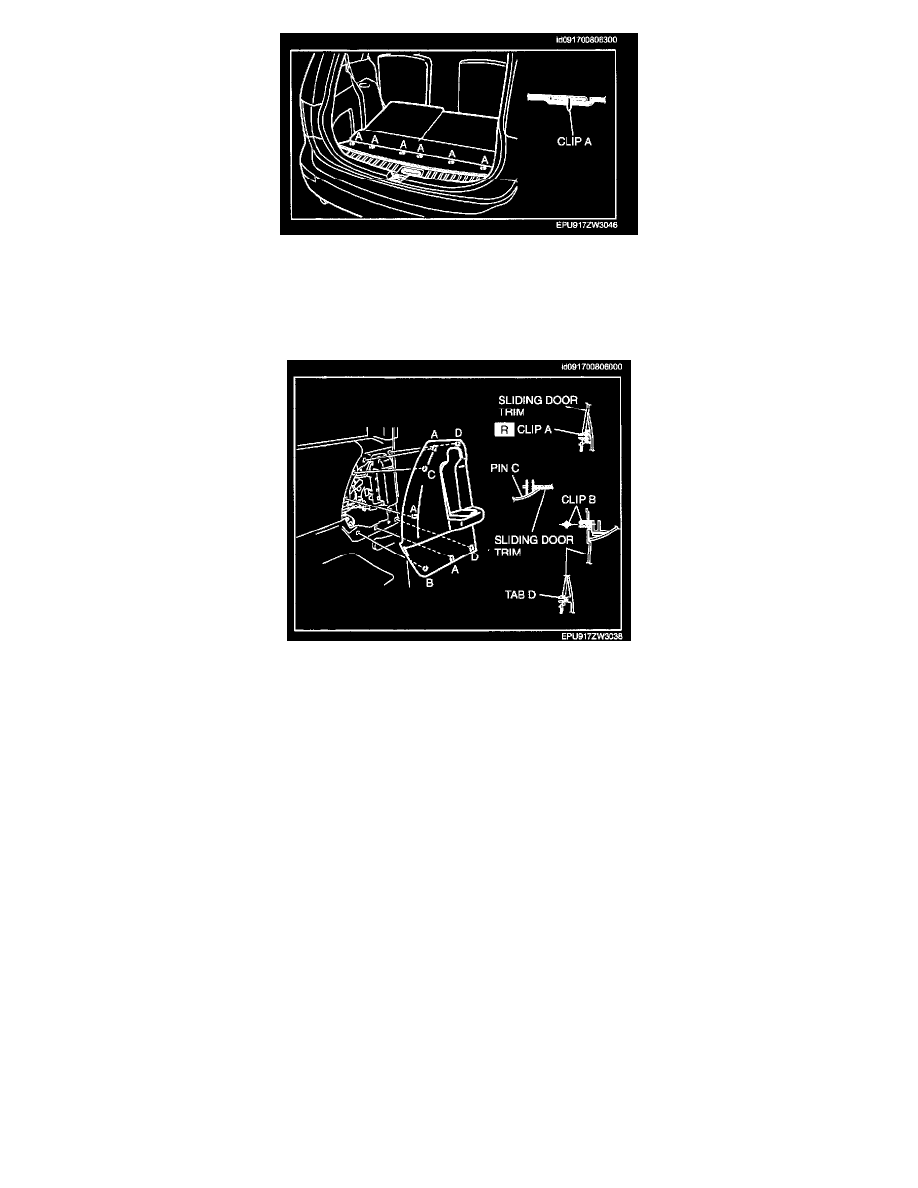
Rear Side Trim Removal/Installation
REAR SIDE TRIM REMOVAL/INSTALLATION
1. Pull the rear side trim outward and detach clips A and B, pin C, and tabs D.
2. Disconnect the power window subswitch connector.
3. Remove the rear side trim.
4. Install in the reverse order of removal.
Shock Absorbing Pad Removal/Installation
SHOCK ABSORBING PAD REMOVAL/INSTALLATION
1. Remove the following parts:
1. A-pillar trim
2. Front scuff plate inner
3. Rear scuff plate
4. B-pillar lower trim
5. Front seat belt upper anchor installation bolt
6. B-pillar upper trim
7. Rear package tray lid
8. Sub-trunk
9. Third-row seat
10. Rear header trim
11. Trunk end trim
12. Third-row seat belt lower anchor installation bolt
13. Cargo compartment light
14. Trunk side trim
15. Second-row seat belt upper anchor installation bolt
16. C-pillar trim
17. Map light
18. Assist handle
19. Sunvisor
20. Headliner