
5 L4-2.3L (2007)
21. Remove the (M6 X 1.0 length 25 mm - 35 mm (0.99 - 1.37 inch)) bolt from the engine front cover to apply tension to the timing chain.
22. Turn the crankshaft clockwise until the crankshaft is in the No.1 cylinder TDC position (until the balance weight is attached to the SST).
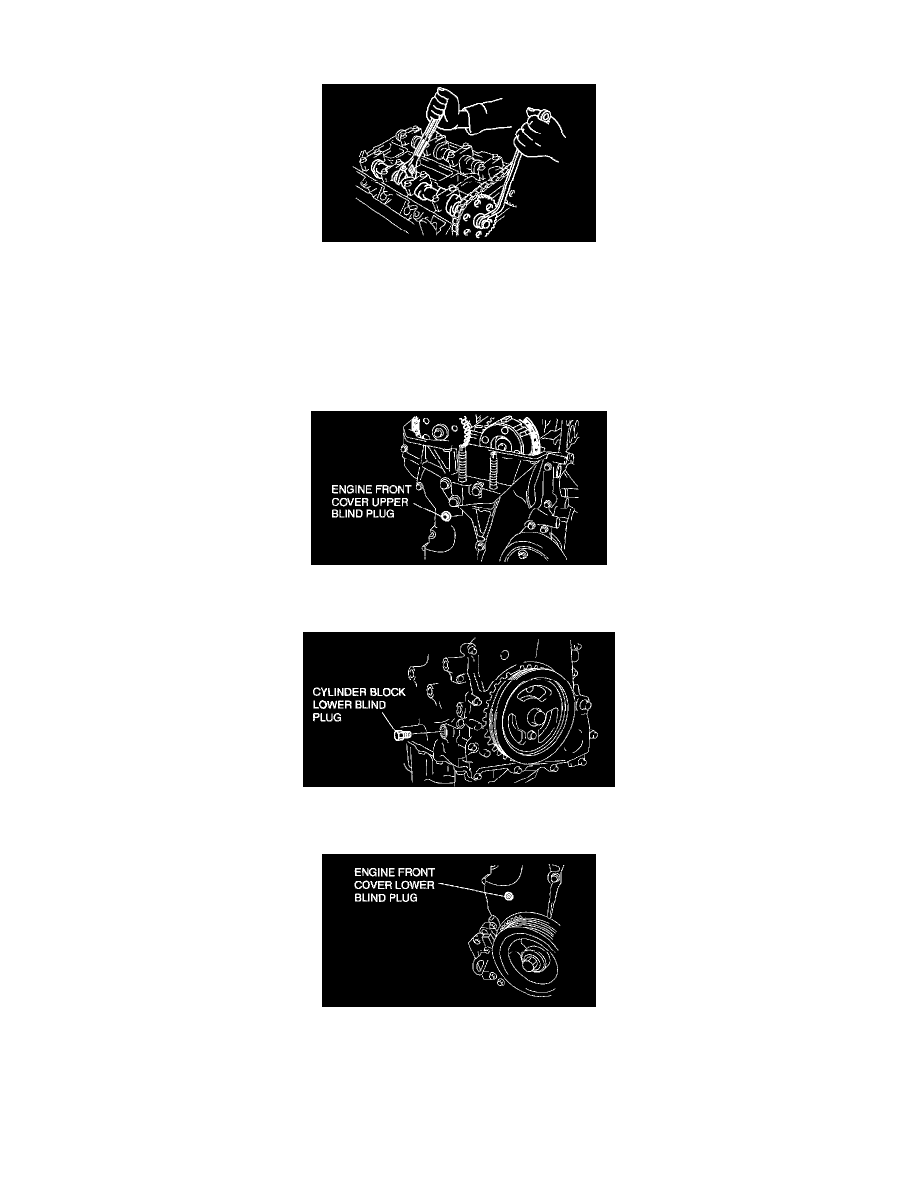
23. Hold the exhaust camshaft using a suitable wrench on the cast hexagon as shown in the figure.
24. Tighten the exhaust camshaft sprocket lock bolt.
Tightening torque 69 - 75 Nm (7.1 - 7.6 kgf-m, 50.9 - 55.3 ft. lbs.)
25. Remove the SST from the camshaft.
26. Remove the SST from the block lower blind plug.
27. Rotate the crankshaft clockwise two turns until the TDC position. If not aligned, loosen the crankshaft pulley lock bolt and repeat from Step 14.
28. Apply silicone sealant to the engine front cover upper blind plug.
29. Install the following parts.
1. Engine front cover upper blind plug.
Tightening torque 8.0 - 11.5 Nm (81.6 - 117.3 kgf-cm, 70.9 - 101.8 inch lbs.)
2. Cylinder block lower blind plug.
Tightening torque 18 - 22 Nm (1.9 - 2.2 kgf-m, 13.3 - 16.2 ft. lbs.)
3. New engine front cover lower blind plug.
Tightening torque 10 - 14 Nm (102 - 142 kgf-cm, 89 - 123 inch lbs.)
4. Cylinder head cover.
5. Ventilation hose.
6. Ignition coils.
7. Engine under cover and splash shield (RH).
8. Front wheel and tire (RH).