
5 L4-2.3L (2007)
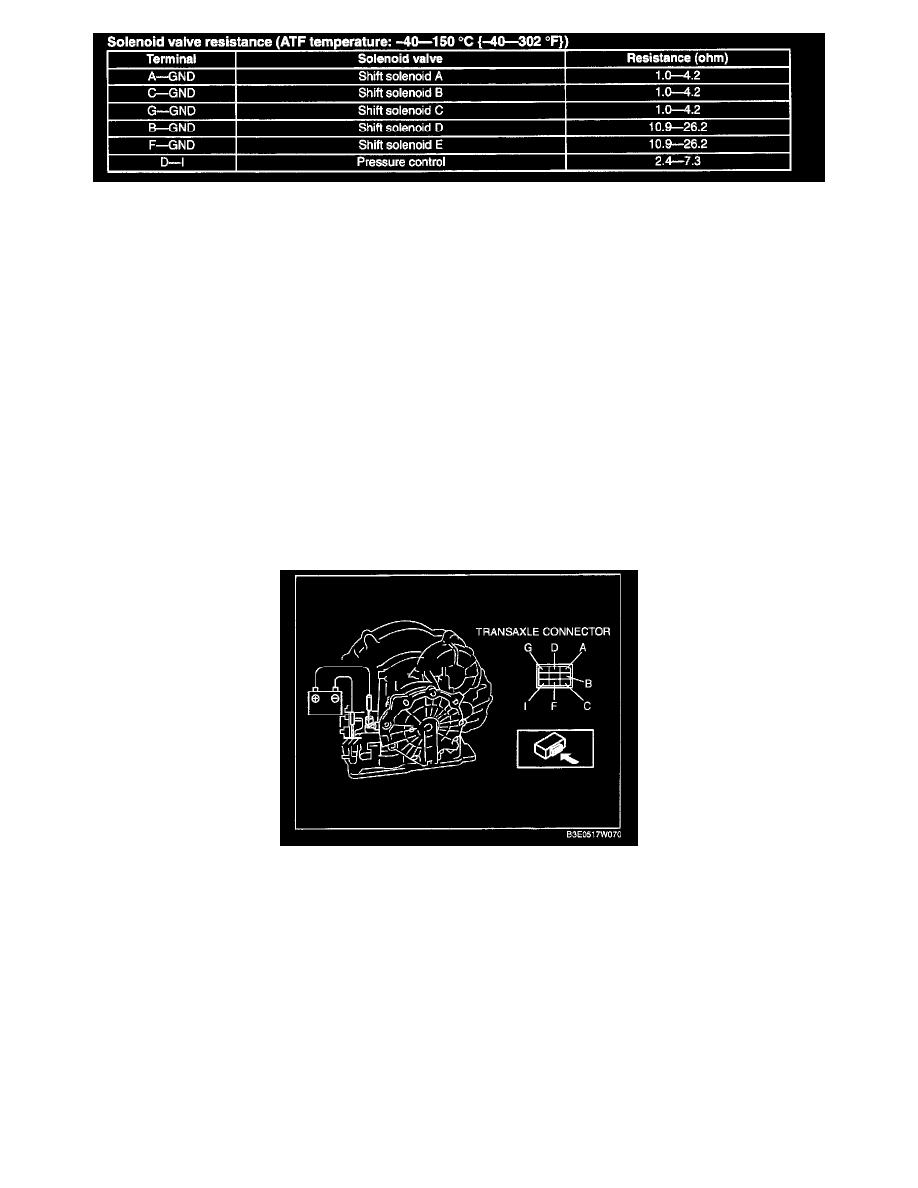
Solenoid Valve Resistance
6. Connect the transaxle connector.
7. Install the under cover.
8. Connect the negative battery cable.
9. Install the battery duct and battery cover.
Operating Inspection
1. Disconnect the transaxle connector.
Caution:
^
Do not apply battery position voltage to terminals A, B, C, D, F and G for more than 3 s.
Note:
^
Because the operation sound of the valves is small, perform inspection in a quiet place.
2. Apply battery positive voltage to the transaxle connector terminals A, B, C, F or G and battery negative voltage to GND, and verify that operating
sound is heard from the solenoid.
^
If the "click" is not heard, inspect the transaxle harness.
-
If the transaxle harness is normal, perform the resistance inspection (off-vehicle inspection).
-
If there is any malfunction, repair or replace the transaxle harness.
3. Apply battery positive voltage to the transaxle connector terminal D and battery negative voltage to the transaxle connector terminal 1, and verify
that operating sound is heard from solenoid.
^
If the "click" is not heard, inspect the transaxle harness.
-
If transaxle harness is normal, perform the resistance inspection (off-vehicle inspection).
-
If there is any malfunction, repair or replace the transaxle harness.
Resistance Inspection (Off-Vehicle Inspection)
1. Remove the control valve body.
2. Measure the resistance of each solenoid valve individually
^
If there is any malfunction, replace the solenoid valve.
3. Install the control valve body.
Pressure control solenoid