
6 L4-2.5L (2010)
Rear Cross-Member: Service and Repair
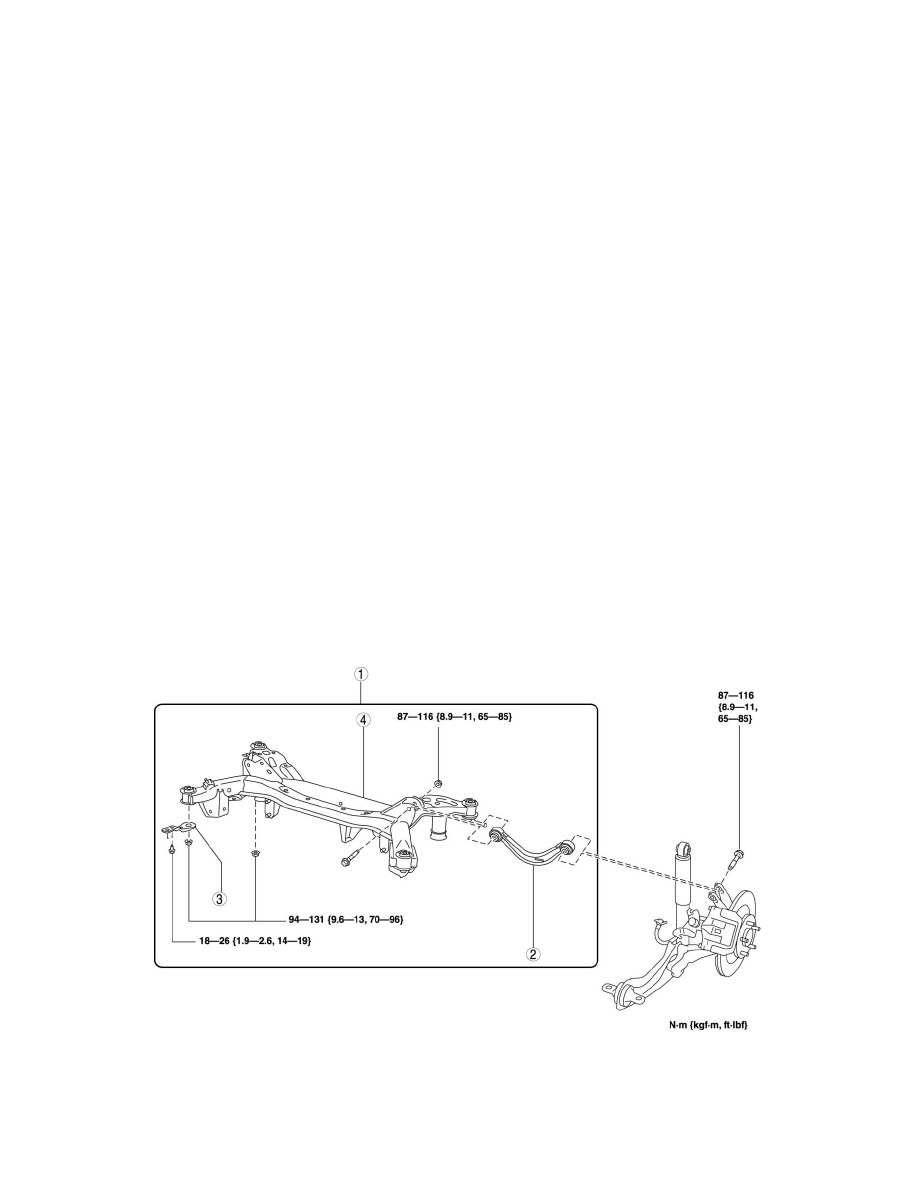
REAR CROSSMEMBER REMOVAL/INSTALLATION
CAUTION:
-
Performing the following procedures without first removing the ABS wheel-speed sensor may possibly cause an open circuit in the harness if it is
pulled by mistake. Before performing the following procedures, remove the ABS wheel-speed sensor (axle side) and fix it to an appropriate place
where the sensor will not be pulled by mistake while servicing the vehicle.
1. Remove the rear ABS wheel-speed sensor, and disconnect the rear ABS wheel-speed sensor harness from the rear trailing link. See: Brakes and
Traction Control/Antilock Brakes / Traction Control Systems/Wheel Speed Sensor/Service and Repair/Rear ABS Wheel-Speed Sensor
Removal/Installation
2. Disconnect the exhaust system, and remove the following parts.
For the vehicle with L5
1
Disconnect the TWC from the exhaust manifold. See: Engine, Cooling and Exhaust/Exhaust System/Service and Repair
2
Remove the main silencer, middle pipe and TWC as a single unit.
For the vehicle with MZI-3.7
1
Disconnect the presilencer from the front pipe. See: Engine, Cooling and Exhaust/Exhaust System/Service and Repair
2
Remove the main silencer (LH/RH), middle pipe and presilencer as a single unit.
3. Remove the rear stabilizer. See: Steering and Suspension/Suspension/Stabilizer Bar/Service and Repair/Rear Stabilizer Removal/Installation
4. Remove the rear coil spring. See: Steering and Suspension/Suspension/Suspension Spring ( Coil / Leaf )/Service and Repair/Removal and
Replacement/Rear Suspension
5. Remove the rear lower arm. See: Steering and Suspension/Suspension/Control Arm/Service and Repair/Rear Lower Arm Removal/Installation
6. Remove the rear lateral link. See: Steering and Suspension/Suspension/Lateral Stabilizer Rod/Service and Repair
7. Remove in the order indicated in the table.
8. Install in the reverse order of removal.
9. Inspect the rear wheel alignment. See: Maintenance/Alignment/Service and Repair/Rear Wheel Alignment