
6 L4-2.5L (2010)
CAUTION:
-
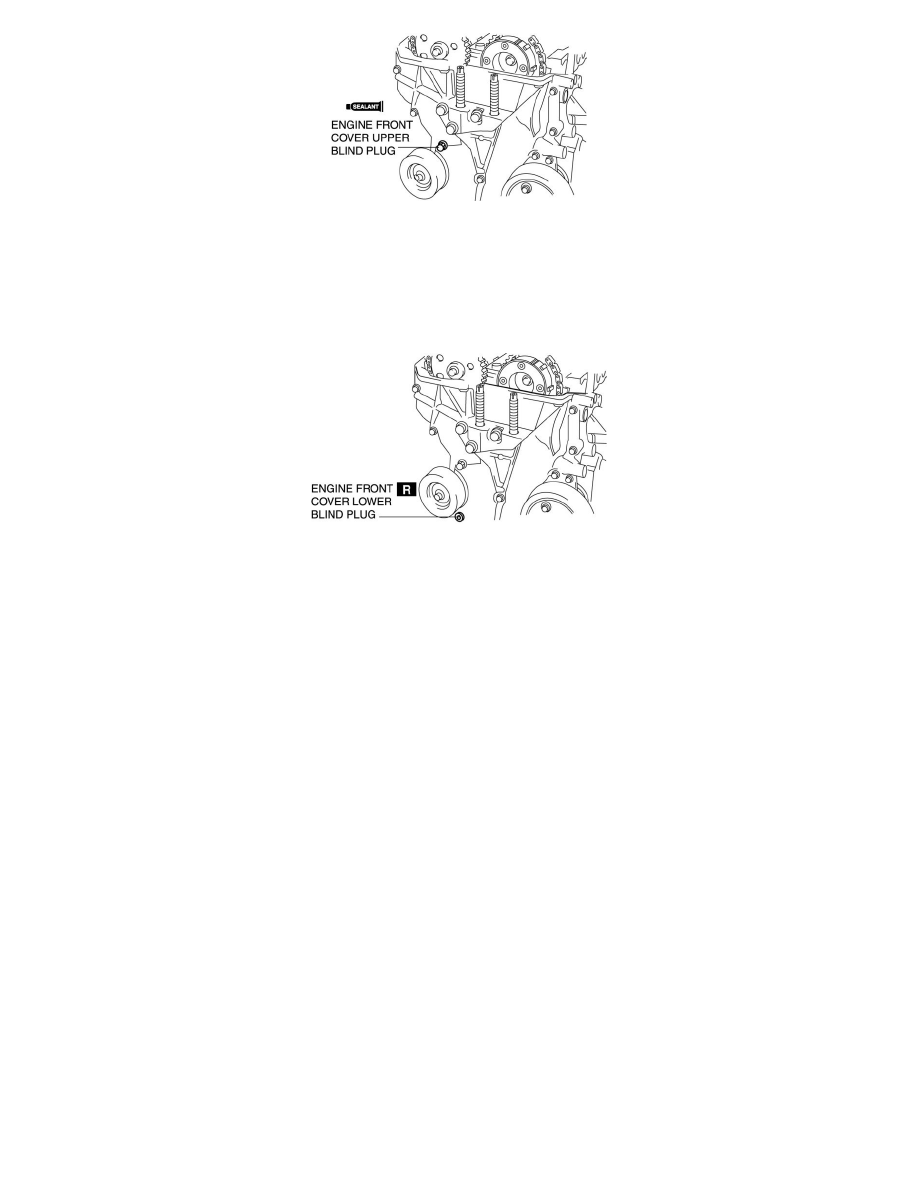
Install the engine front cover upper blind plug before the applied silicone sealant starts to harden.
Tightening torque
-
8-11 Nm {82-117 kgf-cm, 71-101 in-lbf}
43. Install a new engine front cover lower blind plug.
Tightening torque
-
10-14 Nm {102-142 kgf-cm, 89-123 in-lbf}
44. Install the drive belt. (See See: Drive Belts, Mounts, Brackets and Accessories/Drive Belt/Service and Repair.)
45. Install the aerodynamic under cover No.2. See: Body and Frame/Splash Guard/Service and Repair/Aerodynamic Under Cover No.2
Removal/Installation
46. Install the splash shield (RH).
47. Install the front mudguard (RH). See: Body and Frame/Spoilers, Flaps, and Air Dams/Mud Flap/Service and Repair
48. Install the cylinder head cover. (See See: Timing Components/Timing Chain/Service and Repair.)
49. Connect the OCV connector.
50. Connect the CMP sensor connector.
51. Install the ventilation hose. See: Intake Manifold/Service and Repair
52. Install the spark plugs. See: Tune-up and Engine Performance Checks/Spark Plug/Service and Repair
53. Install the ignition coils. See: Powertrain Management/Ignition System/Ignition Coil/Service and Repair
54. Install the plug hole plate. See: Service and Repair/Removal and Replacement/Plug Hole Plate Removal/Installation
55. Connect the negative battery cable.